
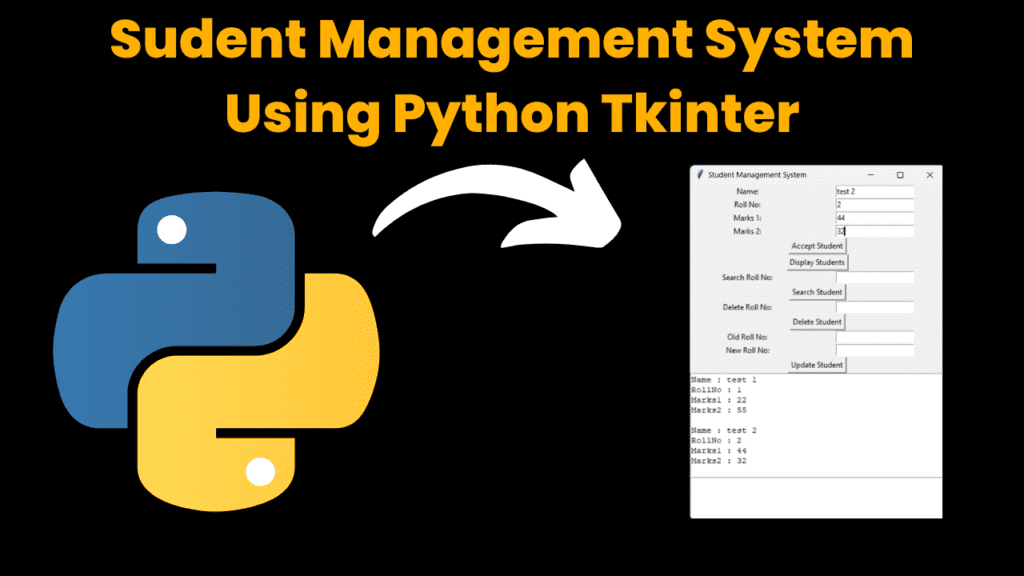
Student Management System Using Python and Tkinter with Source Code
Introduction:
In this blog post, we’ll guide you through the process of creating a simple Student Management System using Python and Tkinter. A Student Management System helps educational institutions organize and manage student data efficiently. Whether you’re new to programming or looking to enhance your GUI development skills, this tutorial will break down each step in an easy-to-understand manner.
Tools and Technologies:
For this project, we’ll be using:
– Python: A versatile programming language known for its simplicity and readability.
– Tkinter: Python’s built-in library for creating graphical user interfaces (GUIs). Tkinter provides tools to design the application window, handle user input, and update the interface dynamically.
Features Covered:
Throughout this tutorial, we’ll cover the following features of our Student Management System:
1. Setting up the application window and designing the user interface with Tkinter.
2. Managing student data, including details like name, age, grade, and contact information.
3. Implementing functionality for adding, deleting, updating, and searching for student records.
4. Displaying student records in a user-friendly format within the Tkinter window.
5. Saving and loading student data to/from a file for persistence.
Required Modules:
The only external module required for this project is Tkinter, which comes bundled with Python. No additional installation is needed.
How to Run the Code:
Follow these steps to run the Student Management System:
1. Install Python from the official website if you haven’t already.
2. Create a new Python file (e.g., `student_management.py`) in your favorite text editor or IDE.
3. Copy the provided Python code for the Student Management System into the file.
4. Save the file and run it using the Python interpreter.
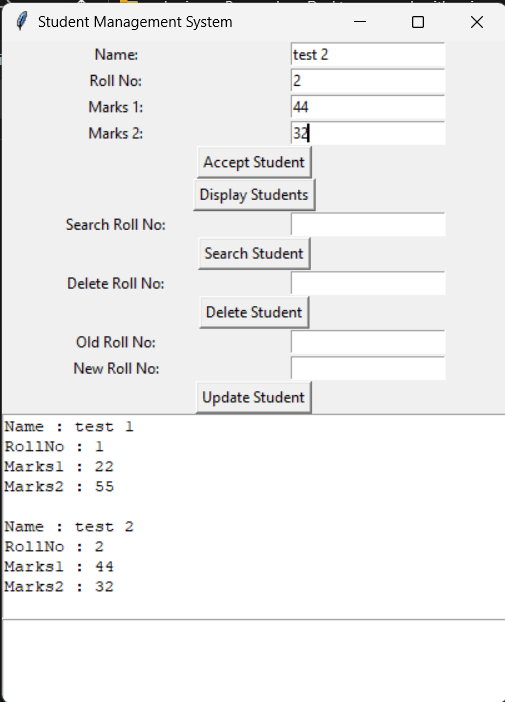
5. Once the program starts, you’ll see the GUI window of the Student Management System.
Code Explanation:
Sure, let’s break down the code into smaller parts and explain each component:
1. Importing Libraries:
import tkinter as tk
tkinteris a standard Python library for creating GUI (Graphical User Interface) applications.
2. Defining the Student Class:
class Student:
def __init__(self, name, rollno, m1, m2):
# Constructor to initialize student attributes
self.name = name
self.rollno = rollno
self.m1 = m1
self.m2 = m2
- This class represents a student with attributes such as name, roll number, and marks for two subjects.
3. Student Class Methods:
def accept(self, Name, Rollno, marks1, marks2):
# Method to accept student details and create a new student object
ob = Student(Name, Rollno, marks1, marks2)
ls.append(ob)
def display(self, ob):
# Method to display student details
return f”Name : {ob.name}\nRollNo : {ob.rollno}\nMarks1 : {ob.m1}\nMarks2 : {ob.m2}\n”
def search(self, rn):
# Method to search for a student by roll number
for i in range(len(ls)):
if ls[i].rollno == rn:
return i
return -1
def delete(self, rn):
# Method to delete a student record
i = self.search(rn)
if i != -1:
del ls[i]
def update(self, rn, No):
# Method to update roll number of a student
i = self.search(rn)
if i != -1:
ls[i].rollno = No
accept: Accepts details of a new student and adds it to the list of students (ls).display: Formats and returns the details of a student.search: Searches for a student in the list by their roll number.delete: Deletes a student record from the list.update: Updates the roll number of a student.
4. GUI Related Functions:
ls = []
obj = Student('', 0, 0, 0)
ls: List to store student objects.obj: Instance of theStudentclass
def accept_student():
# Function to accept student details from GUI input fields
name = name_entry.get()
try:
rollno = int(rollno_entry.get())
marks1 = int(marks1_entry.get())
marks2 = int(marks2_entry.get())
obj.accept(name, rollno, marks1, marks2)
except ValueError:
print("Invalid input for roll number or marks.")
accept_student: Gets student details from GUI input fields, converts them to integers, and adds a new student object to the list.
def display_students():
# Function to display all students in the GUI
result_text.config(state=tk.NORMAL)
result_text.delete(1.0, tk.END)
for i in range(len(ls)):
result_text.insert(tk.END, obj.display(ls[i]) + "\n")
result_text.config(state=tk.DISABLED)
display_students: Displays details of all students in the GUI text area.
# Functions for searching, deleting, and updating students follow a similar structure...
5. GUI Setup:
root = tk.Tk()
root.title("Student Management System")

# GUI elements (labels, entry fields, buttons, etc.) are defined here...
tk.Tk(): Creates the main window for the GUI application.root.title(): Sets the title of the window.
6. Running the GUI Application:
root.mainloop()
root.mainloop(): Starts the event loop that listens for user actions in the GUI window. This function call is necessary to display the GUI and handle user interactions.
This code creates a simple student management system GUI application using Tkinter, allowing users to add, display, search, delete, and update student records.
Get Discount on Top Educational Courses
					import tkinter as tk

class Student:
    def __init__(self, name, rollno, m1, m2):
        self.name = name
        self.rollno = rollno
        self.m1 = m1
        self.m2 = m2

    def accept(self, Name, Rollno, marks1, marks2):
        ob = Student(Name, Rollno, marks1, marks2)
        ls.append(ob)

    def display(self, ob):
        return f"Name : {ob.name}\nRollNo : {ob.rollno}\nMarks1 : {ob.m1}\nMarks2 : {ob.m2}\n"

    def search(self, rn):
        for i in range(len(ls)):
            if ls[i].rollno == rn:
                return i
        return -1

    def delete(self, rn):
        i = self.search(rn)
        if i != -1:
            del ls[i]

    def update(self, rn, No):
        i = self.search(rn)
        if i != -1:
            ls[i].rollno = No

ls = []
obj = Student('', 0, 0, 0)

def accept_student():
    name = name_entry.get()
    try:
        rollno = int(rollno_entry.get())
        marks1 = int(marks1_entry.get())
        marks2 = int(marks2_entry.get())
        obj.accept(name, rollno, marks1, marks2)
    except ValueError:
        print("Invalid input for roll number or marks.")

def display_students():
    result_text.config(state=tk.NORMAL)
    result_text.delete(1.0, tk.END)
    for i in range(len(ls)):
        result_text.insert(tk.END, obj.display(ls[i]) + "\n")
    result_text.config(state=tk.DISABLED)

def search_student():
    rollno = int(search_rollno_entry.get())
    s = obj.search(rollno)
    if s != -1:
        search_result_text.config(state=tk.NORMAL)
        search_result_text.delete(1.0, tk.END)
        search_result_text.insert(tk.END, obj.display(ls[s]) + "\n")
        search_result_text.config(state=tk.DISABLED)
    else:
        print("Student not found.")

def delete_student():
    rollno = int(delete_rollno_entry.get())
    obj.delete(rollno)
    display_students()

def update_student():
    old_rollno = int(update_old_rollno_entry.get())
    new_rollno = int(update_new_rollno_entry.get())
    obj.update(old_rollno, new_rollno)
    display_students()

# GUI
root = tk.Tk()
root.title("Student Management System")

name_label = tk.Label(root, text="Name:")
name_label.grid(row=0, column=0)
name_entry = tk.Entry(root)
name_entry.grid(row=0, column=1)

rollno_label = tk.Label(root, text="Roll No:")
rollno_label.grid(row=1, column=0)
rollno_entry = tk.Entry(root)
rollno_entry.grid(row=1, column=1)

marks1_label = tk.Label(root, text="Marks 1:")
marks1_label.grid(row=2, column=0)
marks1_entry = tk.Entry(root)
marks1_entry.grid(row=2, column=1)

marks2_label = tk.Label(root, text="Marks 2:")
marks2_label.grid(row=3, column=0)
marks2_entry = tk.Entry(root)
marks2_entry.grid(row=3, column=1)

accept_button = tk.Button(root, text="Accept Student", command=accept_student)
accept_button.grid(row=4, column=0, columnspan=2)

display_button = tk.Button(root, text="Display Students", command=display_students)
display_button.grid(row=5, column=0, columnspan=2)

search_rollno_label = tk.Label(root, text="Search Roll No:")
search_rollno_label.grid(row=6, column=0)
search_rollno_entry = tk.Entry(root)
search_rollno_entry.grid(row=6, column=1)
search_button = tk.Button(root, text="Search Student", command=search_student)
search_button.grid(row=7, column=0, columnspan=2)

delete_rollno_label = tk.Label(root, text="Delete Roll No:")
delete_rollno_label.grid(row=8, column=0)
delete_rollno_entry = tk.Entry(root)
delete_rollno_entry.grid(row=8, column=1)
delete_button = tk.Button(root, text="Delete Student", command=delete_student)
delete_button.grid(row=9, column=0, columnspan=2)

update_old_rollno_label = tk.Label(root, text="Old Roll No:")
update_old_rollno_label.grid(row=10, column=0)
update_old_rollno_entry = tk.Entry(root)
update_old_rollno_entry.grid(row=10, column=1)

update_new_rollno_label = tk.Label(root, text="New Roll No:")
update_new_rollno_label.grid(row=11, column=0)
update_new_rollno_entry = tk.Entry(root)
update_new_rollno_entry.grid(row=11, column=1)
update_button = tk.Button(root, text="Update Student", command=update_student)
update_button.grid(row=12, column=0, columnspan=2)

result_text = tk.Text(root, height=10, width=50)
result_text.grid(row=13, column=0, columnspan=2)
result_text.config(state=tk.DISABLED)

search_result_text = tk.Text(root, height=4, width=50)
search_result_text.grid(row=14, column=0, columnspan=2)
search_result_text.config(state=tk.DISABLED)

root.mainloop()
Output:
Conclusion:
By following this tutorial, you’ve learned how to build a Student Management System using Python and Tkinter. You can further enhance this project by adding features like data validation, sorting, filtering, and exporting data to different file formats. With practice and exploration, you can customize the system to suit your specific requirements and gain valuable experience in GUI development with Python.
More Projects:

URL Shortener Using Python Django
URL Shortener Using Python Django Introduction: Long URLs can be shortened into short, shareable links with the help of the URL Shortener project. Though it

User Authentication System Using Python Django
User Authentication System Using Python Django Introduction: The implementation of safe and adaptable user authentication in Django is the main goal of this project. It

E-Learning System Using JAVA
The E-Learning System using Java with a Graphical User Interface (GUI) Introduction The E-Learning System is developed using Java (with a Graphical User interface through

Weather App Using Python Django with Source Code
Weather App Using Python Django Introduction: When a user enters the name of a city, the Weather App retrieves current weather information. It provides temperature,

Quiz App Using Python Django with complete source code
Quiz App Using Python Django Introduction: Users can take quizzes in a variety of subjects, see their results, and monitor their progress with the Django

Resume Screener in python using GUI
resume screener in python using python introduction The hiring process often begins with reviewing numerous resumes to filter out the most suitable candidates for a
More HTML CSS JS Projects

Get Huge Discounts
