
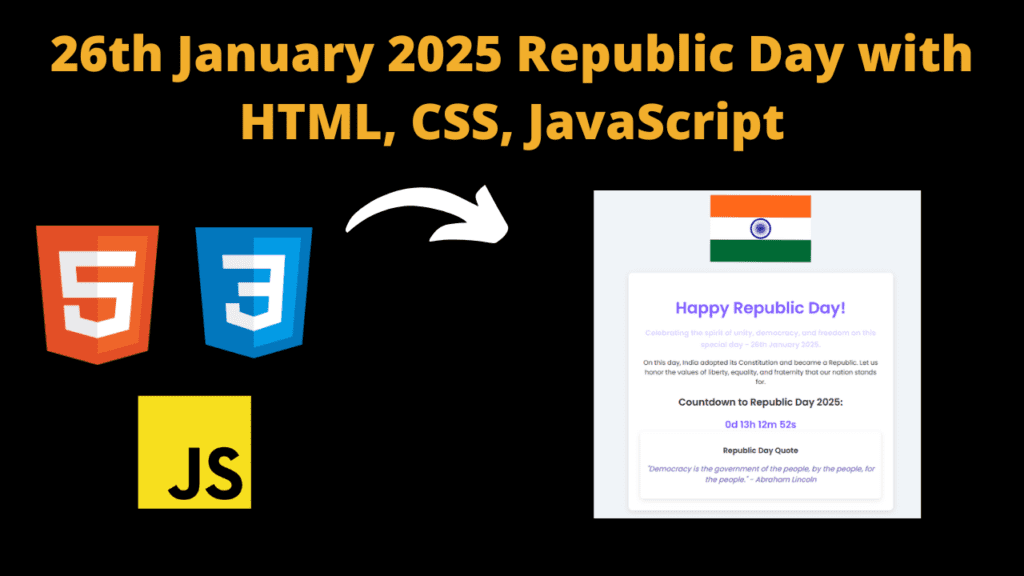
Create 26th January Republic Day with HTML, CSS, JavaScript
Introduction
Hello friends, my name is Gautam and you all are welcome to today’s beautiful project. You know that Republic Day of our country India is coming on 26th January 2025 and to celebrate it well, we thought of making a project on it through which we will also get knowledge of coding and a republic day project will also be made for our India. So today we have made a project for you and for our India which is on Republic Day. This project is going to be beginners friendly, so any user can use this project if you are learning coding or else If you want to learn then you can use this. We have used html, css and javascript to create the republic day project and we have added the Indian flag in this project because this is very important and we have used animation in the Indian flag which is a very easy task to do which we are going to see in the code now, let us now understand about our code.
HTML (index.html)
Get Discount on Top Educational Courses
Friends, now we will create the structure of our republic day project with the help of HTML code, but when we create the structure with the help of HTML, it will not look good at all. To design it well, we will have to use CSS, which we are going to see next. So let us now understand our HTML code.
- We can consider this as a sample of HTML, with the help of which we come to know that this code is of HTML <!DOCTYPE HTML>
- After this comes the language of the code or the language of our project which we have to set which you can do through this element <html lang=”en”>
- This is that meta tag of HTML with the help of which the width height of every device is automatically set <meta name=”viewport” content=”width=device-width, initial-scale=1.0″> We do not have to make any changes in this
- After this, if we want to add the title of our project, then you can do something like this. We have added the title <title>Indian Republic Day – 26th January 2025</title>
- To link the CSS file to HTML we need to use this link tag <link rel=”includesstyles” url=”styles.cs”>
- This is an important tag in our HTML code, within which we have to write our HTML code <body> It also has a closing tag </body>
- First of all we have set a background in our project <div class=”background”></div>
- We have created Elec container to create our Republic Day project <div class=”container”>
- We have created a container to create the Indian flag in which we have added the tag <div class=”flag-container”>
- We have used the <img> element to add the flag tag to the flag container
- Then we have also created a message container in which we have added some messages for people <div class=”message-container”>
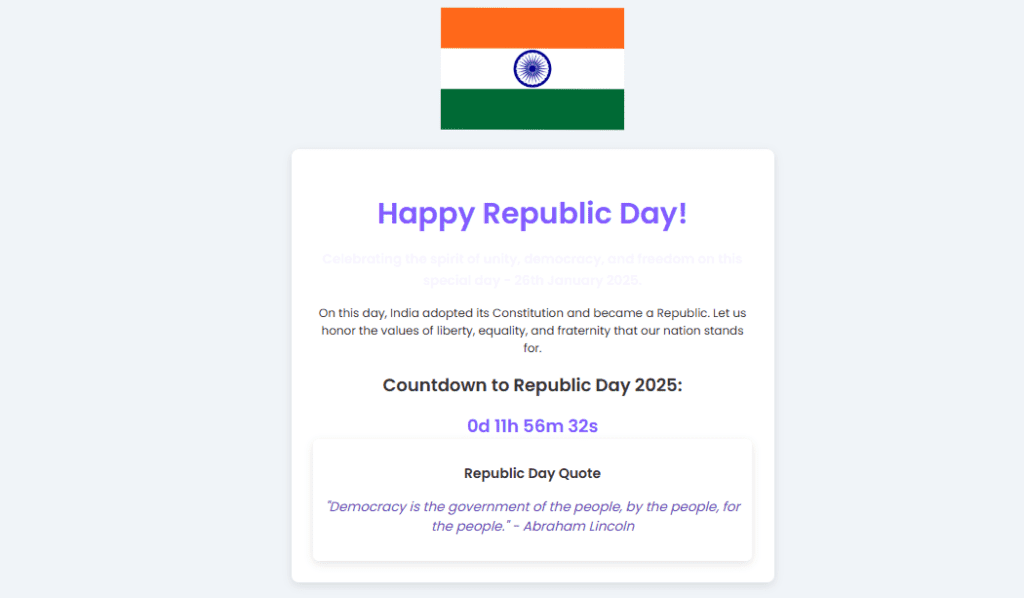
- In the message container, we have added a message which we have added with the help of h1 heading <h1>Happy Republic Day!</h1>
- Then we have also added some paragraph messages for which we have added with the help of HTML <p> tag
- We have also created a countdown timer in which we have set the quota and this quota is of Republic Day <div class=”countdown”>
- Then at last in the html part we have linked the javascript file which is like this <script src=”script.js”></script>
    <title>Indian Republic Day - 26th January 2025</title>


    <div class="background"></div>
    <div class="container">
        <div class="flag-container">
            <img data-lazyloaded="1" src="data:image/gif;base64,R0lGODdhAQABAPAAAMPDwwAAACwAAAAAAQABAAACAkQBADs=" decoding="async" data-src="https://upload.wikimedia.org/wikipedia/commons/thumb/4/41/Flag_of_India.svg/1280px-Flag_of_India.svg.png" alt="Indian Flag" class="flag">
        </div>
        <div class="message-container">
            <h1>Happy Republic Day!</h1>
            <p class="dynamic-message">Celebrating the spirit of unity, democracy, and freedom on this special day - 26th January 2025.</p>
            <p>On this day, India adopted its Constitution and became a Republic. Let us honor the values of liberty, equality, and fraternity that our nation stands for.</p>
            <div class="countdown">
                <h2>Countdown to Republic Day 2025:</h2>
                <div id="countdown-timer"></div>
            </div>
            <div class="quote-container">
                <h3>Republic Day Quote</h3>
                <p class="quote">"Democracy is the government of the people, by the people, for the people." - Abraham Lincoln</p>
            </div>
        </div>
    </div>
CSS (Style.css)
Friends, now we are going to understand our CSS code. With the help of CSS, we have designed our Republic Day project. Without CSS, you cannot design it. It is important for you to have knowledge of CSS, so let’s go now, let us explain the CSS code.
- First of all we have made the margin and padding in the body 0px margin: 0; and padding: 0; also we have used this font, you can change it as well font-family: ‘Poppins’, sans-serif;
- To use color as the background of the body we did something like this: background-color: #f0f4f8;
- We have created a background container in HTML whose positions we have set position: absolute;
- In the background we have used z-index z-index: -1; You will have to set this as per your requirement and in the background we have used white color background: #f0f4f8;
- We have created a container in HTML whose all items we have flexed display: flex;
- We have centered the container items and also centered the align items justify-content: center; align-items: center;
- We have used display flex in the container due to which all the items have become flex. To make them columns we have used this element flex-direction: column;
- The text is centered in the container, you can keep it as per text-align: center; and the text color is black color: #333;
- We have added the flag of India in the project, for which we have created a flag container, in which we have added margin from the bottom margin-bottom: 20px; and to show it better, we have used animation in it animation: wave 5s infinite;
- We have set the width of the Indian flag as width: 250px; and set the height to auto so that it gets set correctly
- We have also added some messages for the logo, for which we have created a message container whose background we have used white color background-color: #fff;
- In the message container we have made the border round border-radius: 10px; and in this we have used padding padding: 30px; and in this we have used black shadow box-shadow: 0 4px 12px rgba(0, 0, 0, 0.1);
- We have used this color in the H1 heading of the message container color: #825qf;
- To set the font of the message heading, we have used something like this, you can increase or decrease it font-size: 40px;
- We have added margin to the countdown container margin-top: 20ps;
- We have used animation in Indian flag for which we have used @keyframes of CSS and in this we have used rotate animation transform: rotate(0deg);
					body {
  margin: 0;
  padding: 0;
  font-family: 'Poppins', sans-serif;
  display: flex;
  justify-content: center;
  align-items: center;
  background-color: #f0f4f8;
}

.background {
  position: absolute;
  top: 0;
  left: 0;
  width: 100%;
  height: 100%;
  background: #f0f4f8;
  z-index: -1;
}

.container {
  display: flex;
  justify-content: center;
  align-items: center;
  flex-direction: column;
  text-align: center;
  color: #333;
  max-width: 800px;
  padding: 20px;
}

.flag-container {
  margin-bottom: 20px;
  animation: wave 5s infinite;
}

.flag {
  width: 250px;
  height: auto;
}

.message-container {
  background-color: #fff;
  padding: 30px;
  border-radius: 10px;
  box-shadow: 0 4px 12px rgba(0, 0, 0, 0.1);
  width: 100%;
  max-width: 600px;
  color: #333;
}

h1 {
  color: #825CFF;
  font-size: 40px;
  margin-bottom: 15px;
}

.dynamic-message {
  font-size: 18px;
  font-weight: bold;
  color: #825CFF;
  line-height: 1.6;
  animation: fadeInOut 3s infinite;
}

@keyframes fadeInOut {
  0% {
      opacity: 0;
  }
  50% {
      opacity: 1;
  }
  100% {
      opacity: 0;
  }
}

.countdown {
  margin-top: 20px;
}

#countdown-timer {
  font-size: 24px;
  font-weight: bold;
  color: #825CFF;
}

.quote-container {
  background-color: #fff;
  padding: 15px;
  border-radius: 8px;
  box-shadow: 0 4px 12px rgba(0, 0, 0, 0.1);
}

.quote {
  font-size: 18px;
  font-style: italic;
  color: #6a47b8;
}


/* Flag Animation */
@keyframes wave {
  0% {
      transform: rotate(0deg);
  }
  50% {
      transform: rotate(5deg);
  }
  100% {
      transform: rotate(0deg);
  }
}
Javascript (Script.js)
Friends, we have created our republic project with the help of HTML and CSS, but we have used some code for which we will have to take the help of Javascript and if you do not know, then I would like to tell you that we have used countdown animation in our project, for which we will have to use Javascript, so let us now understand the code of Javascript.
- First we set up a countdown function in JavaScript: function countDown() {
- then we have targeted our date and time with the help of const, in this you need to set it correctly which is appropriate const targetDate = new Date(“January 26, 2025 00:00:00”).getTime();
- then we have replaced current date or new date with the help of const const now = new Date().getTime(); which will automatically set date-time according to the day
- Then we set the distance with the help of cust which is the date percent that is going to come constDistance = TargetDate – Now;
- Then we set the date, time, seconds using the formula which is something like this const days = Math.floor(Distance / (1000 * 60 * 60 * 24));
- Then we added the timer with the help of IdgetElementById(“countdown-timer”).innerHTML = In this your Id name must be correct
This is how we have set our countdown timer. If I have made a mistake in understanding any code then I am sorry, you can check the rest of the code.
					function countdown() {
  const targetDate = new Date("January 26, 2025 00:00:00").getTime();
  const now = new Date().getTime();
  const distance = targetDate - now;

  const days = Math.floor(distance / (1000 * 60 * 60 * 24));
  const hours = Math.floor((distance % (1000 * 60 * 60 * 24)) / (1000 * 60 * 60));
  const minutes = Math.floor((distance % (1000 * 60 * 60)) / (1000 * 60));
  const seconds = Math.floor((distance % (1000 * 60)) / 1000);

  document.getElementById("countdown-timer").innerHTML =
      days + "d " + hours + "h " + minutes + "m " + seconds + "s ";

  if (distance < 0) {
      clearInterval(x);
      document.getElementById("countdown-timer").innerHTML = "Republic Day has arrived!";
  }
}

let x = setInterval(countdown, 1000);
Output:
Disclaimer: The code provided in this post is sourced from GitHub and is distributed under the MIT License. All credits for the original code go to the respective owner. We have shared this code for educational purposes only. Please refer to the original repository for detailed information and any additional usage rights or restrictions.
Top 5 Data Science Courses to Build a Strong Career in 2026 Data science is no longer limited to tech companies. Banks …
Free Things You Get With Your College ID 🎓 Free / Discounted Platforms with College ID Platform What You Get (Student Benefits) …
25 Best Free Great Learning Courses for CSE Students (With Certificates) – Start Learning Today! If you’re a CSE student, engineering fresher, …

Why Target Test Prep Is the Best GMAT/GRE Prep Platform in 2025? Preparing for the GMAT or GRE has changed drastically in …
Get Huge Discounts

More Python Projects
