
Realtime Color Detection Using Open CV Python With Source Code
Introduction :
Colour detection is a process of identifying and detecting the colour of any part in an image or video frame , its performed on Live Stream camera feed to that make it real- time colour-based tracking. This processes is capturing video frames from a camera, Image processing based on colour isolation, markup or tracking of detected colors in real time. To enhance the efficiency of colour detection, OpenCV offers a wide array of tools which allow us to convert images from its RGB colour space into HSV (Hue,Saturation and Value) Colour Space. HSV Model — This model provides an easier way to segment and detect the colour depending on hue ranges. There are countless applications for real-time colour detection: object tracking, AR or in robotics. It is an essential component in interactive and automated systems, as it dynamically detects colours that appear. This is the basis for other more complicated image processing and computer vision works.
Language And Interface :-
Realtime Colour Detection Using Python , A Versatile Programming Language With Source Code .
Required Modules Or Packages :-
You Need The Packages List Given Below :-
- Numpy :- It is a core library for numerical computation in python and it can handle large arrays of numbers.
- cv2 :- It is a library to use in Computer Vision task. You will get basic image processing tools while using cv2 for example, Image Reading and Writing
How To Run The Code :-
Step 1 . First , You Download and Install Visual Studio Code or VS Code In your PC or Laptop by VS Code Official Website .
Step 2 . Now Open CMD As Administrator and install the above packages using pip .
Step 3 . Now Open Visual Studio Code .
Step 4. Now Make The file named as colourdetection.py .
Step 5 . Now Copy And Paste The Code from the Link Given Below
Step 6 . After pasting The code , Save This & Click On Run Button .
Step 7 . Now You will See The Output .
Code Explaination :-
Below code is the python script for real-time color detection through webcam using opencv. Enables the user to tune HSV (Hue, Saturation and Value) parameters
interactively in order to isolate and detect specific colors in a video feed. Code breakdown
Imports and Setup:
cv2 : This is the OpenCV library used for doing computer vision tasks.
numpy : It is used for dealing with arrays, which we can use it to handle color range.
Frame Size :
frameWidth , frameHeight : Dimensions where you like to have video frame (640×480 pixels)
Trackbar Window Setup:
cv2. namedWindow(“HSV”) and cv2. resizeWindow(“HSV”, 640, 240) : Create a window named “HSV” for the trackbars.
cv2. : You can call this function to create trackbars so that you could adjust your HSV values. These sliders can be moved by the user to set minimum and maximum values for Hue, Saturation, Value that specify what colour range should be detected.
Main Loop:
img = cap. read() : Reads a frame from the webcam.
imgHsv = cv2. cvtColor(img, cv2. COLOR_BGR2HSV) : This will convert the frame from BGR (default colour format in OpenCV) to HSV.
Trackbar Value Retrieval:
cv2. getTrackbarPos : The position of each trackBar ( value) from the min to max hsv values, that user set.
Color Range Masking:
lower : The lower bounds of the HSV values for color to be detected.
mask = cv2. cv2 inRange function -> inRange(imgHsv, lower, upper) : Creates a binary mask where the pixels falling within the specified HSV range are white (255) and the rest are black(0) .
Display:
We then put the original, mask and final images next to each other horizontally
(hStack),so we can see what have occurred .
cv2. imshow(‘Horizontal Stacking’, hStack): Outputs the horizontal stacking of images in a window.
if cv2. # Exit the loop if user presses ‘q’ .
if cv2.waitKey(1) & 0xFF == ord(‘q’): breakcv2.destroyAllWindows() Cleanup:
cap. release() and cv2. destroyAllWindows(): Release the webcam and close all OpenCV windows .
With this code, you can tweak around it for use in real-time color detection and apply to various applications such as object tracking and augmented reality.
Get Discount on Top Educational Courses
Source Code :-
RealTime_Color_Detection.py
					import cv2
import numpy as np

frameWidth = 640
frameHeight = 480
cap = cv2.VideoCapture(1)
cap.set(3, frameWidth)
cap.set(4, frameHeight)

def empty(a):
    pass

cv2.namedWindow("HSV")
cv2.resizeWindow("HSV", 640, 240)
cv2.createTrackbar("HUE Min", "HSV", 0, 179, empty)
cv2.createTrackbar("HUE Max", "HSV", 179, 179, empty)
cv2.createTrackbar("SAT Min", "HSV", 0, 255, empty)
cv2.createTrackbar("SAT Max", "HSV", 255, 255, empty)
cv2.createTrackbar("VALUE Min", "HSV", 0, 255, empty)
cv2.createTrackbar("VALUE Max", "HSV", 255, 255, empty)

while True:
    _, img = cap.read()
    imgHsv = cv2.cvtColor(img, cv2.COLOR_BGR2HSV)

    h_min = cv2.getTrackbarPos("HUE Min", "HSV")
    h_max = cv2.getTrackbarPos("HUE Max", "HSV")
    s_min = cv2.getTrackbarPos("SAT Min", "HSV")
    s_max = cv2.getTrackbarPos("SAT Max", "HSV")
    v_min = cv2.getTrackbarPos("VALUE Min", "HSV")
    v_max = cv2.getTrackbarPos("VALUE Max", "HSV")
    print(h_min)

    lower = np.array([h_min, s_min, v_min])
    upper = np.array([h_max, s_max, v_max])
    mask = cv2.inRange(imgHsv, lower, upper)
    result = cv2.bitwise_and(img, img, mask=mask)

    mask = cv2.cvtColor(mask, cv2.COLOR_GRAY2BGR)
    hStack = np.hstack([img, mask, result])

    cv2.imshow('Horizontal Stacking', hStack)
    if cv2.waitKey(1) & 0xFF == ord('q'):
        break

cap.release()
cv2.destroyAllWindows()
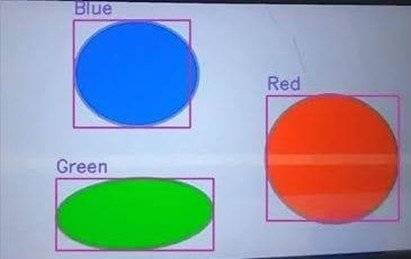
Output :
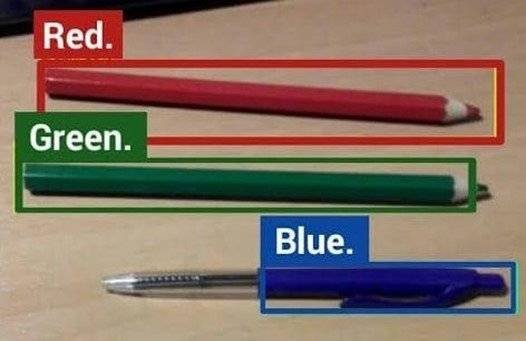
After Running the Code , You Will See The Output Like This .

Find More Projects

URL Shortener Using Python Django Introduction: Long URLs can be shortened into short, shareable links with the help of the URL Shortener …

User Authentication System Using Python Django Introduction: The implementation of safe and adaptable user authentication in Django is the main goal of …

The E-Learning System using Java with a Graphical User Interface (GUI) Introduction The E-Learning System is developed using Java (with a Graphical …

Weather App Using Python Django Introduction: When a user enters the name of a city, the Weather App retrieves current weather information. …

Quiz App Using Python Django Introduction: Users can take quizzes in a variety of subjects, see their results, and monitor their progress …

resume screener in python using python introduction The hiring process often begins with reviewing numerous resumes to filter out the most suitable …
Get Huge Discounts

More Python Projects
