
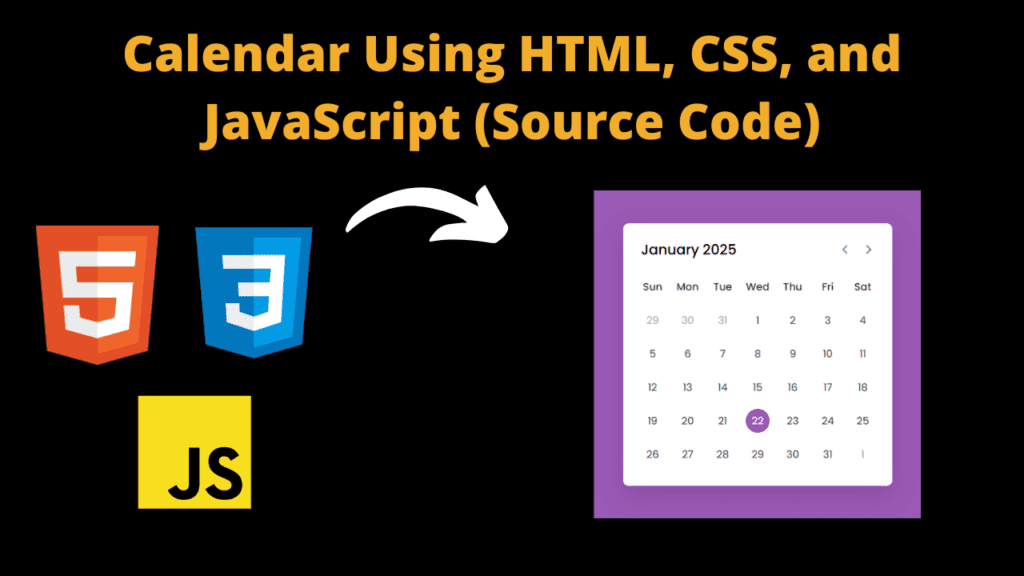
Calendar Using HTML, CSS, and JavaScript (Source Code)
Introduction
Hello friends my name is Gautam and you all are welcome to today’s new and beautiful project. Today we have created a beautiful and easy project for you which is a dynamic calendar and for making it we have taken the help of html css and javascript. Making it is very easy. If you have even a little knowledge of Javascript then you can make it very easily. But if you try to make it for the first time then you may face some difficulty. But when you try to create it then you will get the knowledge of coding as well which you will need to create it. also different errors will come up, you will get the knowledge to solve them. then when you create big projects, you will not come across such errors and if you do come up, you will be able to solve them easily. for creating our calendar we have taken help of javascript most of the time and if you face any problem in javascript code, then your calendar will not work, so go ahead, now we will understand its code.
HTML (index.html)
Get Discount on Top Educational Courses
To create a calendar, we will first have to create a structure for which we will have to take the help of HTML. Without HTML you cannot create a calendar, so first of all you will have to create a structure with the help of HTML. If it is very easy to create, then let us understand your HTML code.
- This is dosctype of HTMl with the help of which we come to know that this code is the code of HTMl <!doctype HTMl>
- Then we added a title to our calendar which tells us which project it is <title>Dynamic Calendar JavaScript</title>
- To link the CSS file to the HTML we have used the link element <link rel=”includesstyles” url=”style.cs”>
- To set our project to work properly on all devices, this HTML meta tag is used <meta name=”viewport” content=”width=device-width, initial-scale=1.0″>
- Javascript is most important for our calendar, so to link javascript to html file we have used this tag <script src=”script.js” defer></script>
- To create Kaldar, we first create an important <div> in which we are going to add our code <div class=”wrapper”>
- Then we have created a header section in which we have added some buttons <header>
- We have created another <div> in the header section <p class=”current-date”></p>
- Then in the header section, we have created a <div> section in which we have added two icons which work to move the date to the left and right <div class=”icons”>
- We have used <span> element to add icon in header section <span id=”prev” class=”material-symbols-rounded”>chevron_left</span>
- We have created a <div> with the name of a calendar <div class=”calendar”>
- In Kaldar we have created a weeks section using HTML <ul> element <ul class=”weeks”>
- To add names of weeks in calendar we have used <li> element <li>Sun</li>
- Then in the last we have created a separate section with the name of days in which days will be shown <ul class=”days”></ul>
    <title>Dynamic Calendar JavaScript</title>


    <div class="wrapper">
      <header>
        <p class="current-date"></p>
        <div class="icons">
          <span id="prev" class="material-symbols-rounded">chevron_left</span>
          <span id="next" class="material-symbols-rounded">chevron_right</span>
        </div>
      </header>
      <div class="calendar">
        <ul class="weeks">
          <li>Sun</li>
          <li>Mon</li>
          <li>Tue</li>
          <li>Wed</li>
          <li>Thu</li>
          <li>Fri</li>
          <li>Sat</li>
        </ul>
        <ul class="days"></ul>
      </div>
    </div>
CSS (Style.css)
Now we have created the structure of our calendar with the help of HTML, but we can create a structure only with the help of HTML, but the layout of HTML does not look good, to design it well we have to take the help of CSS, so let’s understand the CSS code now.
- First we have imported our font in Kass’s code @import URL(‘https://fonts.google.com/Kass2?family=Poppins:Wghat@400;500;600&display=swap’);
- In the body we have used box-sizing: border-box; to set the width, height and some other properties of the content
- After importing the font, we have used Poppins font font-family: ‘Poppins’, sans-only;
- We have used flex in the body display: flex; then we have centered the content justify-content: center; and to align the items horizontally we have used align-items: center;
- For the body background we have used this color background: #9b59b6;
- To create the color, we’ve created an important <div> with width: 450ps; and background background: #ffff;
- We have used border-radius: 10ps; in the box of the calendar so that the calendar looks good
- The shadow used in the colored box is like this: box-shadow: 0 15ps 40ps square(0,0,0,0.12);
- The box header items are flexed like this display: flex; then for horizontal centering the items are align-items: center;
- The header icons in the calendar are flexed display: flex;
- We have kept height and width of header icon height: 38ps; We have used cursor pointer in icon cursor: pointer;
- In header icon we have used this color color: #878787; Font size we have used this color font-size: 1.9rem;
- To make the header icon look nice, we have added hover effect in which we have used this color background: #f2f2f2;
- The font-size of the current date section in the header is 1.45 rem; you can reduce it further and we have kept font-weight: 500; in this
- In the calendar section, we have used padding which is like this padding: 20ps;
- We have flexed the reverse tag of the calendar display: flex; and to make it responsive we have wrapped it flex-wrap: wrap; so that it gets set according to its space
- In the calendar tool tag we have used list-style: none; so that the bullet points will become none
Friends, this was our code of the lesson, about which I have explained it very well to you and you can see in the code of the lesson below what else we have done with it.
					/* Import Google font - Poppins */
@import url('https://fonts.googleapis.com/css2?family=Poppins:wght@400;500;600&display=swap');
*{
  margin: 0;
  padding: 0;
  box-sizing: border-box;
  font-family: 'Poppins', sans-serif;
}
body{
  display: flex;
  align-items: center;
  padding: 0 10px;
  justify-content: center;
  min-height: 100vh;
  background: #9B59B6;
}
.wrapper{
  width: 450px;
  background: #fff;
  border-radius: 10px;
  box-shadow: 0 15px 40px rgba(0,0,0,0.12);
}
.wrapper header{
  display: flex;
  align-items: center;
  padding: 25px 30px 10px;
  justify-content: space-between;
}
header .icons{
  display: flex;
}
header .icons span{
  height: 38px;
  width: 38px;
  margin: 0 1px;
  cursor: pointer;
  color: #878787;
  text-align: center;
  line-height: 38px;
  font-size: 1.9rem;
  user-select: none;
  border-radius: 50%;
}
.icons span:last-child{
  margin-right: -10px;
}
header .icons span:hover{
  background: #f2f2f2;
}
header .current-date{
  font-size: 1.45rem;
  font-weight: 500;
}
.calendar{
  padding: 20px;
}
.calendar ul{
  display: flex;
  flex-wrap: wrap;
  list-style: none;
  text-align: center;
}
.calendar .days{
  margin-bottom: 20px;
}
.calendar li{
  color: #333;
  width: calc(100% / 7);
  font-size: 1.07rem;
}
.calendar .weeks li{
  font-weight: 500;
  cursor: default;
}
.calendar .days li{
  z-index: 1;
  cursor: pointer;
  position: relative;
  margin-top: 30px;
}
.days li.inactive{
  color: #aaa;
}
.days li.active{
  color: #fff;
}
.days li::before{
  position: absolute;
  content: "";
  left: 50%;
  top: 50%;
  height: 40px;
  width: 40px;
  z-index: -1;
  border-radius: 50%;
  transform: translate(-50%, -50%);
}
.days li.active::before{
  background: #9B59B6;
}
.days li:not(.active):hover::before{
  background: #f2f2f2;
}
Javascript (Script.js)
Friends, now we will take the help of Javascript to create the calendar in a perfect way. Friends, we are taking the help of Javascript because we have to show which date on which day. All this work is done with the help of Javascript and we have also added next and private button with the help of which user can check the date of private month and next month. All this work is done with the help of Javascript. If you do not have knowledge of Javascript then you may face problem. Therefore, it is important for you to know about some Javascript codes. We have to set the date and year with the help of Javascript due to which the date changes automatically. There is no need to do it yourself, I have written a lot of javascript code which you can see in the code below
const daysTag = document.querySelector(".days"),
currentDate = document.querySelector(".current-date"),
prevNextIcon = document.querySelectorAll(".icons span");
// getting new date, current year and month
let date = new Date(),
currYear = date.getFullYear(),
currMonth = date.getMonth();
// storing full name of all months in array
const months = ["January", "February", "March", "April", "May", "June", "July",
"August", "September", "October", "November", "December"];
const renderCalendar = () => {
let firstDayofMonth = new Date(currYear, currMonth, 1).getDay(), // getting first day of month
lastDateofMonth = new Date(currYear, currMonth + 1, 0).getDate(), // getting last date of month
lastDayofMonth = new Date(currYear, currMonth, lastDateofMonth).getDay(), // getting last day of month
lastDateofLastMonth = new Date(currYear, currMonth, 0).getDate(); // getting last date of previous month
let liTag = "";
for (let i = firstDayofMonth; i > 0; i--) { // creating li of previous month last days
liTag += `<li class="inactive">${lastDateofLastMonth - i + 1}</li>`;
}
for (let i = 1; i <= lastDateofMonth; i++) { // creating li of all days of current month
// adding active class to li if the current day, month, and year matched
let isToday = i === date.getDate() && currMonth === new Date().getMonth()
&& currYear === new Date().getFullYear() ? "active" : "";
liTag += `<li class="${isToday}">${i}</li>`;
}
for (let i = lastDayofMonth; i < 6; i++) { // creating li of next month first days
liTag += `<li class="inactive">${i - lastDayofMonth + 1}</li>`
}
currentDate.innerText = `${months[currMonth]} ${currYear}`; // passing current mon and yr as currentDate text
daysTag.innerHTML = liTag;
}
renderCalendar();
prevNextIcon.forEach(icon => { // getting prev and next icons
icon.addEventListener("click", () => { // adding click event on both icons
// if clicked icon is previous icon then decrement current month by 1 else increment it by 1
currMonth = icon.id === "prev" ? currMonth - 1 : currMonth + 1;
if(currMonth 11) { // if current month is less than 0 or greater than 11
// creating a new date of current year & month and pass it as date value
date = new Date(currYear, currMonth, new Date().getDate());
currYear = date.getFullYear(); // updating current year with new date year
currMonth = date.getMonth(); // updating current month with new date month
} else {
date = new Date(); // pass the current date as date value
}
renderCalendar(); // calling renderCalendar function
});
});
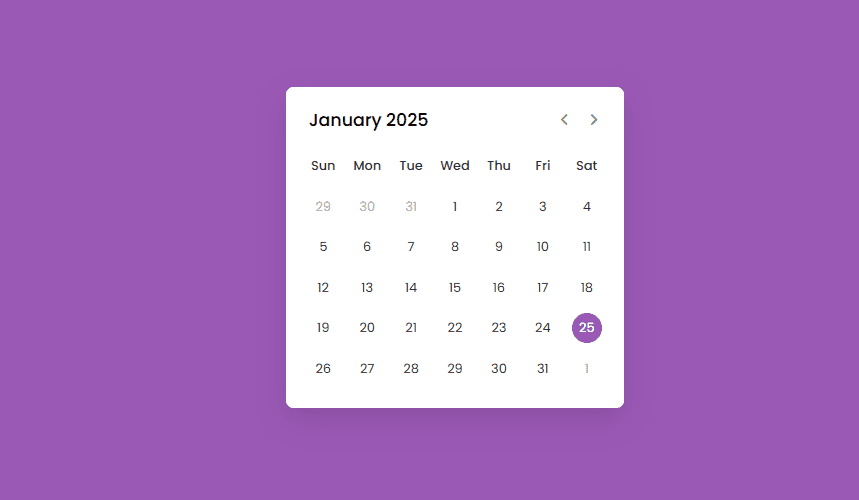
Output:
Disclaimer: The code provided in this post is sourced from GitHub and is distributed under the MIT License. All credits for the original code go to the respective owner. We have shared this code for educational purposes only. Please refer to the original repository for detailed information and any additional usage rights or restrictions.
Top 5 Data Science Courses to Build a Strong Career in 2026 Data science is no longer limited to tech companies. Banks …
Free Things You Get With Your College ID 🎓 Free / Discounted Platforms with College ID Platform What You Get (Student Benefits) …
25 Best Free Great Learning Courses for CSE Students (With Certificates) – Start Learning Today! If you’re a CSE student, engineering fresher, …

Why Target Test Prep Is the Best GMAT/GRE Prep Platform in 2025? Preparing for the GMAT or GRE has changed drastically in …
Get Huge Discounts

More Python Projects
