
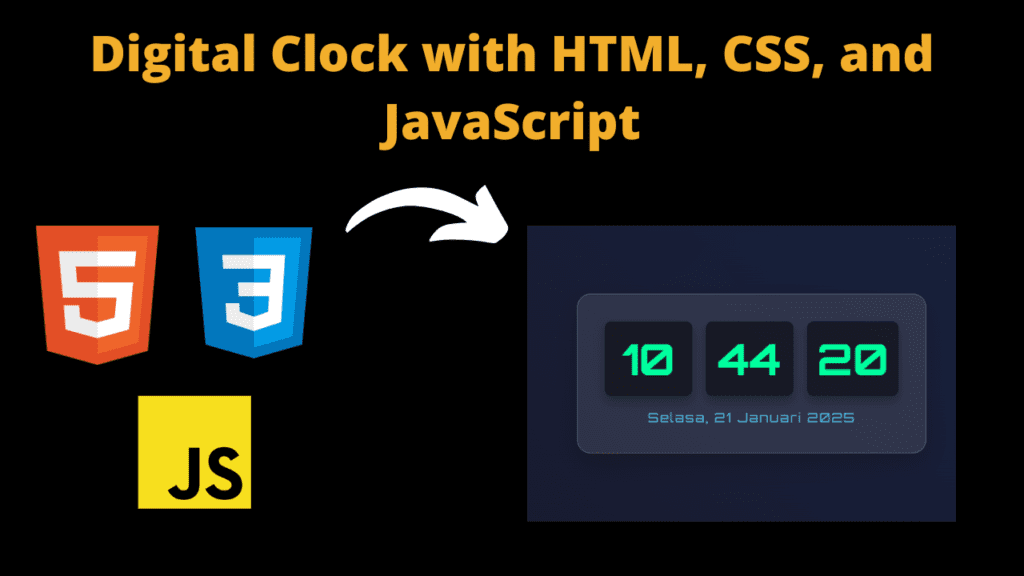
Digital Clock with HTML, CSS, and JavaScript
Introduction
Hello friends, my name is Gautam and you are all welcome to today’s new project. Today we have created a very easy and simple project for you. The name of this project is digital clock and to create it, we have taken the help of html, css and javascript. Friends, if you are new in the world of coding, then this project is going to be for you because if you are learning coding, then you should make such type of project which increases your coding knowledge and you understand how you can solve the error. Friends, creating this digital clock is very easy in this We have edited some colours and fonts and taken help of some Javascript. By creating such a project, you can add it to your resume and GitHub. You may not get a job with such a project but it creates a good impression. When you make small projects like this, then you will have no problem in creating bigger projects. So let’s go now, let us understand the code of our project.
HTML (index.html)
Get Discount on Top Educational Courses
All my developer friends, the code that you are seeing below is HTML code which is very easy to write but before writing HTML code, we need to understand HTML code, so let us now understand our HTML code.
- <DOCTYPE html> this means that this code is of html this tells about the code
- This element tells us which language our code is in and we can also change it <html lang=”en”>
- We have added title to the website which you can add as per your choice <title>Futuristic Neon Digital Clock | Responsive Modern UI Clock</title>
- It is very important to link the html file with css, for which we have used the link element <link rel=”stylesheet” href=”./style.css”> Make sure you have added the name of your file correctly
- This is an important element of HTML, within whose opening tag and closing tag the HTML code is written <body></body>
- To create the structure of the digital clock, we first create an important <the> in HTML <div class=”clock-container”>
- Then we have created a separate container named clock <div class=”clock”> in which we will create different boxes of our clock
- We have created total three boxes in clock container which is like this <div class=”time-segment” id=”hours”>00</div> and all three are different
- We have created three different boxes in which we have added different text like minutes, seconds and hours <div class=”segment-label”>Hours</div>
- At the end of the clock we have created a date section in which we have displayed the date <div class=”date” id=”date”>Loading…</div>
- And at the end of the html we have linked our javascript file with the html code <script src=”./script.js”></script>
  <title>Futuristic Neon Digital Clock | Responsive Modern UI Clock</title>


<div class="clock-container">
        <div class="clock">
            <div class="time-segment" id="hours">00
                <div class="segment-label">Hours</div>
            </div>
            <div class="time-segment" id="minutes">00
                <div class="segment-label">Minutes</div>
            </div>
            <div class="time-segment" id="seconds">00
                <div class="segment-label">Seconds</div>
            </div>
        </div>
        <div class="date" id="date">Loading...</div>
    </div>
CSS (Style.css)
Now let’s talk about CSS, with the help of CSS we have designed our digital clock, without CSS you cannot design your clock or any other project, if you have good knowledge of CSS then you can design it very well, it all depends on you how much knowledge you have about designing, so let’s go now let us tell you about our CSS code.
- Firstly, in Cass we have imported our font @import URL(‘https://fonts.google.com/cass2?family=Orbitron:Waghat@400;700&display=swap’);
- We have flexed the body of the clock display: flex; we have also centered the content justify-content: center; and also align-items: center; so that all the content becomes center
- We have used color for the body background which is background: linear-gradient(45deg, #1a1a2e, #16213e);
- Whatever text we have added in the clock, we have added this font font-family: ‘Orbitron’, sans-only;
- We have added this color to the background of the important container of the clock background: rgba(255, 255, 255, 0.1); also we have used border radius border-radius: 20px;
- We have designed the clock a bit differently by blurring the filter of the background backdrop-filter: blur(10ps);
- We have kept the border of the clock something like this border: 1px solid rgba(255, 255, 255, 0.2); We have also used padding padding: 40px; and have used box shadow so that the clock looks good box-shadow: 0 15px 35px rgba(0, 0, 0, 0.2);
- We have centered the text of the clock container text-align: center; We have used animation in this, so we have used transition: all 0.3s ease;
- In clock we have centered the text and content for which we have flected display: flex; and also justify-content: center; , align-items: center; and in clock we have kept a gap gap: 20px;
- We have also created a date section in the clock in which we have used margin margin-top: 20px; and added color color: #4eb8dd;
- To make the clock responsive we have used media query @media (max-width: 600ps) {}
					@import url('https://fonts.googleapis.com/css2?family=Orbitron:wght@400;700&display=swap');

        body {
            display: flex;
            justify-content: center;
            align-items: center;
            min-height: 100vh;
            background: linear-gradient(45deg, #1a1a2e, #16213e);
            margin: 0;
            font-family: 'Orbitron', sans-serif;
            overflow: hidden;
        }

        .clock-container {
            background: rgba(255, 255, 255, 0.1);
            border-radius: 20px;
            backdrop-filter: blur(10px);
            border: 1px solid rgba(255, 255, 255, 0.2);
            padding: 40px;
            box-shadow: 0 15px 35px rgba(0, 0, 0, 0.2);
            text-align: center;
            transition: all 0.3s ease;
        }

        .clock {
            display: flex;
            justify-content: center;
            align-items: center;
            gap: 20px;
        }

        .time-segment {
            background: rgba(0, 0, 0, 0.5);
            border-radius: 10px;
            padding: 15px;
            min-width: 100px;
            color: #00ff9f;
            font-size: 4rem;
            font-weight: bold;
            position: relative;
            overflow: hidden;
            box-shadow: 0 8px 15px rgba(0, 0, 0, 0.3);
            transition: transform 0.2s ease;
        }

        .time-segment:hover {
            transform: scale(1.05);
        }

        .segment-label {
            position: absolute;
            bottom: -25px;
            left: 0;
            width: 100%;
            color: #4eb8dd;
            font-size: 0.8rem;
            text-transform: uppercase;
        }

        .date {
            margin-top: 20px;
            color: #4eb8dd;
            font-size: 1.2rem;
            letter-spacing: 2px;
        }

        @media (max-width: 600px) {
            .time-segment {
                font-size: 2.5rem;
                padding: 10px;
                min-width: 60px;
            }
            .clock-container {
                padding: 20px;
            }
        }
Javascript (Script.js)
Friends now we are going to talk about the javascript code which has a huge contribution in this clock. Without javascript you can create this digital clock but this digital clock will not work in the way it should because we have not added javascript in this clock. With the help of javascript we have to set some functions like timing hours, second and minute, so we have to create different functions and we have to add their ID in the html code which you can see in the code below. We have added some javascript code which you can see.
					function updateClock() {
            const now = new Date();
            const hours = now.getHours().toString().padStart(2, '0');
            const minutes = now.getMinutes().toString().padStart(2, '0');
            const seconds = now.getSeconds().toString().padStart(2, '0');

            const days = ['Minggu', 'Senin', 'Selasa', 'Rabu', 'Kamis', 'Jumat', 'Sabtu'];
            const months = ['Januari', 'Februari', 'Maret', 'April', 'Mei', 'Juni', 'Juli', 'Agustus', 'September', 'Oktober', 'November', 'Desember'];

            document.getElementById('hours').textContent = hours;
            document.getElementById('minutes').textContent = minutes;
            document.getElementById('seconds').textContent = seconds;

            document.getElementById('date').textContent =
                `${days[now.getDay()]}, ${now.getDate()} ${months[now.getMonth()]} ${now.getFullYear()}`;
        }

        // Initial call to display clock immediately
        updateClock();

        // Update clock every second
        setInterval(updateClock, 1000);
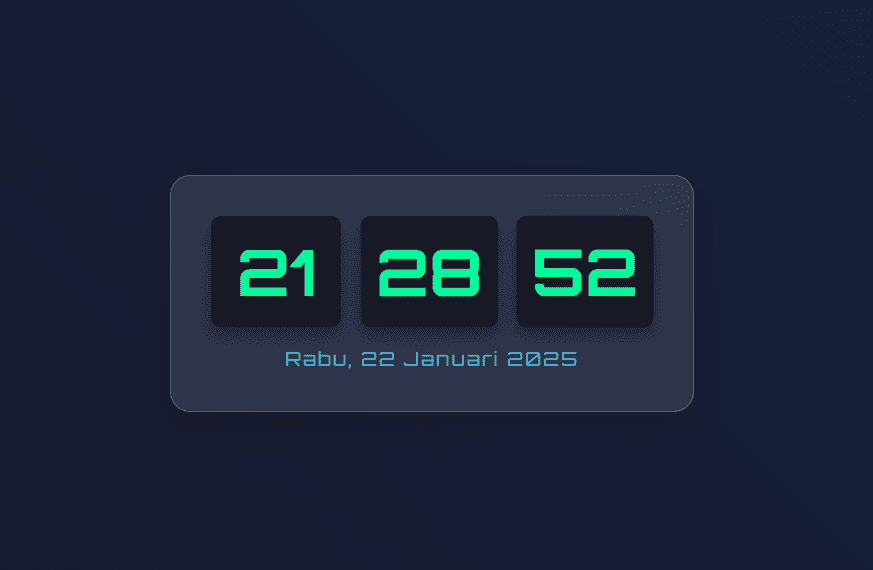
Output:
Disclaimer: The code provided in this post is sourced from GitHub and is distributed under the MIT License. All credits for the original code go to the respective owner. We have shared this code for educational purposes only. Please refer to the original repository for detailed information and any additional usage rights or restrictions.
Top 5 Data Science Courses to Build a Strong Career in 2026Data science is no longer limited to tech companies. Banks use …
Free Things You Get With Your College ID 🎓 Free / Discounted Platforms with College ID Platform What You Get (Student Benefits) …
25 Best Free Great Learning Courses for CSE Students (With Certificates) – Start Learning Today! If you’re a CSE student, engineering fresher, …

Why Target Test Prep Is the Best GMAT/GRE Prep Platform in 2025? Preparing for the GMAT or GRE has changed drastically in …
Get Huge Discounts

More Python Projects
