
Custom AI Story Generator With Emotion Control Using Python

Introduction:
With the help of this AI-powered story generator, users can compose stories based on a selected emotion, such as excitement, fear, joy, or sadness. It was created with Python and natural language processing (NLP) tools, giving users the ability to manipulate the story’s emotional tone, which increases its impact and personalization.
Purpose:
Helping users—writers, students, or creators—create original stories based on particular themes and emotions is the aim. By granting users emotional control, it addresses the issue of generic storytelling.
Key Features:
- Storytelling based on emotions.
- Select the plot, characters, and genre.
- Content produced by AI with language models.
- A straightforward and engaging user interface.
How it Works:
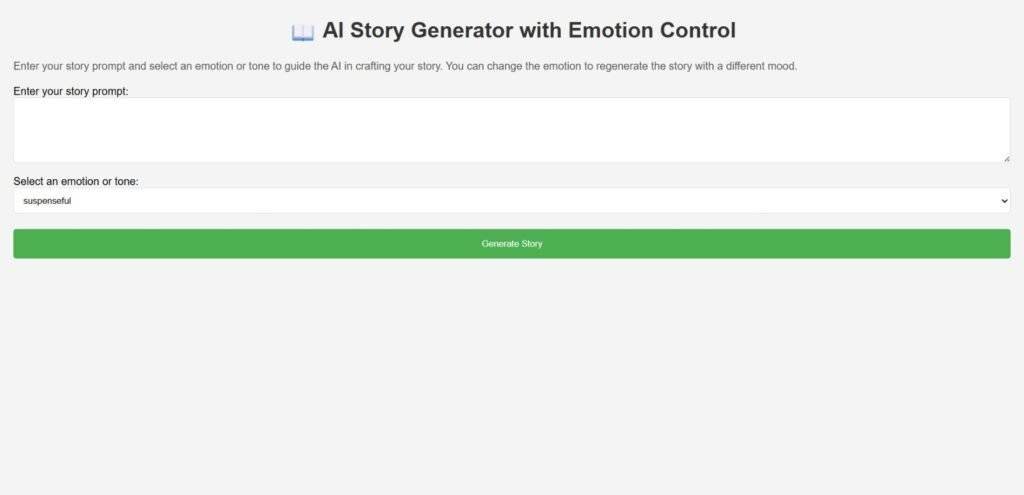
Users choose a story’s details and an emotion. After processing this data, the AI crafts a narrative that fits the tone. With text boxes or dropdowns for input and a “Generate Story” button for output, the interface is simple to use.
What’s Unique:
This project is perfect for emotional writing, creative projects, or entertainment apps because it allows you to control the story’s emotional direction, unlike simple generators.
Required Modules Or Packages:
- Os – This module is used in handling files and directories.
- Openai – This module is used to access OpenAI’s models (like ChatGPT) by Python code.
- Streamlit – This module will helps you to build interactive web apps easily by using Python.
- Datetime – This module is used to work with dates and times.
To install these Packages, use the following command:
1. Openai:
pip install openai
2. Streamlit:
pip install streamlit
3. Os and Datetime:
import os
import datetime
How To Run The Code:
Method 1:
Step 1 . First , You Download and Install Visual Studio Code or VS Code In your PC or Laptop by VS Code Official Website .
Step 2 . Now Open CMD As Administrator and install the above packages using Pip .
Step 3 . Now Open Visual Studio Code .
Step 4. Now Make The file named as main.py .
Step 5 . Now Copy And Paste The Code from the Link Given Below ⬇️
Step 6 . After pasting The Code , Save This & Click On Run Button .
Step 7 . Now You will See The Output .
Method 2:
Step 1 . First , You Download and Install Visual Studio Code or VS Code In your PC or Laptop by VS Code Official Website .
Step 2 . Now Open CMD As Administrator and install the above packages using Pip .
Step 3 . Now Open the Github link , which is provided below.
Step 4. Now download the ZIP file of the code.
Step 5 . Now Extract the ZIP file and Open in VS Code.
Step 6 . Now go to the main file and click on run button.
Step 7 . Now You will See The Output .
Code Explanation:
This Python code is used to Create a Custom AI Story Generator With Emotion Control. Ensures that You Have Downloaded the modules given above .
This project is a Streamlit-based web app for generating short stories using the OpenAI GPT API, with emotion control.
1. Library Imports and API Configuration:
import os
import openai
import streamlit as st
from datetime import datetime
- Os – This module is used in handling files and directories.
- Openai – This module is used to access OpenAI’s models (like ChatGPT) by Python code.
- Streamlit – This module will helps you to build interactive web apps easily by using Python.
- Datetime – This module is used to work with dates and times.
The API key will be fetched from an environment variable:
openai.api_key = os.getenv("OPENAI_API_KEY")If the key is not found, then it shows an error and stops the app:
if not openai.api_key:
st.error("OpenAI API key not found! Please set the OPENAI_API_KEY environment variable.")
st.stop()
2. Story Generation Function:
def generate_story(prompt: str, emotion: str) -> str:
This function in this code takes two user inputs: prompt of story (story idea) and emotion (like happy, suspenseful, etc.).
user_message = {
"role": "user",
"content": f"Write a short story based on this prompt: \"{prompt}\". Make it {emotion} in tone."
}
The function in this code will uses openai.ChatCompletion.create() to send the story prompt and the emotion to the Open AI GPT model:
response = openai.ChatCompletion.create(
model="gpt-3.5-turbo",
messages=[system_message, user_message],
max_tokens=500,
temperature=0.8,
)
This block of the code will returns the generated story as a string.
3. Save Story to File:
def save_story_to_file(story: str, prompt: str, emotion: str):
This function in the code will saves the generated story into a text file with a unique filename which is using the current timestamp:
filename = f"story_{safe_prompt[:30].replace(' ', '')}{emotion}{datetime.now().strftime('%Y%m%d%H%M%S')}.txt"It will creates a user-friendly filename for later reading.
4. Streamlit User Interface (main function):
def main():
This is the block of code, where the user interface is defined:
st.title(): App title.
st.text_area(): User inputs the story prompt.
st.selectbox(): User selects an emotional tone.
st.button(): When clicked, it will starts the story generation.
if st.button("Generate Story") and prompt.strip():
If a story will be generated, then it is displayed with:
st.subheader("Generated Story:")
st.write(story)
And Now users can save it using the “Save Story” button.
Source Code:
					import os
import openai
import streamlit as st
from datetime import datetime

# Configure OpenAI API key from environment variable
openai.api_key = os.getenv("OPENAI_API_KEY")

if not openai.api_key:
    st.error("OpenAI API key not found! Please set the OPENAI_API_KEY environment variable.")
    st.stop()

def generate_story(prompt: str, emotion: str) -> str:
    """
    Generate a short story using OpenAI's GPT model based on the prompt and emotion.

    Emotion control is achieved by prepending a phrase instructing the model to write
    the story with the specified emotional tone.

    Parameters:
      - prompt: The user input story prompt.
      - emotion: The desired emotion or tone (e.g., suspenseful, happy).

    Returns:
      - Generated story text.
    """
    system_message = {
        "role": "system",
        "content": (
            "You are a creative assistant who writes engaging short stories. "
            "Incorporate the specified tone or emotion in your writing."
        )
    }

    user_message = {
        "role": "user",
        "content": f"Write a short story based on this prompt: \"{prompt}\". Make it {emotion} in tone."
    }

    try:
        response = openai.ChatCompletion.create(
            model="gpt-3.5-turbo",
            messages=[system_message, user_message],
            max_tokens=500,
            temperature=0.8,
            top_p=1,
            n=1,
            stop=None,
        )
        story = response.choices[0].message.content.strip()
        return story
    except Exception as e:
        return f"Error generating story: {e}"

def save_story_to_file(story: str, prompt: str, emotion: str):
    """
    Save the generated story to a text file with a timestamped filename.
    """
    safe_prompt = "".join(c for c in prompt if c.isalnum() or c in (' ', '_')).rstrip()
    filename = f"story_{safe_prompt[:30].replace(' ', '')}{emotion}{datetime.now().strftime('%Y%m%d%H%M%S')}.txt"
    with open(filename, "w", encoding="utf-8") as f:
        f.write(f"Prompt: {prompt}\nEmotion: {emotion}\n\nStory:\n{story}\n")
    return filename

def main():
    st.set_page_config(page_title="AI Story Generator with Emotion Control", page_icon="📖")
    st.title("📖 AI Story Generator with Emotion Control")

    st.markdown(
        """
        Enter your story prompt and select an emotion or tone to guide the AI in crafting your story.
        You can change the emotion to regenerate the story with a different mood.
        """
    )

    prompt = st.text_area("Enter your story prompt:", height=100)
    emotion_options = [
        "suspenseful",
        "happy",
        "romantic",
        "melancholic",
        "humorous",
        "inspiring",
        "mysterious",
        "adventurous",
        "dark",
        "optimistic",
    ]
    emotion = st.selectbox("Select an emotion or tone:", options=emotion_options)

    if st.button("Generate Story") and prompt.strip():
        with st.spinner("Generating story..."):
            story = generate_story(prompt.strip(), emotion)
        st.subheader("Generated Story:")
        st.write(story)

        if st.button("Save Story"):
            filename = save_story_to_file(story, prompt.strip(), emotion)
            st.success(f"Story saved as {filename}")

    elif st.button("Generate Story"):
        st.error("Please enter a prompt to generate a story.")

if _name_ == "_main_":
    main()
Output:
Get Huge Discounts

More Python Projects
