
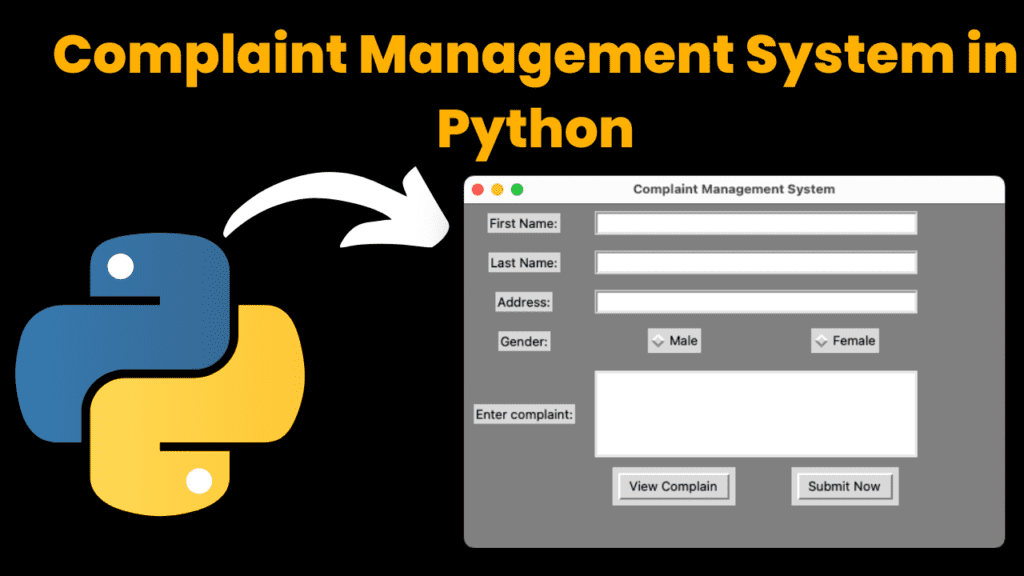
Complain Management using Python with a Graphical User Interface (GUI)
Introduction:
The Complain Management using Python program designed to manage complaints effectively within an organization. Through this system, it’s easier than ever to log, manage and respond to customer complaints-and by streamlining communication between staff members, keep the problems from festering. Complaint handling is handled using GUI interfaces: which means everything is done quickly and new complaints can’t get forgotten about. The system also ensures that all problems are properly accounted for, so we know whether they will recur if not solved now and how long it has been taking them down that road concomitantly with those incidents in which there may be some connection between damaging effects or malfunctions of our equipment (whatever circumstances exist at present elsewhere.
The system uses Python’s Tkinter module to build a graphical user interface, SQLite for managing the database, and is designed to be easy update or modify. The user interface is very intuitive: users can submit complaint forms, view all logged complaints and manage them directly-from deleting to labeling them resolved. The back-end database holds important information such as complaint details, date and current status. This ensures that data is managed securely and is easily retrievable.
The Complaint Management System’s primary purpose is to provide a centralized platform where users can log complaints and administrators or designated personnel (hereinafter: “responsible personnel”). This system is especially useful for businesses or service-oriented organizations that receive large numbers of complaints and have to keep a handle on these complaints in order to improve their service or handle issues effectively. It is also adaptable for use inside an organization itself, where workers can report problems such as IT or maintenance concerns.
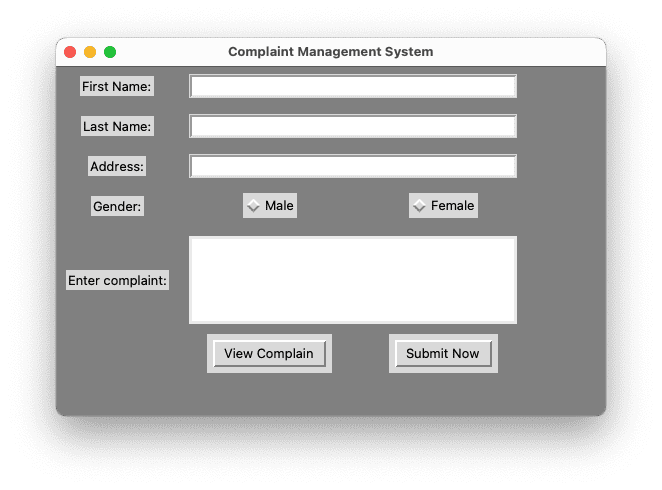
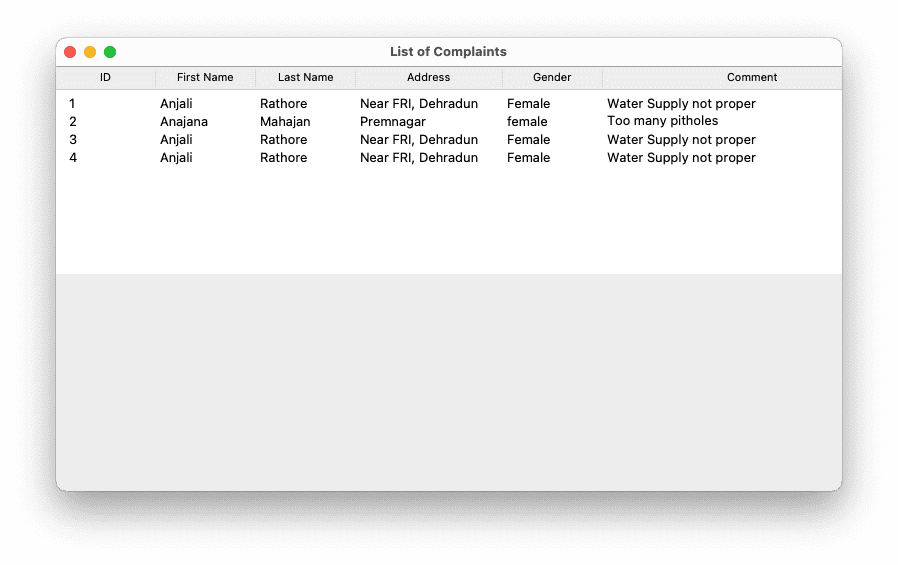
The Complaint Management System boasts several major functions: Submit Complaints: Users can easily submit new complaints by filling out a form with information such as the issue description and category. View Complaints: All complaints are presented in a structured way, showing fields such as complaint ID, description, date submitted and current status. Update and Resolve Complaints: Status updates or removal of complaints is authorized and controlled by the administrator. Database Management: SQLite is used to manage the complain data. It ensures that all records are properly stored, able to be read back, and updated.
This project is an excellent learning resource for novice programmers and experienced ones alike who are interested in developing an application that has both a GUI front-end, database usage, plus modular design. It is an example showing how Python can be applied to real-world applications bringing together front and back ends to make a workable management system.
Required Modules or Packages:
The system was developed using Tkinter, which is a Python package used for building simple GUI applications. Below are the essential packages required for this project:
Tkinter:
- Used for building the graphical user interface (GUI).
- Provides various widgets such as buttons, text fields, and tables, which are essential for creating the complaint management system.
- Installation:
pip install tk
SQLite3:
- Used for managing the database that stores all the complaint details.
- SQLite is a lightweight, file-based database that requires minimal configuration and works well for small applications.
- No external installation is required for SQLite, as it comes bundled with Python.
How to Run the Code:
Follow the steps below to run the Complaint Management System on your machine:
Download Python:
- Make sure Python is installed. You can download it from here.
Extract the Project:
- Extract the downloaded ZIP file containing the project.
Open the Project:
- Navigate to the project folder and open the main
.pyfile.
- Navigate to the project folder and open the main
Run the Script:
- Press
F5or click on the Run menu, and select Run Module to execute the code. This will launch the complaint management system.
- Press
Code Explanation:
Main Script:
Complaint-System-Main.pyThis is the primary script responsible for launching the graphical user interface (GUI) and handling the core functionality of the Complaint Management System.
Key Components:
Tkinter Initialization:
Here, Tkinter is imported to create the graphical interface. Thefrom tkinter import * import tkinter.messagebox as MessageBox from complaintListing import ComplaintListingMessageBoxmodule is used to display alert boxes (e.g., for error handling). TheComplaintListingis imported from thecomplaintListing.pyfile to handle displaying and managing complaints in the system.Complaint Submission Form: The form used for complaint submission is built using Tkinter’s widgets such as
Labels,Entries, andButtons. For example:root = Tk() root.title("Complaint Management System") Label(root, text='Complaint Description').grid(row=0, column=0) desc_entry = Entry(root) desc_entry.grid(row=0, column=1) submit_btn = Button(root, text='Submit', command=submit_complaint) submit_btn.grid(row=2, column=1)- The root window (
root) is created usingTk(), and the title of the window is set to “Complaint Management System”. - A label widget is created to prompt the user to enter the complaint description, and an entry widget is used to collect the complaint from the user.
- The
submit_complaintfunction is triggered when the “Submit” button is clicked.
- The root window (
Submit Complaint Functionality:
def submit_complaint(): description = desc_entry.get() if description == "": MessageBox.showinfo("Insert Status", "All fields are required") else: insert_complaint(description)- The
submit_complaint()function is responsible for handling the submission of a complaint. It checks if the description is empty. If the field is empty, a message box alerts the user that all fields are required. - If the description is valid, the
insert_complaint()function is called to store the data into the database.
- The
Database Insertion:
def insert_complaint(description): conn = sqlite3.connect('complaintDB.db') cursor = conn.cursor() cursor.execute("INSERT INTO complaints(description, status) VALUES(?, ?)", (description, "Pending")) conn.commit() conn.close() MessageBox.showinfo("Insert Status", "Complaint Submitted Successfully") desc_entry.delete(0, END)- A connection to the SQLite database (
complaintDB.db) is established usingsqlite3.connect(). - The
INSERT INTOSQL command is executed to add a new complaint with the description provided by the user. The status of the complaint is set to “Pending” by default. - After executing the command, the database is committed and the connection is closed. A success message is displayed to the user, and the input field is cleared.
- A connection to the SQLite database (
Complaint Management Buttons: In addition to the submission button, buttons for viewing, updating, and deleting complaints are provided:
view_btn = Button(root, text='View Complaints', command=view_complaints) view_btn.grid(row=3, column=1) delete_btn = Button(root, text='Delete Complaint', command=delete_complaint) delete_btn.grid(row=4, column=1)- The
view_complaints()function opens a new window to display all complaints. - The
delete_complaint()function allows the user to delete a specific complaint based on its ID.
- The
Complaint Listing Script:
complaintListing.pyThis script handles the display and management of the complaints that are stored in the database.
Complaint Listing GUI:
def ComplaintListing(): listing_window = Tk() listing_window.title("Complaint Listing") # Create Treeview to display complaints tree = ttk.Treeview(listing_window, columns=('ID', 'Description', 'Status'), show='headings') tree.heading('ID', text='ID') tree.heading('Description', text='Description') tree.heading('Status', text='Status') tree.pack(fill=BOTH, expand=1)- A new window (
listing_window) is created to display the complaints. - A
Treeviewwidget is used to display the complaints in a table-like format with columns for the ID, description, and status. The data is fetched from the database and inserted into the treeview.
- A new window (
Fetching and Displaying Complaints:
conn = sqlite3.connect('complaintDB.db') cursor = conn.cursor() cursor.execute("SELECT * FROM complaints") rows = cursor.fetchall() for row in rows: tree.insert("", END, values=row) conn.close()- The SQLite database is queried to fetch all the complaints stored in the
complaintstable. - Each row from the result is inserted into the
Treeviewwidget for display.
- The SQLite database is queried to fetch all the complaints stored in the
Updating and Deleting Complaints: Buttons are provided for users to update or delete complaints directly from the listing window:
update_btn = Button(listing_window, text='Mark as Resolved', command=mark_as_resolved) update_btn.pack()- The
mark_as_resolved()function updates the status of the selected complaint to “Resolved” in the database.
- The
Database Configuration:
configdb.pyThis script is responsible for setting up and configuring the SQLite database.
- Database Initialization:
conn = sqlite3.connect('complaintDB.db') cursor = conn.cursor() cursor.execute("CREATE TABLE IF NOT EXISTS complaints (id INTEGER PRIMARY KEY AUTOINCREMENT, description TEXT, status TEXT)") conn.commit() conn.close()- The SQLite database connection is established, and a table named
complaintsis created if it doesn’t already exist. The table contains three columns:id,description, andstatus.
- The SQLite database connection is established, and a table named
- Database Initialization:
Database File:
complaintDB.dbThis file is the actual SQLite database where all complaint records are stored. The database is lightweight and does not require a separate server, making it ideal for small-scale applications like this one.
Code Flow:
- Initialization: The database is initialized using
configdb.py, creating the necessary table if it doesn’t exist. - Complaint Submission: The user submits a complaint through the main GUI, which is inserted into the SQLite database via
Complaint-System-Main.py. - View Complaints: The user can view all the complaints in a separate window using the
ComplaintListingfunction fromcomplaintListing.py. - Manage Complaints: The user can update or delete complaints directly from the listing window, and these actions are reflected in the database.
This modular design allows for easy extension of the project, and additional features such as user authentication or enhanced reporting can be implemented with minimal changes to the core structure.
Get Discount on Top Educational Courses
Source Code:
Output:
More Projects:

URL Shortener Using Python Django
URL Shortener Using Python Django Introduction: Long URLs can be shortened into short, shareable links with the help of the URL Shortener project. Though it
User Authentication System Using Python Django
User Authentication System Using Python Django Introduction: The implementation of safe and adaptable user authentication in Django is the main goal of this project. It

E-Learning System Using JAVA
The E-Learning System using Java with a Graphical User Interface (GUI) Introduction The E-Learning System is developed using Java (with a Graphical User interface through

Weather App Using Python Django with Source Code
Weather App Using Python Django Introduction: When a user enters the name of a city, the Weather App retrieves current weather information. It provides temperature,
Quiz App Using Python Django with complete source code
Quiz App Using Python Django Introduction: Users can take quizzes in a variety of subjects, see their results, and monitor their progress with the Django
Resume Screener in python using GUI
resume screener in python using python introduction The hiring process often begins with reviewing numerous resumes to filter out the most suitable candidates for a
Get Huge Discounts

More Python Projects
