
Catch The Insect Game Using HTML CSS And JavaScript

Introduction
Hello coders, welcome to another new blog. Today in this article we will learn to create a insect catch game. This insect catch game is very interesting to play and it is dynamic as well. We’ve used HTML CSS and JavaScript to create this insect catch game.
In our insect catch game the HTML sets up the basic structure of our game. CSS designs and improve user interactivity of our game. Using CSS we make our game visually appealing. JavaScript adds interactive functionality to our insect catch game.
If you’ve good amount of knowledge in HTML CSS and JavaScript then you can also create this type of game project. These dynamic project always helps you to grow and enhance your coding skills. In the tech field the more you create, the more your learn. Let’s understand the code.
HTML (index.html)
Get Discount on Top Educational Courses
This is our HTML code which sets up the basic structure of our insect catch game. This code sets the basic element for our game which we can later modify using JavaScript. Let’s breakdown our code.
- <!DOCTYPE html> : This tag defines the type of our document and ensures that our document is a HTML file.
- <title> : Sets the title of our webpage as Catch the insect.
- <link> : This tag links external files to our HTML document.
- <div class = “screen”> : This tag contains one h1 tag which displays a heading of the game before the start of the game and a button with the Play Game text.
- <div class = ”screen”> : This is 2nd div with the class screen. This appears when we click on Play Game button.
- <h1> : This displays a heading on top of the game when we choose insect.
- <ul> : This unordered list contains several lists for the insects.
- <li> : Each li tag contains a button with the class choose-insect-btn. This also contains a paragraph tag with some text and an <input values.
- <div class = “screen game-container”> : This section will appear when game will start. This has 3 heading tags.
- <h3 class=”time”> : This displays the in time game.
- <h3 class=”score”> : This displays the score of the player.
- <h5 class=”message”> : This displays a message randomly in game to boost the confidence.
- <script> : This tag links external JavaScript file to our HTML document.
<title>Catch The Insect</title>
<div class="screen">
<h1>Catch The Insect</h1>
<button class="btn" id="start-btn">Play Game</button>
</div>
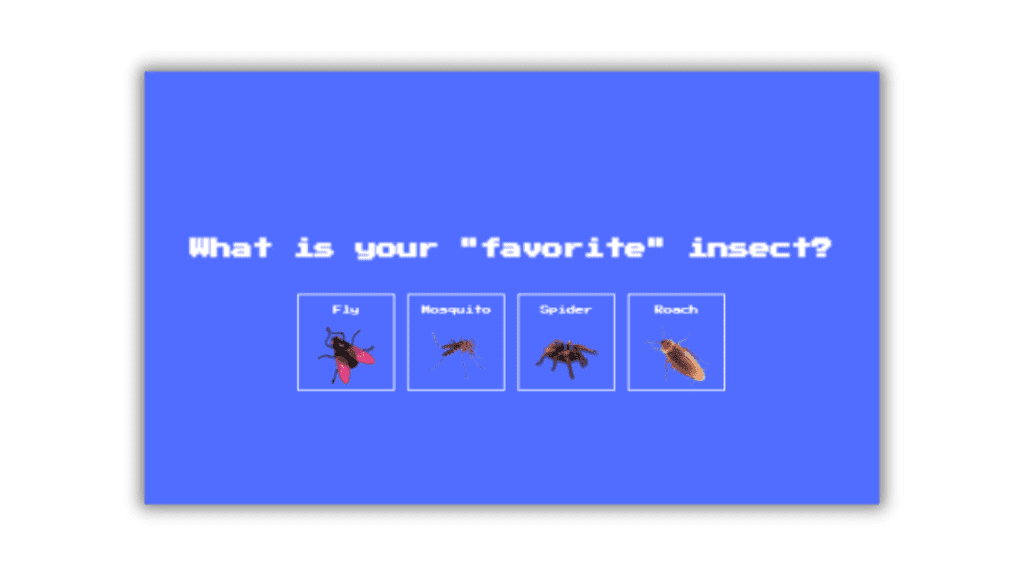
<div class="screen">
<h1>What is your "favorite" insect?</h1>
<ul class="insects-list">
<li>
<button class="choose-insect-btn">
<p>Fly</p>
<img data-lazyloaded="1" src="data:image/svg+xml;base64,PHN2ZyB4bWxucz0iaHR0cDovL3d3dy53My5vcmcvMjAwMC9zdmciIHdpZHRoPSIyNTYiIGhlaWdodD0iMjU2IiB2aWV3Qm94PSIwIDAgMjU2IDI1NiI+PHJlY3Qgd2lkdGg9IjEwMCUiIGhlaWdodD0iMTAwJSIgc3R5bGU9ImZpbGw6I2NmZDRkYjtmaWxsLW9wYWNpdHk6IDAuMTsiLz48L3N2Zz4=" decoding="async" data-src="http://pngimg.com/uploads/fly/fly_PNG3946.png" alt="fly" width="256" height="256" />
</button>
</li>
<li>
<button class="choose-insect-btn">
<p>Mosquito</p>
<img data-lazyloaded="1" src="data:image/svg+xml;base64,PHN2ZyB4bWxucz0iaHR0cDovL3d3dy53My5vcmcvMjAwMC9zdmciIHdpZHRoPSIyMDUyIiBoZWlnaHQ9IjE3MjQiIHZpZXdCb3g9IjAgMCAyMDUyIDE3MjQiPjxyZWN0IHdpZHRoPSIxMDAlIiBoZWlnaHQ9IjEwMCUiIHN0eWxlPSJmaWxsOiNjZmQ0ZGI7ZmlsbC1vcGFjaXR5OiAwLjE7Ii8+PC9zdmc+" decoding="async" data-src="http://pngimg.com/uploads/mosquito/mosquito_PNG18175.png" alt="mosquito" width="2052" height="1724" />
</button>
</li>
<li>
<button class="choose-insect-btn">
<p>Spider</p>
<img data-lazyloaded="1" src="data:image/svg+xml;base64,PHN2ZyB4bWxucz0iaHR0cDovL3d3dy53My5vcmcvMjAwMC9zdmciIHdpZHRoPSIzNjAiIGhlaWdodD0iMjc0IiB2aWV3Qm94PSIwIDAgMzYwIDI3NCI+PHJlY3Qgd2lkdGg9IjEwMCUiIGhlaWdodD0iMTAwJSIgc3R5bGU9ImZpbGw6I2NmZDRkYjtmaWxsLW9wYWNpdHk6IDAuMTsiLz48L3N2Zz4=" decoding="async" data-src="http://pngimg.com/uploads/spider/spider_PNG12.png" alt="spider" width="360" height="274" />
</button>
</li>
<li>
<button class="choose-insect-btn">
<p>Roach</p>
<img data-lazyloaded="1" src="data:image/svg+xml;base64,PHN2ZyB4bWxucz0iaHR0cDovL3d3dy53My5vcmcvMjAwMC9zdmciIHdpZHRoPSIzNTQiIGhlaWdodD0iMzUwIiB2aWV3Qm94PSIwIDAgMzU0IDM1MCI+PHJlY3Qgd2lkdGg9IjEwMCUiIGhlaWdodD0iMTAwJSIgc3R5bGU9ImZpbGw6I2NmZDRkYjtmaWxsLW9wYWNpdHk6IDAuMTsiLz48L3N2Zz4=" decoding="async" data-src="http://pngimg.com/uploads/roach/roach_PNG12163.png" alt="roach" width="354" height="350" />
</button>
</li>
</ul>
</div>
<div class="screen game-container" id="game-container">
<h3 id="time" class="time">Time: 00:00</h3>
<h3 id="score" class="score">Score: 0</h3>
<h5 id="message" class="message">
Are you annnoyed yet? <br />
You are playing an impossible game!!
</h5>
</div>
CSS (Style.css)
This is our CSS code which designs our insect catch game. This code makes our game visually appealing. CSS generally used to design the webpages. Nowadays many frameworks of CSS are available in market. Let’s breakdown our code.
- It starts with importing a google font Press Start 2P.
- Universal selector sets box-sizing as border-box to all elements.
- Body sets a background color, text color, font family and margin. It sets a height of 100vh with overflow hidden.
- Anchor tag applies the text color of white.
- H1 sets line height of 1.4 .
- Next, we styled the .btn class element. It sets border, background color, color, padding, font family and cursor as pointer. A hover and focus effect is added to this class.
- The .screen class centre its element horizontally and vertically using flexbox properties. A height of 100vh and width of 100vw set to this class and a transition as well.
- The .insect-list displays insect buttons in a flexible grid, wrapping the items and removing default list styles. A margin of 10px is set to each list.
- The .choose-insect-btn sets transparent background, border, white text color, font family, cursor as pointer and height width of 150px. A hover and active class effect are added to this class as well.
- Image of .choose-insect-btn class sets height width of 100px and object fit as contain.
- .game-container sets it position relative.
- .time and .score sets position absolute with top of 20px.
- Next the .message is styled. This sets the background color, line height, width, padding, z-index and text align properties. Opacity initially set as 0. Position set as absolute with top 0 and left 50%. A transform property applied as well to the .message class.
- The .visible sets the transform and sets opacity as 1.
- The .insect class centers the element horizontally and vertically using flexbox properties. It sets height width of 100px, position absolute, cursor pointer and some transition and transform property as well.
- Image in .insect class sets height and width of 100px.
This is what our CSS code is. You can check the code below.
					@import url("https://fonts.googleapis.com/css?family=Press+Start+2P&display=swap");

* {
  box-sizing: border-box;
}

body {
  background-color: #516dff;
  color: #fff;
  font-family: "Press Start 2P", sans-serif;
  height: 100vh;
  overflow: hidden;
  margin: 0;
  text-align: center;
}

a {
  color: #fff;
}

h1 {
  line-height: 1.4;
}

.btn {
  border: 0;
  background-color: #fff;
  color: #516dff;
  padding: 15px 20px;
  font-family: inherit;
  cursor: pointer;
}

.btn:hover {
  opacity: 0.9;
}

.btn:focus {
  outline: none;
}

.screen {
  display: flex;
  flex-direction: column;
  align-items: center;
  justify-content: center;
  height: 100vh;
  width: 100vw;
  transition: margin 0.5s ease-out;
}

.screen.up {
  margin-top: -100vh;
}

.insects-list {
  display: flex;
  flex-wrap: wrap;
  justify-content: center;
  list-style-type: none;
  padding: 0;
}

.insects-list li {
  margin: 10px;
}

.choose-insect-btn {
  background-color: transparent;
  border: 2px solid #fff;
  color: #fff;
  cursor: pointer;
  font-family: inherit;
  width: 150px;
  height: 150px;
}

.choose-insect-btn:hover {
  background-color: #fff;
  color: #516dff;
}

.choose-insect-btn:active {
  background-color: rgba(255, 255, 255, 0.7);
}

.choose-insect-btn img {
  width: 100px;
  height: 100px;
  object-fit: contain;
}

.game-container {
  position: relative;
}

.time,
.score {
  position: absolute;
  top: 20px;
}

.time {
  left: 20px;
}

.score {
  right: 20px;
}

.message {
  line-height: 1.7;
  background-color: rgba(0, 0, 0, 0.5);
  width: 100%;
  padding: 20px;
  z-index: 100;
  text-align: center;
  opacity: 0;
  position: absolute;
  top: 0;
  left: 50%;
  transform: translate(-50%, -150%);
}

.message.visible {
  transform: translate(-50%, 150%);
  opacity: 1;
}

.insect {
  display: flex;
  align-items: center;
  justify-content: center;
  width: 100px;
  height: 100px;
  position: absolute;
  transform: translate(-50%, -50%) scale(1);
  transition: transform 0.3s ease-in-out;
  cursor: pointer;
}

.insect img {
  width: 100px;
  height: 100px;
}

.insect.caught {
  transform: translate(-50%, -50%) scale(0);
}
Javascript (Script.js)
This is our JavaScript code which adds interactive functionality in our insect catch game. This code is main part of our game because without the JS code we can’t make our game functional. Let’s understand our JavaScript code.
- Initially we access all the necessary element from the HTML document using DOM and stored them in variable.
- Next, we create 3 new variables that are seconds, score, selectedInsect. Seconds variable tracks the time which initially set to 0. Score variable tracks the players score and selectedInsect stores the insect image.
- A event listener is added on startButton. When clicked, it’ll add the .up class to the first screen element.
- The increaseScore increases the score everytime when insect is caught. When the player’s score cross the 19, the .visible class actives and displays the message. It update the scoreElement with the new score.
- The addInsect function adds new insect after a set time interval.
- catchInsect function increase the score when insect is clicked. This adds .caught class to the insect. After a set time insect will remove. Lastly it calls addInsect function.
- The getRandomLocation function calculates browsers for positioning of insect. It returns x and y coordinates with random locations.
- createInsect function create a insect with random position and random rotation of image. Add an event listener to the insect and allow catchInsect function when clicked. Then it appends the insect to the gameContainer.
- The increaseTime function increase the time in seconds and convert it into minute:seconds . Then updates the timeElement to display the pass time.
- startGame function start a timer which updates the game time in every 1 second.
- Lastly, using forEach method we choose an insect. When insect button is clicked, it’ll choose the image src and alt text of the clicked image. Then it moves by adding the up class to the second screen. After 1 second of delay, the createInsect function will run and then startGame function will execute.
This is how our JavaScript code works.
const screens = document.querySelectorAll(".screen");
const chooseInsectButtons = document.querySelectorAll(".choose-insect-btn");
const startButton = document.getElementById("start-btn");
const gameContainer = document.getElementById("game-container");
const timeElement = document.getElementById("time");
const scoreElement = document.getElementById("score");
const message = document.getElementById("message");
let seconds = 0;
let score = 0;
let selectedInsect = {};
startButton.addEventListener("click", () => screens[0].classList.add("up"));
const increaseScore = () => {
score++;
if (score > 19) message.classList.add("visible");
scoreElement.innerHTML = `Score: ${score}`;
};
const addInsects = () => {
setTimeout(createInsect, 1000);
setTimeout(createInsect, 1500);
};
const catchInsect = function () {
increaseScore();
this.classList.add("caught");
setTimeout(() => this.remove, 2000);
addInsects();
};
const getRandomLocation = () => {
const width = window.innerWidth;
const height = window.innerHeight;
const x = Math.random() * (width - 200) + 100;
const y = Math.random() * (height - 200) + 100;
return { x, y };
};
const createInsect = () => {
const insect = document.createElement("div");
insect.classList.add("insect");
const { x, y } = getRandomLocation();
insect.style.top = `${y}px`;
insect.style.left = `${x}px`;
insect.innerHTML = `<img decoding="async" src="${selectedInsect.src}" alt="${selectedInsect.alt}" />`;
insect.addEventListener("click", catchInsect);
gameContainer.appendChild(insect);
};
const increaseTime = () => {
let m = Math.floor(seconds / 60);
let s = seconds % 60;
m = m < 10 ? `0${m}` : m;
s = s setInterval(increaseTime, 1000);
chooseInsectButtons.forEach((button) => {
button.addEventListener("click", () => {
const image = button.querySelector("img");
const src = image.getAttribute("src");
const alt = image.getAttribute("alt");
selectedInsect = { src, alt };
screens[1].classList.add("up");
setTimeout(createInsect, 1000);
startGame();
});
});
Output:
Disclaimer: The code provided in this post is sourced from GitHub and is distributed under the MIT License. All credits for the original code go to the respective owner. We have shared this code for educational purposes only. Please refer to the original repository for detailed information and any additional usage rights or restrictions.
Top 5 Data Science Courses to Build a Strong Career in 2026 Data science is no longer limited to tech companies. Banks …
Free Things You Get With Your College ID 🎓 Free / Discounted Platforms with College ID Platform What You Get (Student Benefits) …
25 Best Free Great Learning Courses for CSE Students (With Certificates) – Start Learning Today! If you’re a CSE student, engineering fresher, …

Why Target Test Prep Is the Best GMAT/GRE Prep Platform in 2025? Preparing for the GMAT or GRE has changed drastically in …
Get Huge Discounts

More Python Projects
