
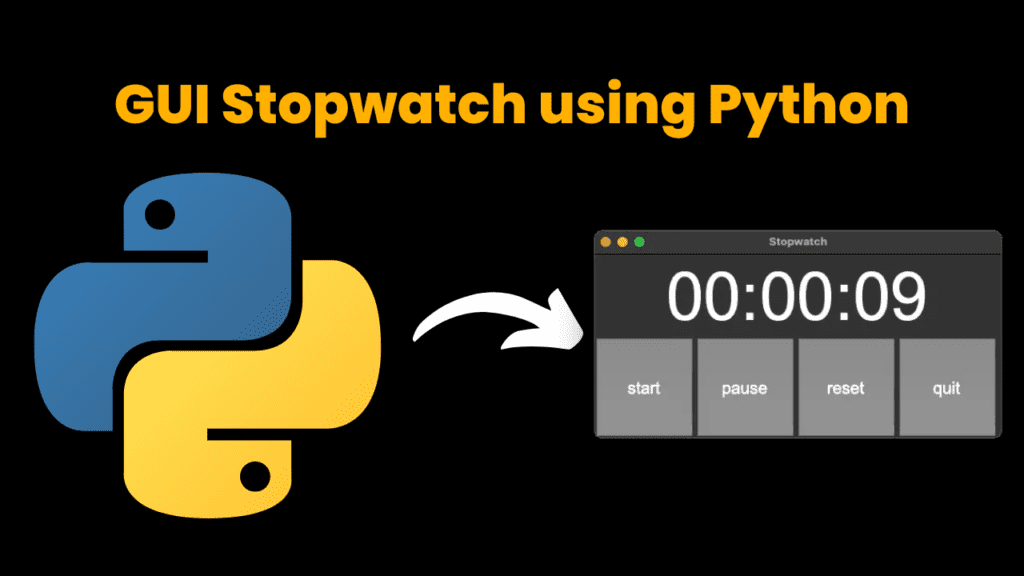
GUI Stopwatch using Python with Source Code
Introduction:
We will build the GUI(graphical user interface) Stopwatch application using
python with Tkinter. Tkinter is a python GUI package. Tkinter is the fast and
easiest way to create GUI applications. We will create start, pause, stop and quit buttons to control our application.
Project Requirements:
- For writing code, there must be a text editor on your pc (any text editor).
- There must be a python installed in your system
That’s it you’re ready to go.
Let’s Start:
Steps:
- Create a new file with any name you like.
- Open that file with a text editor of your choice. We are using vs code.
- Now create a folder with stopwatch.py (you can use any name you like just add .py at the end)
- Now programming and programming logic begins (Final Code)
Source Code:
Get Discount on Top Educational Courses
# ***** IMPORTS *****
import tkinter as tk
# ***** VARIABLES *****
# use a boolean variable to help control state of time (running or not running)
running = False
# time variables initially set to 0
hours, minutes, seconds = 0, 0, 0
# ***** NOTES ON GLOBAL *****
# global will be used to modify variables outside functions
# another option would be to use a class and subclass Frame
# ***** FUNCTIONS *****
# start, pause, and reset functions will be called when the buttons are clicked
# start function
def start():
global running
if not running:
update()
running = True
# pause function
def pause():
global running
if running:
# cancel updating of time using after_cancel()
stopwatch_label.after_cancel(update_time)
running = False
# reset function
def reset():
global running
if running:
# cancel updating of time using after_cancel()
stopwatch_label.after_cancel(update_time)
running = False
# set variables back to zero
global hours, minutes, seconds
hours, minutes, seconds = 0, 0, 0
# set label back to zero
stopwatch_label.config(text='00:00:00')
# update stopwatch function
def update():
# update seconds with (addition) compound assignment operator
global hours, minutes, seconds
seconds += 1
if seconds == 60:
minutes += 1
seconds = 0
if minutes == 60:
hours += 1
minutes = 0
# format time to include leading zeros
hours_string = f'{hours}' if hours > 9 else f'0{hours}'
minutes_string = f'{minutes}' if minutes > 9 else f'0{minutes}'
seconds_string = f'{seconds}' if seconds > 9 else f'0{seconds}'
# update timer label after 1000 ms (1 second)
stopwatch_label.config(text=hours_string + ':' + minutes_string + ':' + seconds_string)
# after each second (1000 milliseconds), call update function
# use update_time variable to cancel or pause the time using after_cancel
global update_time
update_time = stopwatch_label.after(1000, update)
# ***** WIDGETS *****
# create main window
root = tk.Tk()
root.geometry('485x220')
root.title('Stopwatch')
# label to display time
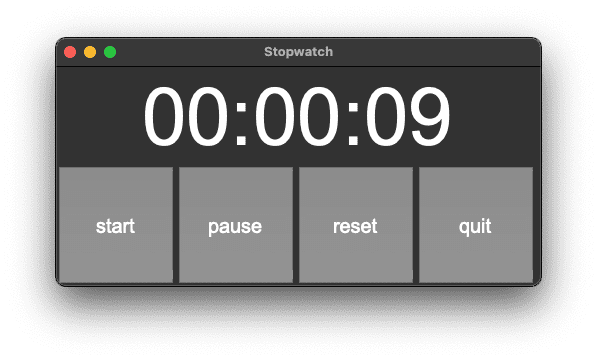
stopwatch_label = tk.Label(text='00:00:00', font=('Arial', 80))
stopwatch_label.pack()
# start, pause, reset, quit buttons
start_button = tk.Button(text='start', height=5, width=7, font=('Arial', 20), command=start)
start_button.pack(side=tk.LEFT)
pause_button = tk.Button(text='pause', height=5, width=7, font=('Arial', 20), command=pause)
pause_button.pack(side=tk.LEFT)
reset_button = tk.Button(text='reset', height=5, width=7, font=('Arial', 20), command=reset)
reset_button.pack(side=tk.LEFT)
quit_button = tk.Button(text='quit', height=5, width=7, font=('Arial', 20), command=root.quit)
quit_button.pack(side=tk.LEFT)
# ***** MAINLOOP *****
# run app
root.mainloop()
Explanation:
- First, we import all the important libraries and modules
Then we created the main window using Tkinter and we use geometry to size the window then we gave it a title. - To create a label for the time we use tk.label there we put our time in the font type and font size then we use the pack to pack it into the window.
- Then we created the start, pause, reset and quit buttons. To create the button we use tk.button then we put in the text the height the width
the font type and font size. - To make our button work we created the start, pause, reset and quit functions.
- Then there for command, we assign the function that will be called when
we click the button and for each button, we use a pack to pack into the window - And to run the app we use root.mainloop(). That’s it you’re stopwatch is ready. Keep visiting codewithcurious.com for more such projects.
Output :
More Projects:

URL Shortener Using Python Django
URL Shortener Using Python Django Introduction: Long URLs can be shortened into short, shareable links with the help of the URL Shortener project. Though it

User Authentication System Using Python Django
User Authentication System Using Python Django Introduction: The implementation of safe and adaptable user authentication in Django is the main goal of this project. It

E-Learning System Using JAVA
The E-Learning System using Java with a Graphical User Interface (GUI) Introduction The E-Learning System is developed using Java (with a Graphical User interface through

Weather App Using Python Django with Source Code
Weather App Using Python Django Introduction: When a user enters the name of a city, the Weather App retrieves current weather information. It provides temperature,

Quiz App Using Python Django with complete source code
Quiz App Using Python Django Introduction: Users can take quizzes in a variety of subjects, see their results, and monitor their progress with the Django
Resume Screener in python using GUI
resume screener in python using python introduction The hiring process often begins with reviewing numerous resumes to filter out the most suitable candidates for a
Get Huge Discounts

More Python Projects
