
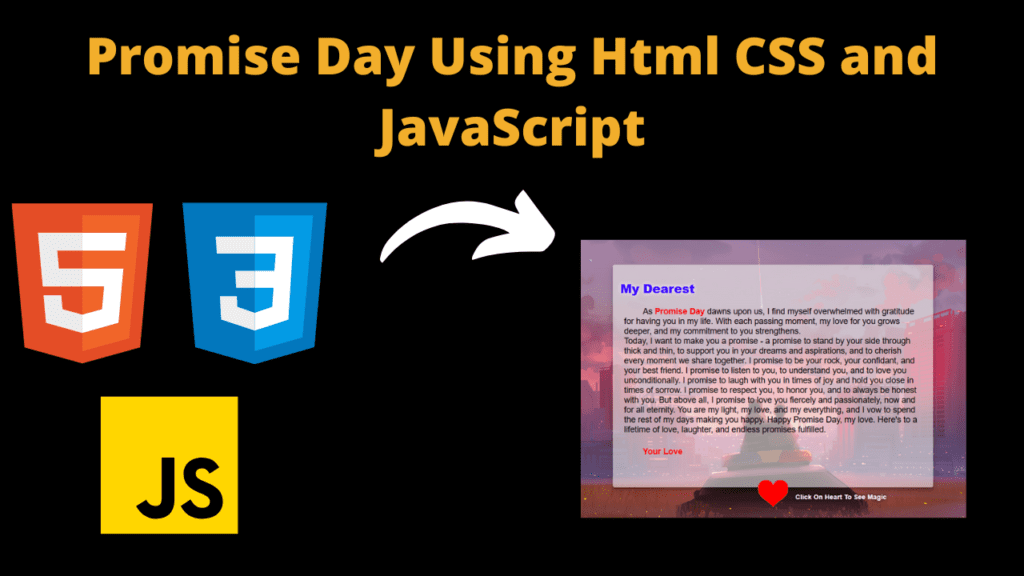
promise day using html CSS and JavaScript
Introduction
Hello all my developers friends my name is Gautam and everyone is welcome to today’s beautiful blog post today we have created a beautiful project for you, you know that the whole month of February is known for lovers in which many different days come, that’s why today we have created a beautiful project for you which you can send to any of your favourite people this project is above promise day in which we have created it with the help of html css and javascript this project is very beautiful which you can use but before using it First of all it is very important for you to understand its code, so let us now understand our code step by step that how we have created this project.
HTML (index.html)
Get Discount on Top Educational Courses
Friends, in step one, HTML plays a major role first. With the help of HTML, we have first created the structure of this project. Using HTML is a very simple task. So, let us now understand the HTML code.
- Friends, we have used animation in our promise day project and to create the animation we have used jquery whose link is like this <script src=”https://code.jquery.com/jquery-3.6.0.min.js”></script>
- To link the CSS file to HTML we have used the HTML link element <link rel=”includesstyles” ref=”style.cs”>
- This is an important part of HTML code in which we write HTML code <body></body>
- This is an important container to create our project which we have created <div class=”container”>
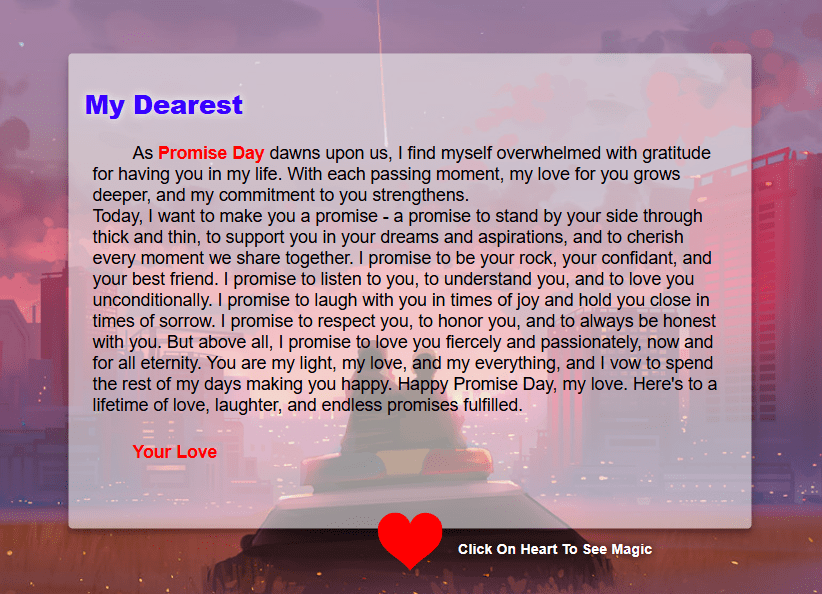
- When we open the project, we see an image of a heart for which we have created a <label>
- In the label we have created a heart box <div class=”heart”> In this we have added an image <img></img> and also created a message check box <input id=”messageState” type=”checkbox” style=”display:none”/>
- As soon as the user clicks on the heart, a message will be shown to him. To create this, we have created a message box <div class=”message”>
- In the message we have added h1 heading <h1>My Dearest</h1> and to add the message we have used <p> element
Friends, we have used very little HTML code because we have created a project which is simple and easy. In this project, when the user opens it, he will be shown a heart, on clicking which an animated message will be displayed.
<title>developergtm</title>


<div class="container">
  <label>
    <div class="heart">
      <img data-lazyloaded="1" src="data:image/gif;base64,R0lGODdhAQABAPAAAMPDwwAAACwAAAAAAQABAAACAkQBADs=" decoding="async" data-src="https://upload.wikimedia.org/wikipedia/commons/4/42/Love_Heart_SVG.svg"></img>
    </div>

  </label>
  <div class="message">
    <h1>My Dearest</h1>
    <p>As <span class="main">Promise Day</span> dawns upon us,
        I find myself overwhelmed with gratitude for having you in my life.
         With each passing moment, my love for you grows deeper, and my commitment to you strengthens.
         <br>Today, I want to make you a promise - a promise to stand by your side through thick and thin,
         to support you in your dreams and aspirations, and to cherish every moment we share together.

        I promise to be your rock, your confidant, and your best friend. I promise to listen to you,
        to understand you, and to love you unconditionally. I promise to laugh with you in times of joy
         and hold you close in times of sorrow. I promise to respect you, to honor you, and to always be
          honest with you.

        But above all, I promise to love you fiercely and passionately, now and for all eternity.
        You are my light, my love, and my everything, and I vow to spend the rest of my days making you happy.

        Happy Promise Day, my love. Here's to a lifetime of love, laughter, and endless promises fulfilled.</p>

       <p><span class="main"> Your Love</span>
       </p>
  </div>
  <p class="back">Click On Heart To See Magic</p>
</div>
CSS (Style.css)
Now we are going to understand the CSS code, which is a bit important because with its help we have made our project look good, so let’s go now let’s understand our code.
- In the code of Kass we have first set the font which is this font font-family: “Hind”, sans-only;
- In h1 heading we have used this color color: rgb(55, 0, 255); and the font weight is bold font-weight: 800; and in the text we have used shadow text-shadow: 0 0 10px white;
- We have used an image in the background of the body background: url(url); whose size we have covered and background-repeat: no-repeat; so that it does not repeat
- We have set the position of the container as position: relative; or the width is 100% and the height is 100vh and the overflow is hidden overflow: hidden;
- In heart we have kept position: absolute; From left we have kept left: 50%; And heart from top we have kept top: 40%; And we have centered the text text-align: center;
- We have kept the font size of the paragraph as font-size: 22ps;
- In message box we have used padding padding: 20ps; In background we have used this color background-color: #iii95;
- message box min-width: 400px; position: absolute; and the content is hidden overflow: hidden; and to make it look good we have used shadow in it box-shadow: 0 10px 20px rgba(0, 0, 0, 0.19), 0 6px 6px rgba(0, 0, 0, 0.23);
- We have used radius in the message box border-radius: 5px; We have used animation in it whose time we have set animation-duration: 2s;
- Then we have created the animation with the help of @kefarme of Kass, in this we have set the animation from 0% to 100%
Friends, I have created an animation of open message in which on clicking the heart, the message animation will be displayed and then the heart will be animated which looks very good, you can check the rest in the code.
					h1,
p {
  font-family: "Hind", sans-serif;
}

p {
  text-indent: 50px;
  padding: 5px;
  padding-left: 10px;
  padding-right: 10px;
}

h1 {
  font-weight: 800;
  color: rgb(55, 0, 255);
  text-shadow: 0 0 10px white;
}

body {
  margin: 0px;
  background: url(https://i.postimg.cc/5tgNs0n9/couple-sunset-city-scenery-art-uhdpaper-com-4-K-8-264.jpg);
  background-size: cover;
  background-repeat: no-repeat;
}

.container {
  position: relative;
  width: 100%;
  height: 100vh;
  overflow: hidden;
}

.heart {
  position: absolute;
  left: 50%;
  top: 40%;
  text-align: center;
  transform: translate(-50%, -50%);
  transiton: transform 2s;
  z-index: 1;
}

.heart > img {
  width: 80px;
  height: auto;
}

p {
  font-size: 22px;
}
.message {
  padding: 20px;
  background-color: #eeeeee95;
  min-width: 400px;
  height: 70%;
  position: absolute;
  left: 50%;
  top: 50%;
  transform: translate(-50%, -50%);
  z-index: 0;
  overflow: hidden;
  animation-name: openmsg;
  animation-duration: 2s;
  animation-timing-function: linear;
  animation-play-state: paused;
  animation-fill-mode: forwards;
  box-shadow: 0 10px 20px rgba(0, 0, 0, 0.19), 0 6px 6px rgba(0, 0, 0, 0.23);
  border-radius: 5px;
}

.heart > img:hover {
  animation-name: beat;
  animation-duration: 2s;
  animation-timing-function: ease-in-out;
  animation-iteration-count: infinite;
  animation-play-state: running;
}

#messageState {
}

@keyframes beat {
  0% {
    width: 80px;
  }
  25% {
    width: 88px;
  }
  30% {
    width: 80px;
  }
  50% {
    width: 70px;
  }
  60% {
    width: 80px;
  }
  75% {
    width: 88px;
  }
  100% {
    width: 80px;
  }
}

@keyframes openmsg {
  0% {
    height: 0px;
    padding: 0px 20px;
  }
  100% {
    height: 75%;
    padding: 20px 20px;
  }
}

@keyframes heartMove {
  0% {
    top: 50%;
  }
  100% {
    top: 85%;
    transform: translate(-50%, 0);
  }
}

.openNor {
  animation-direction: normal;
  animation-play-state: running;
}

.closeNor {
  animation-direction: reverse;
  animation-play-state: running;
}

.no-anim {
  animation: none;
}

.closed {
  height: 0px;
  padding: 0px 20px;
}

.bottom {
  bottom: 5px;
}

.openHer {
  animation-name: heartMove;
  animation-duration: 2s;
  animation-timing-function: linear;
  animation-play-state: running;
  animation-fill-mode: forwards;
}

.closeHer {
  animation-name: heartMove;
  animation-duration: 2s;
  animation-timing-function: linear;
  animation-play-state: running;
  animation-direction: reverse;
  animation-fill-mode: forwards;
}

.beating > img {
  animation-name: beat;
  animation-duration: 2s;
  animation-timing-function: ease-in-out;
  animation-iteration-count: infinite;
  animation-play-state: running;
}

.openedHer {
  top: 85%;
  transform: translate(-50%, 0);
}

.main {
  color: red;
  font-weight: 700;
}
@media (max-width: 480px) {
  p {
    font-size: 17px;
  }
  h1 {
    padding-left: 10px;
  }
}
@media (max-width: 580px) {
  p {
    font-size: 17px;
  }
}
.back {
  position: absolute;
  bottom: 5%;
  left: 50%;
  font-size: 18px;
  font-weight: 700;
  color: white;
  text-shadow: 0 0 10px rgb(0, 0, 0);
}
Javascript (Script.js)
Friends, now we have created our project with the help of HTML and CSS, but when a user comes to our project, he will not see any animation or message there because we have not added the Javascript code to it. It is very important for you to add the Javascript code. We have created a heart in the project, on clicking which, a message is displayed animatedly and we can also close it again and we have done all this work with the help of Javascript, without Javascript you cannot create it and you will find all this code below.
$(“#messageState”).on(“change”, (x) => {
$(“.message”).removeClass(“openNor”).removeClass(“closeNor”);
if ($(“#messageState”).is(“:checked”)) {
					$("#messageState").on("change", (x) => {
    $(".message").removeClass("openNor").removeClass("closeNor");
    if ($("#messageState").is(":checked")) {
      $(".message")
        .removeClass("closed")
        .removeClass("no-anim")
        .addClass("openNor");
      $(".heart")
        .removeClass("closeHer")
        .removeClass("openedHer")
        .addClass("openHer");
      $(".container").stop().animate({ backgroundColor: "#f48fb1" }, 2000);
      console.log("Abrindo");
    } else {
      $(".message").removeClass("no-anim").addClass("closeNor");
      $(".heart")
        .removeClass("openHer")
        .removeClass("openedHer")
        .addClass("closeHer");
      $(".container").stop().animate({ backgroundColor: "#fce4ec" }, 2000);
      console.log("fechando");
    }
  });

  $(".message").on(
    "webkitAnimationEnd oanimationend msAnimationEnd animationend",
    function (e) {
      console.log("Animation End");
      if ($(".message").hasClass("closeNor")) $(".message").addClass("closed");
      $(".message")
        .removeClass("openNor")
        .removeClass("closeNor")
        .addClass("no-anim");
    }
  );

  $(".heart").on(
    "webkitAnimationEnd oanimationend msAnimationEnd animationend",
    function (e) {
      console.log("Animation End");
      if (!$(".heart").hasClass("closeHer"))
        $(".heart").addClass("openedHer").addClass("beating");
      else $(".heart").addClass("no-anim").removeClass("beating");
      $(".heart").removeClass("openHer").removeClass("closeHer");
    }
  );
Output:
Source Code:- Untold coding
Disclaimer: The code provided in this post is sourced from GitHub and is distributed under the MIT License. All credits for the original code go to the respective owner. We have shared this code for educational purposes only. Please refer to the original repository for detailed information and any additional usage rights or restrictions.
Top 5 Data Science Courses to Build a Strong Career in 2026 Data science is no longer limited to tech companies. Banks …
Free Things You Get With Your College ID 🎓 Free / Discounted Platforms with College ID Platform What You Get (Student Benefits) …
25 Best Free Great Learning Courses for CSE Students (With Certificates) – Start Learning Today! If you’re a CSE student, engineering fresher, …

Why Target Test Prep Is the Best GMAT/GRE Prep Platform in 2025? Preparing for the GMAT or GRE has changed drastically in …
Get Huge Discounts

More Python Projects
