
Jarvis Chatbot Using HTML CSS & javaScript
Introduction
Hello friends, hope you all are doing well today we have created a very amazing project for you which is a live AI chatbot which you can also call a digital robot. Its specialty is that this robot can answer any question you ask it. And whatever work you do by typing on a computer or laptop, you can do that work instantly and just by speaking. But to create this you need to have knowledge of JavaScript because if you do not know how to write the JavaScript code then your chatbot will not do any work without HTML or CSS. This digital robot works only after using JavaScript a lot. We have named it Jarvis in which you can call it Jarvis like if you say to it Jarvis open YouTube then it will open YouTube instantly in few seconds without typing anything. Actually, this robot is made with very advanced technology but some such things have not been added in it which every user needs. We have not made it like chat but it is not less than chat. In chat you have to type but in it you can work by speaking.
Friends, its code It is very important for you to understand, so if you want to continue with us step by step, then let’s start with the HTML code.
HTML (index.html)
Get Discount on Top Educational Courses
Friends, first of all we will have to create the structure of our chatbot with the help of HTML, for which we will have to take the help of HTML, so let’s first understand the code of HTML.
- The first thing that comes first in DOCTYPE is HTML, which means that this code is from HTML <!DOCTYPE HTML>
- This is the tag in our HTML code in which we add the link of CSS file or any other important link <head></head>
- We have added the title like this <title>JARVIS – Virtual Assistant</title> and friends you can keep any title
- We have also added an icon to our AI robot which is visible to you in front of the title <link rel=”shortcut icon” href=”avatar.png” type=”image/x-icon”>
- It is necessary to link the css file with the hml file which you can do like this <link rel=”styles.cs” ref=”style.cs”>
- This is an important tag in the HTML code within which we are going to write the code of our chatbot <body></body>
- To create a chatbot, we first create a section <section class=”main”>
- To give our chatbot a good look, we have also added an image of a robot to it, for which we have created an image container <div class=”image-container”>
- We have also created an image box in the image container <div class=”image”> We have used this element to add the image in it <img src=”iron_man.gif” alt=”image”>
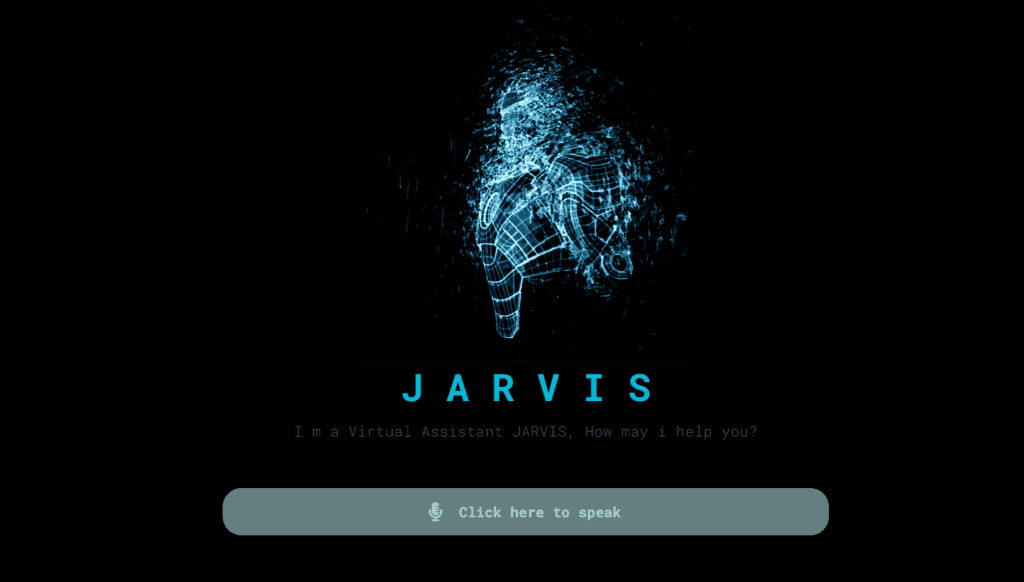
- We have also added a text in our chatbot with h1 heading <h1>J A R V I S</h1> which works as a title in a similar way
- We have used <p> element to add paragraph in the chatbot
- We have created an input section in which we have created two buttons <div class=”input”>
- In the input section, first of all we have created a microphone button in which we have added an icon <button class=”talk”><i class=”fas fa-microphone-alt”></i></button> and secondly we have added text <h1 class=”content”> Click here to speak</h1>
- It is very important to link the javascript file to the html which you can do like this <script src=”app.js”></script>
  <title>JARVIS - Virtual Assistant</title>


  <section class="main">
    <div class="image-container">
        <div class="image">
            <img data-lazyloaded="1" src="data:image/gif;base64,R0lGODdhAQABAPAAAMPDwwAAACwAAAAAAQABAAACAkQBADs=" decoding="async" data-src="iron_man.gif" alt="image">
        </div>
        <h1>J A R V I S</h1>
        <p>I m a Virtual Assistant JARVIS, How may i help you?</p>
    </div>
    <div class="input">
        <button class="talk"><i class="fas fa-microphone-alt"></i></button>
        <h1 class="content"> Click here to speak</h1>
    </div>
</section>
CSS (Style.css)
All of us are going to explain the CSS code with the help of which we have designed our chatbot, like font size, background color, button color etc. so go ahead, now we will understand the CSS code.
- First we apply box-sizing: border-box; to the body so that width, height and border are set correctly
- We have used this font in our chatbot, you can also use any other font font-family: “Roboto Mono”, monospace;
- We have created an important section for chatbot in HTML where we have kept man-height: 100px;
- We have kept position: relative; in the main section and used black color in the background background: #000; To center the item and content, we have flexed the display and centered the item align-items: center; justify-content: center;
- We have also added image to give good look to our chatbot robot, in which we have used padding in image container padding: 10ps;
- The width of the image is something like this width: 100%; and to center it we have used display: flex; and we have centered the align items align-items: center; and along with it we have centered the content as well justify-content: center;
- We have kept the width of the chatbot image width: 350ps; and we have centered it align-items: center;
- In the h1 heading of the image container we have used this color color: #00bk4; and we have centered it like this text-align: center;
- In the paragraph of image container we have added this color color: #324042; and in this also we have centered the text text-align: center; and have added margin from the bottom margin-bottom: 40px;
- In input section we have flexed the display display: flex; and centered the item or content justify-content: center; align-items: center; In background we have used this color background: rgb(202 253 255 / 50%);
- In the input section we have created a talk button in which the background is kept transparent background: transparent; and outline or border is made none outline: none; border: none;
- In the talk button we have added font size like this font-size: 20ps; and color is kept as color: #red0red0;
					@import url("https://fonts.googleapis.com/css2?family=Roboto+Mono:wght@100;200;300;400;500;600;700&display=swap");
* {
    margin: 0;
    padding: 0;
    box-sizing: border-box;
    font-family: "Roboto Mono", monospace;
}

.main {
  min-height: 100vh;
  position: relative;
  width: 100%;
  background: #000;
  display: flex;
  flex-direction: column;
  align-items: center;
  justify-content: center;
}

.main .image-container {
  padding: 10px;
}

.main .image-container .image {
  width: 100%;
  display: flex;
  align-items: center;
  justify-content: center;
}

.main .image-container .image img {
  width: 350px;
  align-items: center;
}

.main .image-container h1 {
  color: #00bcd4;
  text-align: center;
  margin-bottom: 10px;
  font-size: 40px;
}

.main .image-container p {
  color: #324042;
  text-align: center;
  margin-bottom: 40px;
}

.main .input {
  display: flex;
  justify-content: center;
  align-items: center;
  width: 40vw;
  height: 50px;
  border-radius: 20px;
  background: rgb(202 253 255 / 50%);
}

.main .input .talk {
  background: transparent;
  outline: none;
  border: none;
  width: 50px;
  height: 50px;
  display: flex;
  justify-content: center;
  align-items: center;
  font-size: 15px;
  cursor: pointer;
}

.main .input .talk i {
  font-size: 20px;
  color: #aed0d0;
}

.main .input .content {
  color: #aed0d0;
  font-size: 15px;
  margin-right: 20px;
}
Javascript (Script.js)
Now we have completed our structure and designing part with the help of HTML and CSS but our chatbit is not ready yet because now we will have to take help of the JavaScript code but before that you will have to understand the JavaScript code so let’s go bab we will understand the JavaScript code.
- First we have added the talk button with the help of JavaScript const btn = document.querySelector(‘.talk’);
- Then we have added the content button but you need to add the ID name correctly. const content = document.querySelector(‘.content’);
- With the help of javascript, when a user asks a question to the chatbot in the form of voice, then that voice goes to the chatbot, for this we have created a function function speak(text) {
- Then we set the user’s speak rate, voice, and pitch text_rate = 1;
- We have also set the time date and hours in the chatbot according to which when we use the chatbot, the chatbot should say good morning or something else to us according to the time function wishMe() { We have created its function with the name wishMe
- Like we have added some messages speak(“Good Morning Boss…”); and in this we have set the date time so that it will speak the message to us according to your time
- Then we have created an eventlistener in which when user speaks his voice message then it starts loading addEventListener(‘load’, () => {
Friends, this is the way we have written our javascript code which is quite easy but it can be quite difficult for those who are learning coding, so you don’t need to worry, if you keep practicing properly then you will understand its code, rest you can see other codes below to see in which way we have used it
					const btn = document.querySelector('.talk');
const content = document.querySelector('.content');

function speak(text) {
  const text_speak = new SpeechSynthesisUtterance(text);

  text_speak.rate = 1;
  text_speak.volume = 1;
  text_speak.pitch = 1;

  window.speechSynthesis.speak(text_speak);
}

function wishMe() {
  var day = new Date();
  var hour = day.getHours();

  if (hour >= 0 && hour = 12 && hour  {
  speak("Initializing JARVIS...");
  wishMe();
});

const SpeechRecognition = window.SpeechRecognition || window.webkitSpeechRecognition;
const recognition = new SpeechRecognition();

recognition.onresult = (event) => {
    const currentIndex = event.resultIndex;
    const transcript = event.results[currentIndex][0].transcript;
    content.textContent = transcript;
    takeCommand(transcript.toLowerCase());
};

btn.addEventListener('click', () => {
    content.textContent = "Listening...";
    recognition.start();
});

function takeCommand(message) {
    if (message.includes('hey') || message.includes('hello')) {
        speak("Hello Sir, How May I Help You?");
    } else if (message.includes("open google")) {
        window.open("https://google.com", "_blank");
        speak("Opening Google...");
    } else if (message.includes("open youtube")) {
        window.open("https://youtube.com", "_blank");
        speak("Opening Youtube...");
    } else if (message.includes("open facebook")) {
        window.open("https://facebook.com", "_blank");
        speak("Opening Facebook...");
    } else if (message.includes('what is') || message.includes('who is') || message.includes('what are')) {
        window.open(`https://www.google.com/search?q=${message.replace(" ", "+")}`, "_blank");
        const finalText = "This is what I found on the internet regarding " + message;
        speak(finalText);
    } else if (message.includes('wikipedia')) {
        window.open(`https://en.wikipedia.org/wiki/${message.replace("wikipedia", "").trim()}`, "_blank");
        const finalText = "This is what I found on Wikipedia regarding " + message;
        speak(finalText);
    } else if (message.includes('time')) {
        const time = new Date().toLocaleString(undefined, { hour: "numeric", minute: "numeric" });
        const finalText = "The current time is " + time;
        speak(finalText);
    } else if (message.includes('date')) {
        const date = new Date().toLocaleString(undefined, { month: "short", day: "numeric" });
        const finalText = "Today's date is " + date;
        speak(finalText);
    } else if (message.includes('calculator')) {
        window.open('Calculator:///');
        const finalText = "Opening Calculator";
        speak(finalText);
    } else {
        window.open(`https://www.google.com/search?q=${message.replace(" ", "+")}`, "_blank");
        const finalText = "I found some information for " + message + " on Google";
        speak(finalText);
    }
}
Output:
Disclaimer: The code provided in this post is sourced from GitHub and is distributed under the MIT License. All credits for the original code go to the respective owner. We have shared this code for educational purposes only. Please refer to the original repository for detailed information and any additional usage rights or restrictions.
Top 5 Data Science Courses to Build a Strong Career in 2026Data science is no longer limited to tech companies. Banks use …
Free Things You Get With Your College ID 🎓 Free / Discounted Platforms with College ID Platform What You Get (Student Benefits) …
25 Best Free Great Learning Courses for CSE Students (With Certificates) – Start Learning Today! If you’re a CSE student, engineering fresher, …

Why Target Test Prep Is the Best GMAT/GRE Prep Platform in 2025? Preparing for the GMAT or GRE has changed drastically in …
Get Huge Discounts

More Python Projects
