
Memory Card Game Using HTML CSS And JavaScript
Introduction
Hello coders, welcome to another new blog. Today in this article we’ll learn that how to create a Memory Card game. A memory card game is a simple game in which we’ve to find out the two same card on the board and match them. This is an interesting game which improves the recognise power as well.
To create our Memory card Game, we’ve used HTML CSS and JavaScript. These three are the basic frontend technologies. Using HTML we’ve set the basic structure of our game. The CSS styles and designs our memory card game. lastly the JavaScript enters, it adds functionality to our game which makes our game ready to play.
If you guys also want to create this type of game all you need is the knowledge and skills in HTML CSS and JavaScript. If you’ve goof amount of knowledge and skills in these technologies then you can also build this type of game easily. These projects enhance our coding skills and make our basics strong. Let’s understand the code.
HTML (index.html)
Get Discount on Top Educational Courses
This is our HTML code for the memory card game. This code sets up the basic structure for our memory card game. It adds basic elements for the game which we’ll design later in CSS and JavaScript. Let’s breakdown our code.
- <!DOCTYPE html> : This defines the type of our document and ensures that our file a HTML code file.
- <title> : It sets the title of our webpage as Memory Card Game.
- <link> : This tag links external CSS file to our code.
- <body> : This contains the content of the page.
- <div class=”wrapper”> : This div with the class wrapper works as a main container for the game as it contains all the game data.
- <ul class=”cards”> : This ul tag contains all the cards for our game. This part contains each card of the game within it.
- <li class=”card”> : This list tag contains 2 div tags within its.
- <div class=”front-view”> : This div contains the front view image for our memory card game which will display a question mark image as front view.
- <div class=”back-view”> : This contains the back view image for our game which contains a specific image which will displays an icon’s image. We’ll get this on the click of any particular image.
- Each list tag contains these two images part.
- <script> : This tag links external JavaScript file to our code.
					<!doctype html>


  <title>Memory Card Game</title>


  <div class="wrapper">
   <ul class="cards">
    <li class="card">
     <div class="view front-view">
      <img data-lazyloaded="1" src="data:image/gif;base64,R0lGODdhAQABAPAAAMPDwwAAACwAAAAAAQABAAACAkQBADs=" decoding="async" data-src="images/que_icon.svg" alt="icon">
     </div>
     <div class="view back-view">
      <img data-lazyloaded="1" src="data:image/gif;base64,R0lGODdhAQABAPAAAMPDwwAAACwAAAAAAQABAAACAkQBADs=" decoding="async" data-src="images/img-1.png" alt="card-img">
     </div> </li>
    <li class="card">
     <div class="view front-view">
      <img data-lazyloaded="1" src="data:image/gif;base64,R0lGODdhAQABAPAAAMPDwwAAACwAAAAAAQABAAACAkQBADs=" decoding="async" data-src="images/que_icon.svg" alt="icon">
     </div>
     <div class="view back-view">
      <img data-lazyloaded="1" src="data:image/gif;base64,R0lGODdhAQABAPAAAMPDwwAAACwAAAAAAQABAAACAkQBADs=" decoding="async" data-src="images/img-6.png" alt="card-img">
     </div> </li>
    <li class="card">
     <div class="view front-view">
      <img data-lazyloaded="1" src="data:image/gif;base64,R0lGODdhAQABAPAAAMPDwwAAACwAAAAAAQABAAACAkQBADs=" decoding="async" data-src="images/que_icon.svg" alt="icon">
     </div>
     <div class="view back-view">
      <img data-lazyloaded="1" src="data:image/gif;base64,R0lGODdhAQABAPAAAMPDwwAAACwAAAAAAQABAAACAkQBADs=" decoding="async" data-src="images/img-3.png" alt="card-img">
     </div> </li>
    <li class="card">
     <div class="view front-view">
      <img data-lazyloaded="1" src="data:image/gif;base64,R0lGODdhAQABAPAAAMPDwwAAACwAAAAAAQABAAACAkQBADs=" decoding="async" data-src="images/que_icon.svg" alt="icon">
     </div>
     <div class="view back-view">
      <img data-lazyloaded="1" src="data:image/gif;base64,R0lGODdhAQABAPAAAMPDwwAAACwAAAAAAQABAAACAkQBADs=" decoding="async" data-src="images/img-2.png" alt="card-img">
     </div> </li>
    <li class="card">
     <div class="view front-view">
      <img data-lazyloaded="1" src="data:image/gif;base64,R0lGODdhAQABAPAAAMPDwwAAACwAAAAAAQABAAACAkQBADs=" decoding="async" data-src="images/que_icon.svg" alt="icon">
     </div>
     <div class="view back-view">
      <img data-lazyloaded="1" src="data:image/gif;base64,R0lGODdhAQABAPAAAMPDwwAAACwAAAAAAQABAAACAkQBADs=" decoding="async" data-src="images/img-1.png" alt="card-img">
     </div> </li>
    <li class="card">
     <div class="view front-view">
      <img data-lazyloaded="1" src="data:image/gif;base64,R0lGODdhAQABAPAAAMPDwwAAACwAAAAAAQABAAACAkQBADs=" decoding="async" data-src="images/que_icon.svg" alt="icon">
     </div>
     <div class="view back-view">
      <img data-lazyloaded="1" src="data:image/gif;base64,R0lGODdhAQABAPAAAMPDwwAAACwAAAAAAQABAAACAkQBADs=" decoding="async" data-src="images/img-5.png" alt="card-img">
     </div> </li>
    <li class="card">
     <div class="view front-view">
      <img data-lazyloaded="1" src="data:image/gif;base64,R0lGODdhAQABAPAAAMPDwwAAACwAAAAAAQABAAACAkQBADs=" decoding="async" data-src="images/que_icon.svg" alt="icon">
     </div>
     <div class="view back-view">
      <img data-lazyloaded="1" src="data:image/gif;base64,R0lGODdhAQABAPAAAMPDwwAAACwAAAAAAQABAAACAkQBADs=" decoding="async" data-src="images/img-2.png" alt="card-img">
     </div> </li>
    <li class="card">
     <div class="view front-view">
      <img data-lazyloaded="1" src="data:image/gif;base64,R0lGODdhAQABAPAAAMPDwwAAACwAAAAAAQABAAACAkQBADs=" decoding="async" data-src="images/que_icon.svg" alt="icon">
     </div>
     <div class="view back-view">
      <img data-lazyloaded="1" src="data:image/gif;base64,R0lGODdhAQABAPAAAMPDwwAAACwAAAAAAQABAAACAkQBADs=" decoding="async" data-src="images/img-6.png" alt="card-img">
     </div> </li>
    <li class="card">
     <div class="view front-view">
      <img data-lazyloaded="1" src="data:image/gif;base64,R0lGODdhAQABAPAAAMPDwwAAACwAAAAAAQABAAACAkQBADs=" decoding="async" data-src="images/que_icon.svg" alt="icon">
     </div>
     <div class="view back-view">
      <img data-lazyloaded="1" src="data:image/gif;base64,R0lGODdhAQABAPAAAMPDwwAAACwAAAAAAQABAAACAkQBADs=" decoding="async" data-src="images/img-3.png" alt="card-img">
     </div> </li>
    <li class="card">
     <div class="view front-view">
      <img data-lazyloaded="1" src="data:image/gif;base64,R0lGODdhAQABAPAAAMPDwwAAACwAAAAAAQABAAACAkQBADs=" decoding="async" data-src="images/que_icon.svg" alt="icon">
     </div>
     <div class="view back-view">
      <img data-lazyloaded="1" src="data:image/gif;base64,R0lGODdhAQABAPAAAMPDwwAAACwAAAAAAQABAAACAkQBADs=" decoding="async" data-src="images/img-4.png" alt="card-img">
     </div> </li>
    <li class="card">
     <div class="view front-view">
      <img data-lazyloaded="1" src="data:image/gif;base64,R0lGODdhAQABAPAAAMPDwwAAACwAAAAAAQABAAACAkQBADs=" decoding="async" data-src="images/que_icon.svg" alt="icon">
     </div>
     <div class="view back-view">
      <img data-lazyloaded="1" src="data:image/gif;base64,R0lGODdhAQABAPAAAMPDwwAAACwAAAAAAQABAAACAkQBADs=" decoding="async" data-src="images/img-5.png" alt="card-img">
     </div> </li>
    <li class="card">
     <div class="view front-view">
      <img data-lazyloaded="1" src="data:image/gif;base64,R0lGODdhAQABAPAAAMPDwwAAACwAAAAAAQABAAACAkQBADs=" decoding="async" data-src="images/que_icon.svg" alt="icon">
     </div>
     <div class="view back-view">
      <img data-lazyloaded="1" src="data:image/gif;base64,R0lGODdhAQABAPAAAMPDwwAAACwAAAAAAQABAAACAkQBADs=" decoding="async" data-src="images/img-4.png" alt="card-img">
     </div> </li>
    <li class="card">
     <div class="view front-view">
      <img data-lazyloaded="1" src="data:image/gif;base64,R0lGODdhAQABAPAAAMPDwwAAACwAAAAAAQABAAACAkQBADs=" decoding="async" data-src="images/que_icon.svg" alt="icon">
     </div>
     <div class="view back-view">
      <img data-lazyloaded="1" src="data:image/gif;base64,R0lGODdhAQABAPAAAMPDwwAAACwAAAAAAQABAAACAkQBADs=" decoding="async" data-src="images/img-4.png" alt="card-img">
     </div> </li>
   </ul>
  </div>
CSS (Style.css)
This is our CSS code which designs our memory card game. This code makes our code visually appealing for the user. CSS styles and provider user interactivity to the webpages. Let’s breakdown our code.
- The code starts by importing the google fonts “Poppins”.
- Universal selector removes the margin and padding, set box sizing as border box and font family as poppins.
- Body centers the content horizontally and vertically using flexbox properties. It sets a min height of 100vh and a light blue background.
- .wrapper class selector sets padding of 25px, border radius of 10px, light fray background and a box shadow.
- .cards, .card and .view classes set its elements horizontally and vertically center using flexbox.
- The .cards sets height and width of 400px with the flex-wrap and justify content to space between.
- .card removes default styling and sets position relative, perspective 1000px, cursor to pointer, height, width and a transform style.
- The .shake class sets a ease-in-out animation. This animation is styled using keyframe property for the different state of the .shake class.
- .view class selector sets full height and width. It sets position absolute, border-radius 7px, white background, box-shadow and some transitions.
- We styled images width and height using the class selector.
- Using media queries, we’ve made it responsive for the smaller screens as well.
					/* Import Google Font - Poppins */
@import url('https://fonts.googleapis.com/css2?family=Poppins:wght@400;500;600;700&display=swap');
*{
  margin: 0;
  padding: 0;
  box-sizing: border-box;
  font-family: 'Poppins', sans-serif;
}
body{
  display: flex;
  align-items: center;
  justify-content: center;
  min-height: 100vh;
  background: #6563FF;
}
.wrapper{
  padding: 25px;
  border-radius: 10px;
  background: #F8F8F8;
  box-shadow: 0 10px 30px rgba(0,0,0,0.1);
}
.cards, .card, .view{
  display: flex;
  align-items: center;
  justify-content: center;
}
.cards{
  height: 400px;
  width: 400px;
  flex-wrap: wrap;
  justify-content: space-between;
}
.cards .card{
  cursor: pointer;
  list-style: none;
  user-select: none;
  position: relative;
  perspective: 1000px;
  transform-style: preserve-3d;
  height: calc(100% / 4 - 10px);
  width: calc(100% / 4 - 10px);
}
.card.shake{
  animation: shake 0.35s ease-in-out;
}
@keyframes shake {
  0%, 100%{
    transform: translateX(0);
  }
  20%{
    transform: translateX(-13px);
  }
  40%{
    transform: translateX(13px);
  }
  60%{
    transform: translateX(-8px);
  }
  80%{
    transform: translateX(8px);
  }
}
.card .view{
  width: 100%;
  height: 100%;
  position: absolute;
  border-radius: 7px;
  background: #fff;
  pointer-events: none;
  backface-visibility: hidden;
  box-shadow: 0 3px 10px rgba(0,0,0,0.1);
  transition: transform 0.25s linear;
}
.card .front-view img{
  width: 19px;
}
.card .back-view img{
  max-width: 45px;
}
.card .back-view{
  transform: rotateY(-180deg);
}
.card.flip .back-view{
  transform: rotateY(0);
}
.card.flip .front-view{
  transform: rotateY(180deg);
}

@media screen and (max-width: 700px) {
  .cards{
    height: 350px;
    width: 350px;
  }
  .card .front-view img{
    width: 17px;
  }
  .card .back-view img{
    max-width: 40px;
  }
}

@media screen and (max-width: 530px) {
  .cards{
    height: 300px;
    width: 300px;
  }
  .card .front-view img{
    width: 15px;
  }
  .card .back-view img{
    max-width: 35px;
  }
}
Javascript (Script.js)
This is our JavaScript code which adds functionality in our game. Without using this code you can’t play our memory card game. This code adds logic to our game and makes it functional. Let’s understand the code.
- Using DOM it accessed the .card and stored them in cards variable.
- We initializes 3 new variables. matched, cardOne, cardTwo and disableDeck. The matched initialise with 0 and disableDeck initialise as false.
- The flipCard function will handle the flip card condition. It checks if card is not clicked and disableDeck is not false. Then it adds flip css class to clickedCard. If cardOne is not set, it’ll assign cardOne to clickedCard. If cardOne is set, it’ll assign the cardTwo and disables the deck, and retrieve the both images of the card for comparison.
- The matchCard function takes 2 parameters. If the images match, it updates the match counter. When all cards are found, it’ll shuffleCard function. Then it’ll reset the cardOne and cardTwo and will disable the deck.
- If images don’t match, it’ll add a shake animation to both images and after a delay it’ll flip the card and reset the variables.
- The shuffleCard function shuffles the card when new game starts. It resets the card and variables. It creates an array and sort it in random order to shuffle the card. This adds forEach loop to the card and set it location to random. After it calls the shuffleCard function.
- Lastly, it adds event listener on each card and when clicked, flipCard function will run.
					const cards = document.querySelectorAll(".card");

let matched = 0;
let cardOne, cardTwo;
let disableDeck = false;

function flipCard({target: clickedCard}) {
    if(cardOne !== clickedCard && !disableDeck) {
        clickedCard.classList.add("flip");
        if(!cardOne) {
            return cardOne = clickedCard;
        }
        cardTwo = clickedCard;
        disableDeck = true;
        let cardOneImg = cardOne.querySelector(".back-view img").src,
        cardTwoImg = cardTwo.querySelector(".back-view img").src;
        matchCards(cardOneImg, cardTwoImg);
    }
}

function matchCards(img1, img2) {
    if(img1 === img2) {
        matched++;
        if(matched == 8) {
            setTimeout(() => {
                return shuffleCard();
            }, 1000);
        }
        cardOne.removeEventListener("click", flipCard);
        cardTwo.removeEventListener("click", flipCard);
        cardOne = cardTwo = "";
        return disableDeck = false;
    }
    setTimeout(() => {
        cardOne.classList.add("shake");
        cardTwo.classList.add("shake");
    }, 400);

    setTimeout(() => {
        cardOne.classList.remove("shake", "flip");
        cardTwo.classList.remove("shake", "flip");
        cardOne = cardTwo = "";
        disableDeck = false;
    }, 1200);
}

function shuffleCard() {
    matched = 0;
    disableDeck = false;
    cardOne = cardTwo = "";
    let arr = [1, 2, 3, 4, 5, 6, 7, 8, 1, 2, 3, 4, 5, 6, 7, 8];
    arr.sort(() => Math.random() > 0.5 ? 1 : -1);
    cards.forEach((card, i) => {
        card.classList.remove("flip");
        let imgTag = card.querySelector(".back-view img");
        imgTag.src = `images/img-${arr[i]}.png`;
        card.addEventListener("click", flipCard);
    });
}

shuffleCard();

cards.forEach(card => {
    card.addEventListener("click", flipCard);
});
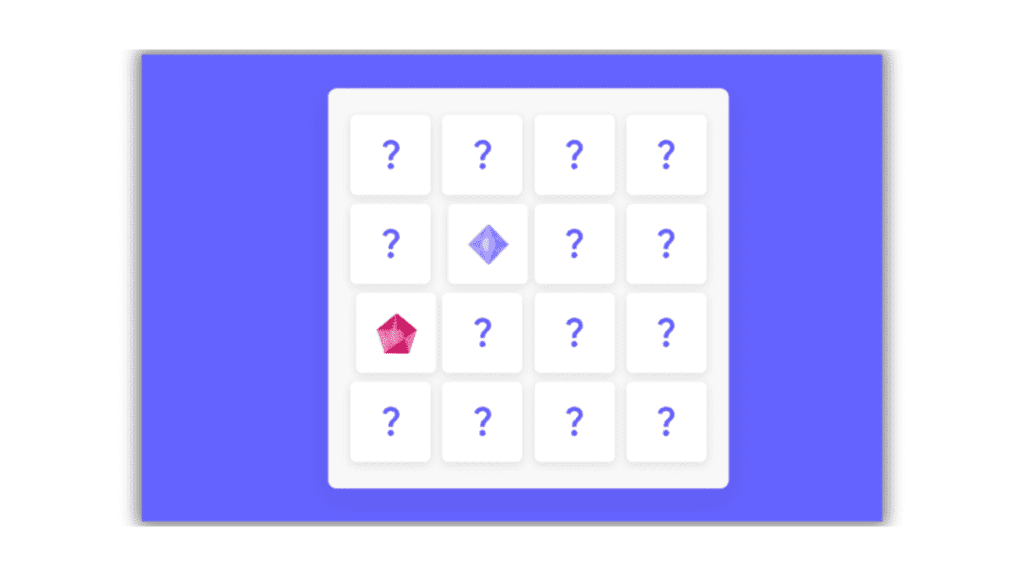
Output:
Disclaimer: The code provided in this post is sourced from GitHub and is distributed under the MIT License. All credits for the original code go to the respective owner. We have shared this code for educational purposes only. Please refer to the original repository for detailed information and any additional usage rights or restrictions.
Top 5 Data Science Courses to Build a Strong Career in 2026 Data science is no longer limited to tech companies. Banks …
Free Things You Get With Your College ID 🎓 Free / Discounted Platforms with College ID Platform What You Get (Student Benefits) …
25 Best Free Great Learning Courses for CSE Students (With Certificates) – Start Learning Today! If you’re a CSE student, engineering fresher, …

Why Target Test Prep Is the Best GMAT/GRE Prep Platform in 2025? Preparing for the GMAT or GRE has changed drastically in …
Get Huge Discounts

More Python Projects
