Contact Management System in Python with a Graphical User Interface (GUI)
Introduction:
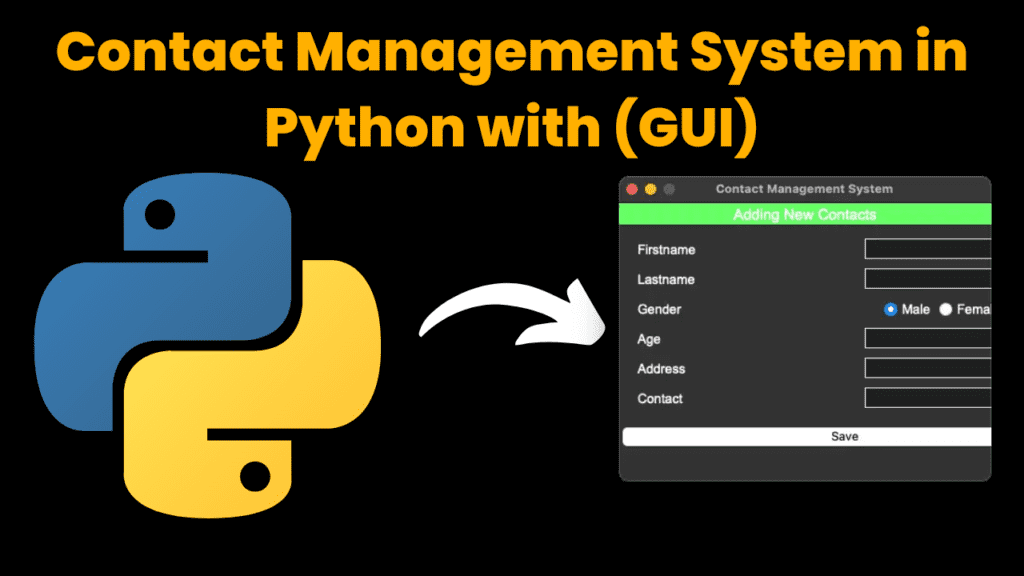
The Contact Management System is a Python-based application designed to manage and organize a list of contacts efficiently. This project helps users store, update, and delete contact details like name, address, gender, and phone number, all within a simple GUI created using the Tkinter module. The system’s primary purpose is to allow users to store personal information and maintain an organized contact list, which can be modified as needed.
This project is a great way to demonstrate how Python can be used to build functional GUI applications. It’s also an excellent learning tool for beginners to improve their skills in Python programming, especially in creating GUI-based applications using Tkinter.
Features of the Contact Management System:
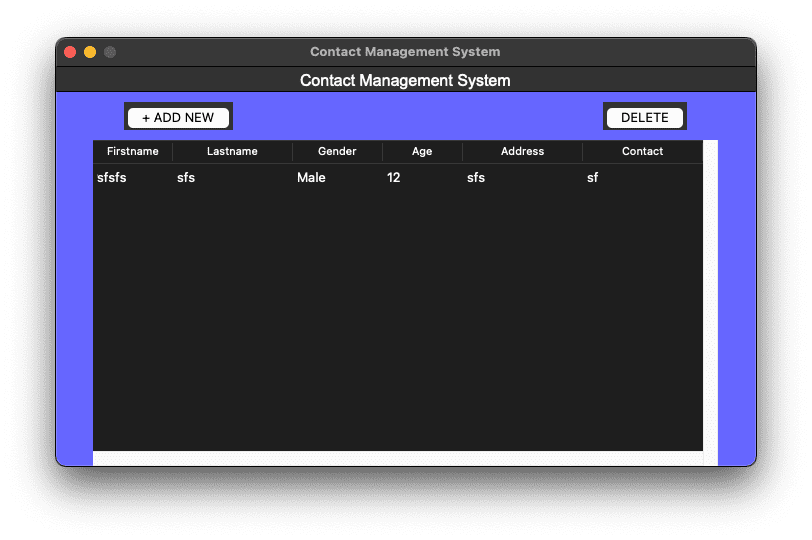
- View All Contacts: On launching the application, the user can view all stored contacts.
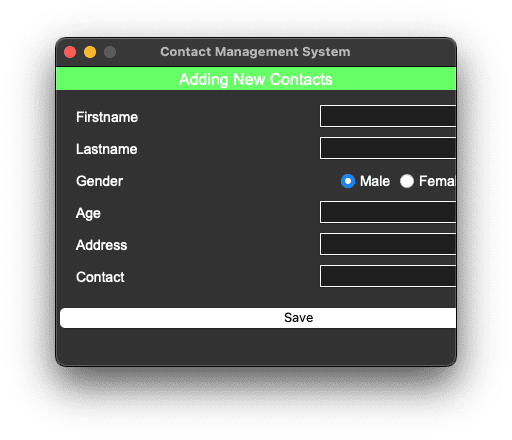
- Add Contacts: Users can add new contacts by filling out the form with relevant details.
- Update Contacts: The system allows users to modify existing contact details by double-clicking on a particular entry.
- Delete Contacts: Users can remove any contact from the list by selecting it and clicking the delete button.
Required Modules or Packages:
The system was developed using Tkinter, which is a Python package used for building simple GUI applications. Below are the essential packages required for this project:
Tkinter:
- Used for building the graphical user interface (GUI).
- Provides various widgets such as buttons, text fields, and tables, which are essential for creating the contact management system.
- Installation:
pip install tk
SQLite3:
- Used for managing the database that stores all the contact details.
- SQLite is a lightweight, file-based database that requires minimal configuration and works well for small applications.
- No external installation is required for SQLite, as it comes bundled with Python.
Dependencies:
- Python 3.x: Ensure Python is installed on your system.
- Tkinter Library: Tkinter is part of the Python Standard Library, but you might need to install it manually, depending on your OS
How to Run the Code:
Follow the steps below to run the Contact Management System on your machine:
Download Python:
- Make sure Python is installed. You can download it from here.
Extract the Project:
- Extract the downloaded ZIP file containing the project.
Open the Project:
- Navigate to the project folder and open the
index.pyfile using Python’s IDLE.
- Navigate to the project folder and open the
Run the Script:
- Press
F5or click on the Run menu, and select Run Module to execute the code. This will launch the contact management system.
- Press
Code Explanation:
The following sections explain some important parts of the code used in the Contact Management System:
Database Connection:
- The project uses SQLite3 to handle database operations, ensuring efficient management of contact information.
					import sqlite3

conn = sqlite3.connect('contact.db')
c = conn.cursor()
Here, a connection to the contact.db database is created, allowing the system to read and write contact data.
Adding Contacts:
- A function is created to allow users to add a new contact by inputting their personal details.
					def add_contact():
    first_name = entry_first_name.get()
    last_name = entry_last_name.get()
    ...
    c.execute('INSERT INTO contacts (first_name, last_name, ...) VALUES (?, ?, ...)', ...)
    conn.commit()
- This function retrieves user input and inserts it into the database using an SQL query.
Updating Contacts:
- The system allows updating contact details by double-clicking on a contact and editing the data.
					def update_contact():
    selected_contact = contact_list.selection()
    ...
    c.execute('UPDATE contacts SET first_name=?, last_name=? WHERE id=?', ...)
    conn.commit()
- The updated contact details are then saved back to the database.
Deleting Contacts:
- A function to delete contacts from the database.
					def delete_contact():
    selected_contact = contact_list.selection()
    ...
    c.execute('DELETE FROM contacts WHERE id=?', ...)
    conn.commit()
Get Discount on Top Educational Courses
Source Code:
					from tkinter import *
import sqlite3
import tkinter.ttk as ttk
import tkinter.messagebox as tkMessageBox

root = Tk()
root.title("Contact Management System")
width = 700
height = 400
screen_width = root.winfo_screenwidth()
screen_height = root.winfo_screenheight()
x = (screen_width/2) - (width/2)
y = (screen_height/2) - (height/2)
root.geometry("%dx%d+%d+%d" % (width, height, x, y))
root.resizable(0, 0)
root.config(bg="#6666ff")

#============================VARIABLES===================================
FIRSTNAME = StringVar()
LASTNAME = StringVar()
GENDER = StringVar()
AGE = StringVar()
ADDRESS = StringVar()
CONTACT = StringVar()


#============================METHODS=====================================

def Database():
    conn = sqlite3.connect("contact.db")
    cursor = conn.cursor()
    cursor.execute("CREATE TABLE IF NOT EXISTS `member` (mem_id INTEGER NOT NULL  PRIMARY KEY AUTOINCREMENT, firstname TEXT, lastname TEXT, gender TEXT, age TEXT, address TEXT, contact TEXT)")
    cursor.execute("SELECT * FROM `member` ORDER BY `lastname` ASC")
    fetch = cursor.fetchall()
    for data in fetch:
        tree.insert('', 'end', values=(data))
    cursor.close()
    conn.close()

def SubmitData():
    if  FIRSTNAME.get() == "" or LASTNAME.get() == "" or GENDER.get() == "" or AGE.get() == "" or ADDRESS.get() == "" or CONTACT.get() == "":
        result = tkMessageBox.showwarning('', 'Please Complete The Required Field', icon="warning")
    else:
        tree.delete(*tree.get_children())
        conn = sqlite3.connect("contact.db")
        cursor = conn.cursor()
        cursor.execute("INSERT INTO `member` (firstname, lastname, gender, age, address, contact) VALUES(?, ?, ?, ?, ?, ?)", (str(FIRSTNAME.get()), str(LASTNAME.get()), str(GENDER.get()), int(AGE.get()), str(ADDRESS.get()), str(CONTACT.get())))
        conn.commit()
        cursor.execute("SELECT * FROM `member` ORDER BY `lastname` ASC")
        fetch = cursor.fetchall()
        for data in fetch:
            tree.insert('', 'end', values=(data))
        cursor.close()
        conn.close()
        FIRSTNAME.set("")
        LASTNAME.set("")
        GENDER.set("")
        AGE.set("")
        ADDRESS.set("")
        CONTACT.set("")

def UpdateData():
    if GENDER.get() == "":
       result = tkMessageBox.showwarning('', 'Please Complete The Required Field', icon="warning")
    else:
        tree.delete(*tree.get_children())
        conn = sqlite3.connect("contact.db")
        cursor = conn.cursor()
        cursor.execute("UPDATE `member` SET `firstname` = ?, `lastname` = ?, `gender` =?, `age` = ?,  `address` = ?, `contact` = ? WHERE `mem_id` = ?", (str(FIRSTNAME.get()), str(LASTNAME.get()), str(GENDER.get()), str(AGE.get()), str(ADDRESS.get()), str(CONTACT.get()), int(mem_id)))
        conn.commit()
        cursor.execute("SELECT * FROM `member` ORDER BY `lastname` ASC")
        fetch = cursor.fetchall()
        for data in fetch:
            tree.insert('', 'end', values=(data))
        cursor.close()
        conn.close()
        FIRSTNAME.set("")
        LASTNAME.set("")
        GENDER.set("")
        AGE.set("")
        ADDRESS.set("")
        CONTACT.set("")


def OnSelected(event):
    global mem_id, UpdateWindow
    curItem = tree.focus()
    contents =(tree.item(curItem))
    selecteditem = contents['values']
    mem_id = selecteditem[0]
    FIRSTNAME.set("")
    LASTNAME.set("")
    GENDER.set("")
    AGE.set("")
    ADDRESS.set("")
    CONTACT.set("")
    FIRSTNAME.set(selecteditem[1])
    LASTNAME.set(selecteditem[2])
    AGE.set(selecteditem[4])
    ADDRESS.set(selecteditem[5])
    CONTACT.set(selecteditem[6])
    UpdateWindow = Toplevel()
    UpdateWindow.title("Contact Management System")
    width = 400
    height = 300
    screen_width = root.winfo_screenwidth()
    screen_height = root.winfo_screenheight()
    x = ((screen_width/2) + 450) - (width/2)
    y = ((screen_height/2) + 20) - (height/2)
    UpdateWindow.resizable(0, 0)
    UpdateWindow.geometry("%dx%d+%d+%d" % (width, height, x, y))
    if 'NewWindow' in globals():
        NewWindow.destroy()

    #===================FRAMES==============================
    FormTitle = Frame(UpdateWindow)
    FormTitle.pack(side=TOP)
    ContactForm = Frame(UpdateWindow)
    ContactForm.pack(side=TOP, pady=10)
    RadioGroup = Frame(ContactForm)
    Male = Radiobutton(RadioGroup, text="Male", variable=GENDER, value="Male",  font=('arial', 14)).pack(side=LEFT)
    Female = Radiobutton(RadioGroup, text="Female", variable=GENDER, value="Female",  font=('arial', 14)).pack(side=LEFT)

    #===================LABELS==============================
    lbl_title = Label(FormTitle, text="Updating Contacts", font=('arial', 16), bg="orange",  width = 300)
    lbl_title.pack(fill=X)
    lbl_firstname = Label(ContactForm, text="Firstname", font=('arial', 14), bd=5)
    lbl_firstname.grid(row=0, sticky=W)
    lbl_lastname = Label(ContactForm, text="Lastname", font=('arial', 14), bd=5)
    lbl_lastname.grid(row=1, sticky=W)
    lbl_gender = Label(ContactForm, text="Gender", font=('arial', 14), bd=5)
    lbl_gender.grid(row=2, sticky=W)
    lbl_age = Label(ContactForm, text="Age", font=('arial', 14), bd=5)
    lbl_age.grid(row=3, sticky=W)
    lbl_address = Label(ContactForm, text="Address", font=('arial', 14), bd=5)
    lbl_address.grid(row=4, sticky=W)
    lbl_contact = Label(ContactForm, text="Contact", font=('arial', 14), bd=5)
    lbl_contact.grid(row=5, sticky=W)

    #===================ENTRY===============================
    firstname = Entry(ContactForm, textvariable=FIRSTNAME, font=('arial', 14))
    firstname.grid(row=0, column=1)
    lastname = Entry(ContactForm, textvariable=LASTNAME, font=('arial', 14))
    lastname.grid(row=1, column=1)
    RadioGroup.grid(row=2, column=1)
    age = Entry(ContactForm, textvariable=AGE,  font=('arial', 14))
    age.grid(row=3, column=1)
    address = Entry(ContactForm, textvariable=ADDRESS,  font=('arial', 14))
    address.grid(row=4, column=1)
    contact = Entry(ContactForm, textvariable=CONTACT,  font=('arial', 14))
    contact.grid(row=5, column=1)


    #==================BUTTONS==============================
    btn_updatecon = Button(ContactForm, text="Update", width=50, command=UpdateData)
    btn_updatecon.grid(row=6, columnspan=2, pady=10)


#fn1353p
def DeleteData():
    if not tree.selection():
       result = tkMessageBox.showwarning('', 'Please Select Something First!', icon="warning")
    else:
        result = tkMessageBox.askquestion('', 'Are you sure you want to delete this record?', icon="warning")
        if result == 'yes':
            curItem = tree.focus()
            contents =(tree.item(curItem))
            selecteditem = contents['values']
            tree.delete(curItem)
            conn = sqlite3.connect("contact.db")
            cursor = conn.cursor()
            cursor.execute("DELETE FROM `member` WHERE `mem_id` = %d" % selecteditem[0])
            conn.commit()
            cursor.close()
            conn.close()

def AddNewWindow():
    global NewWindow
    FIRSTNAME.set("")
    LASTNAME.set("")
    GENDER.set("")
    AGE.set("")
    ADDRESS.set("")
    CONTACT.set("")
    NewWindow = Toplevel()
    NewWindow.title("Contact Management System")
    width = 400
    height = 300
    screen_width = root.winfo_screenwidth()
    screen_height = root.winfo_screenheight()
    x = ((screen_width/2) - 455) - (width/2)
    y = ((screen_height/2) + 20) - (height/2)
    NewWindow.resizable(0, 0)
    NewWindow.geometry("%dx%d+%d+%d" % (width, height, x, y))
    if 'UpdateWindow' in globals():
        UpdateWindow.destroy()

    #===================FRAMES==============================
    FormTitle = Frame(NewWindow)
    FormTitle.pack(side=TOP)
    ContactForm = Frame(NewWindow)
    ContactForm.pack(side=TOP, pady=10)
    RadioGroup = Frame(ContactForm)
    Male = Radiobutton(RadioGroup, text="Male", variable=GENDER, value="Male",  font=('arial', 14)).pack(side=LEFT)
    Female = Radiobutton(RadioGroup, text="Female", variable=GENDER, value="Female",  font=('arial', 14)).pack(side=LEFT)

    #===================LABELS==============================
    lbl_title = Label(FormTitle, text="Adding New Contacts", font=('arial', 16), bg="#66ff66",  width = 300)
    lbl_title.pack(fill=X)
    lbl_firstname = Label(ContactForm, text="Firstname", font=('arial', 14), bd=5)
    lbl_firstname.grid(row=0, sticky=W)
    lbl_lastname = Label(ContactForm, text="Lastname", font=('arial', 14), bd=5)
    lbl_lastname.grid(row=1, sticky=W)
    lbl_gender = Label(ContactForm, text="Gender", font=('arial', 14), bd=5)
    lbl_gender.grid(row=2, sticky=W)
    lbl_age = Label(ContactForm, text="Age", font=('arial', 14), bd=5)
    lbl_age.grid(row=3, sticky=W)
    lbl_address = Label(ContactForm, text="Address", font=('arial', 14), bd=5)
    lbl_address.grid(row=4, sticky=W)
    lbl_contact = Label(ContactForm, text="Contact", font=('arial', 14), bd=5)
    lbl_contact.grid(row=5, sticky=W)

    #===================ENTRY===============================
    firstname = Entry(ContactForm, textvariable=FIRSTNAME, font=('arial', 14))
    firstname.grid(row=0, column=1)
    lastname = Entry(ContactForm, textvariable=LASTNAME, font=('arial', 14))
    lastname.grid(row=1, column=1)
    RadioGroup.grid(row=2, column=1)
    age = Entry(ContactForm, textvariable=AGE,  font=('arial', 14))
    age.grid(row=3, column=1)
    address = Entry(ContactForm, textvariable=ADDRESS,  font=('arial', 14))
    address.grid(row=4, column=1)
    contact = Entry(ContactForm, textvariable=CONTACT,  font=('arial', 14))
    contact.grid(row=5, column=1)


    #==================BUTTONS==============================
    btn_addcon = Button(ContactForm, text="Save", width=50, command=SubmitData)
    btn_addcon.grid(row=6, columnspan=2, pady=10)


#============================FRAMES======================================
Top = Frame(root, width=500, bd=1, relief=SOLID)
Top.pack(side=TOP)
Mid = Frame(root, width=500,  bg="#6666ff")
Mid.pack(side=TOP)
MidLeft = Frame(Mid, width=100)
MidLeft.pack(side=LEFT, pady=10)
MidLeftPadding = Frame(Mid, width=370, bg="#6666ff")
MidLeftPadding.pack(side=LEFT)
MidRight = Frame(Mid, width=100)
MidRight.pack(side=RIGHT, pady=10)
TableMargin = Frame(root, width=500)
TableMargin.pack(side=TOP)
#============================LABELS======================================
lbl_title = Label(Top, text="Contact Management System", font=('arial', 16), width=500)
lbl_title.pack(fill=X)

#============================ENTRY=======================================

#============================BUTTONS=====================================
btn_add = Button(MidLeft, text="+ ADD NEW", bg="#66ff66", command=AddNewWindow)
btn_add.pack()
btn_delete = Button(MidRight, text="DELETE", bg="red", command=DeleteData)
btn_delete.pack(side=RIGHT)

#============================TABLES======================================
scrollbarx = Scrollbar(TableMargin, orient=HORIZONTAL)
scrollbary = Scrollbar(TableMargin, orient=VERTICAL)
tree = ttk.Treeview(TableMargin, columns=("MemberID", "Firstname", "Lastname", "Gender", "Age", "Address", "Contact"), height=400, selectmode="extended", yscrollcommand=scrollbary.set, xscrollcommand=scrollbarx.set)
scrollbary.config(command=tree.yview)
scrollbary.pack(side=RIGHT, fill=Y)
scrollbarx.config(command=tree.xview)
scrollbarx.pack(side=BOTTOM, fill=X)
tree.heading('MemberID', text="MemberID", anchor=W)
tree.heading('Firstname', text="Firstname", anchor=W)
tree.heading('Lastname', text="Lastname", anchor=W)
tree.heading('Gender', text="Gender", anchor=W)
tree.heading('Age', text="Age", anchor=W)
tree.heading('Address', text="Address", anchor=W)
tree.heading('Contact', text="Contact", anchor=W)
tree.column('#0', stretch=NO, minwidth=0, width=0)
tree.column('#1', stretch=NO, minwidth=0, width=0)
tree.column('#2', stretch=NO, minwidth=0, width=80)
tree.column('#3', stretch=NO, minwidth=0, width=120)
tree.column('#4', stretch=NO, minwidth=0, width=90)
tree.column('#5', stretch=NO, minwidth=0, width=80)
tree.column('#6', stretch=NO, minwidth=0, width=120)
tree.column('#7', stretch=NO, minwidth=0, width=120)
tree.pack()
tree.bind('<Double-Button-1>', OnSelected)

#============================INITIALIZATION==============================
if __name__ == '__main__':
    Database()
    root.mainloop()
Output:
More Projects:
URL Shortener Using Python Django
URL Shortener Using Python Django Introduction: Long URLs can be shortened into short, shareable links with the help of the URL Shortener project. Though it

User Authentication System Using Python Django
User Authentication System Using Python Django Introduction: The implementation of safe and adaptable user authentication in Django is the main goal of this project. It

E-Learning System Using JAVA
The E-Learning System using Java with a Graphical User Interface (GUI) Introduction The E-Learning System is developed using Java (with a Graphical User interface through
Weather App Using Python Django with Source Code
Weather App Using Python Django Introduction: When a user enters the name of a city, the Weather App retrieves current weather information. It provides temperature,
Quiz App Using Python Django with complete source code
Quiz App Using Python Django Introduction: Users can take quizzes in a variety of subjects, see their results, and monitor their progress with the Django
Resume Screener in python using GUI
resume screener in python using python introduction The hiring process often begins with reviewing numerous resumes to filter out the most suitable candidates for a


