
Create a Screen Recorder Using Python With Source Code

Introduction :
In this article, we are going to see how to create a Screen Recorder using Python. Python is a widely used general-purpose language. It allows for performing a variety of tasks. One of them can be recording a video. It provides a module named pyautogui which can be used for the same. This module along with NumPy and OpenCV provides a way to manipulate and save the images (screenshot in this case) . Screen Recorder is a tool that captures everything displayed on your computer screen and save it as a video or MP4 File . This is useful for making tutorials , recording gameplays , or capturing the screen activity . The pyautogui , a Python Library handles the task of taking screenshots and capturing the live content of your screen . OpenCV , A Powerful Python library is used for image and video
processing . Pillow (PIL) , It is also a python library is used to handle necessary image processing like resizing them or converting image formats , etc .
Required Modules Or Packages :-
1. Numpy : – It is a core library for numerical computation in python and it can handle large arrays of numbers. To install Numpy type the following command in the terminal :-
pip install numpy
2. Pyautogui : This python library is used to handle the tasks of taking screenshots and capturing the live content of your screen . To install pyautogui type the following command in the terminal :-
pip install pyautogui
3. OpenCV : This is a powerful computer vision library that provides tools for image and video processing . To install OpenCV type the following command in the terminal :-
pip install pyautogui
How To Run The Code :-
Step 1 . First , You Download and Install Visual Studio Code or VS Code In your PC or Laptop by VS Code Official Website .
Step 2 . Now Open CMD And Run As Administrator and install the above packages using pip .
Step 3 . Now Open Visual Studio Code .
Step 4. Now Make The file named main.py .
Step 5 . Now Copy And Paste The Code From the Link Given Below
Step 6 . After pasting The code , Save This & Click On Run Button .
Step 7 . Now You will See The Output .
Code Explanation :-
This Python code makes the Screen Recorder . Ensures that You Have Downloaded the modules given above using pip .
Imports :
• Numpy : – It is a core library for numerical computation in python and it can handle large arrays of numbers.
• Pyautogui : This python library is used to handle the tasks of taking screenshots and capturing the live content of your screen .
• OpenCV : This is a powerful computer vision library that provides tools for image and video processing .
First, import all the required packages by following this image :
# importing the required packages
import pyautogui
import cv2
import numpy as np
We have to create a VideoWriter object. Also, we have to specify the output file name, Video codec, FPS, and video resolution. In video codec, we have to specify a 4-byte code (such as XVID, MJPG, X264, etc.). We’ll be using XVID here.
# Specify resolution
resolution = (1920, 1080)

# Specify video codec
codec = cv2.VideoWriter_fourcc("XVID")

# Specify name of Output file
filename = "Recording.avi"

# Specify frames rate. We can choose # any value and experiment with it
fps = 60.0

# Creating a Videowriter object
out = cv2.Videowriter(filename, codec, fps, resolution)
Optional: To display the recording in real-time, we have to create an Empty window and resize it.
# Create an Empty window
cv2.namedWindow("Live", cv2.WINDOW_NORMAL)
# Resize this window
cv2.resizeWindow("Live", 480, 270)
We will be running an infinite loop and in each iteration of the loop, we will take a screenshot and write it to the output file with the help of the video writer.
while True:

# Take screenshot using PyAutoGUI
img = pyautogui.screenshot()

# Convert the screenshot to a numpy array
frame = np.array(img)

# Convert it from BGR (Blue, Green, Red) to # RGB (Red, Green, Blue)
frame = cv2.cvtColor(frame, cv2.COLOR_BGR2RGB)

# write it to the output file
out.write(frame)

# Optional: Display the recording screen
cv2.imshow('Live', frame)

# Stop recording when we press 'q' if
cv2.waitKey(1) == ord('q'):
break
After everything is done, we will release the writer and destroy all windows opened by OpenCV.
# Release the video writer
out.release()

#Destroy all windows
cv2.destroyAllWindows()
Get Discount on Top Educational Courses
Source Code :
main.py
					# importing the required packages
import pyautogui
import cv2
import numpy as np

# Specify resolution
resolution = (1920, 1080)

# Specify video codec
codec = cv2.VideoWriter_fourcc(*"XVID")

# Specify name of output file
filename = "Recording.avi"

# Specify frame rate
fps = 60.0

# Creating a VideoWriter object
out = cv2.VideoWriter(filename, codec, fps, resolution)

# Create an empty window
cv2.namedWindow("Live", cv2.WINDOW_NORMAL)

# Resize this window
cv2.resizeWindow("Live", 480, 270)

while True:
    # Take screenshot using PyAutoGUI
    img = pyautogui.screenshot()

    # Convert the screenshot to a numpy array
    frame = np.array(img)

    # Convert it from RGB to BGR (OpenCV format)
    frame = cv2.cvtColor(frame, cv2.COLOR_RGB2BGR)

    # Write it to the output file
    out.write(frame)

    # Optional: Display the recording screen
    cv2.imshow('Live', frame)

    # Stop recording when we press 'q'
    if cv2.waitKey(1) == ord('q'):
        break

# Release the video writer
out.release()

# Destroy all windows
cv2.destroyAllWindows()
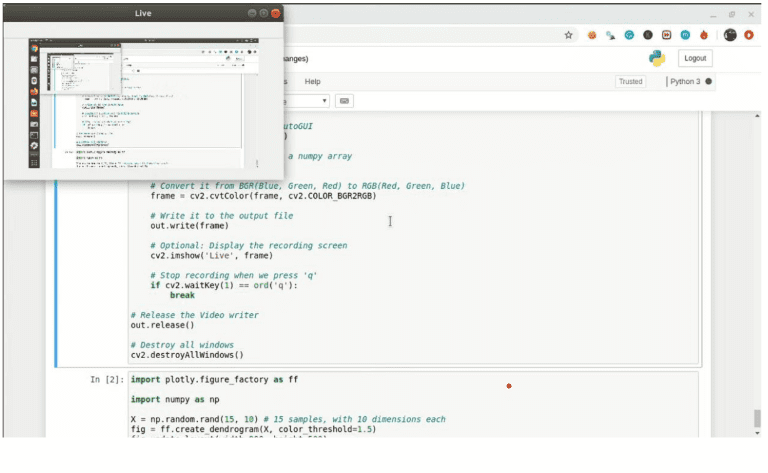
Output :
Find More Projects

URL Shortener Using Python Django Introduction: Long URLs can be shortened into short, shareable links with the help of the URL Shortener …

User Authentication System Using Python Django Introduction: The implementation of safe and adaptable user authentication in Django is the main goal of …

The E-Learning System using Java with a Graphical User Interface (GUI) Introduction The E-Learning System is developed using Java (with a Graphical …

Weather App Using Python Django Introduction: When a user enters the name of a city, the Weather App retrieves current weather information. …

Quiz App Using Python Django Introduction: Users can take quizzes in a variety of subjects, see their results, and monitor their progress …

resume screener in python using python introduction The hiring process often begins with reviewing numerous resumes to filter out the most suitable …
Get Huge Discounts

More Python Projects
