Jungle Dash Game Using Python with source code with Pygame module
Introduction:
Dive into the excitement of jungle adventures with our new blog post, “Make Your Own Jungle Dash Game Using Python!” Ever thought about creating your own video game? Well, Python, a popular programming language, can help you do just that! This blog post will guide you through every step of creating your very own jungle-themed game using Python’s Pygame module.
Don’t worry if you’re new to programming or game development. We’ll explain everything in simple terms, making it easy for you to follow along. Pygame is a set of tools that helps you make games, and it’s perfect for beginners.
We’ll start by setting up your computer so you can write code. Then, we’ll show you how to make your character move around the screen, avoid obstacles, and even collect points! With our easy-to-understand instructions and sample code, you’ll be able to create your own version of the game in no time.
So, join us on this adventure as we explore the world of Python game development together. Get ready to unleash your creativity and have a blast making your very own Jungle Dash game!
Required Modules and their installation:
To install the required modules for this game (os, random, pygame), you can follow these steps:
Open Command Prompt (Windows) or Terminal (Mac/Linux): This is where you’ll enter the commands to install the modules.
Install pygame: Pygame is the main module we need for game development. You can install it using pip, a Python package manager. Enter the following command:
pip install pygameThis command will download and install pygame and all its dependencies.
No installation needed for os and random: These modules come built-in with Python, so you don’t need to install them separately
How to Run the Code:
Download the Repository:
- Click on the provided link to download the code zip.
- Extract the contents of the downloaded ZIP file to your computer.
Navigate to the Directory:
- Open the extracted folder.
Open the main.py File:
- Inside the extracted folder, locate the main.py file.
- Open it using your preferred code editor.
Run the Game:
- Look for the “Run” button or option in your code editor’s menu and click on it.
- Alternatively, open the terminal or command prompt, navigate to the directory containing main.py, and run the command
python main.py.
Play the Game:
- Once the game window opens, use the arrow keys on your keyboard to move the falling Tetris blocks left, right, or down.
- Press the “Up” arrow key to rotate the falling tetromino.
- Try to complete horizontal lines to clear them and earn points.
- Keep playing and challenge yourself to achieve a high score!
Code Explanation :
1. Main Structure of the Game (main.py)
In the main.py file, the overall game is controlled. It sets up the game window, loads images, handles the player, and interacts with various objects like platforms, enemies, and collectibles.
Game Window and Setup
The game window is the space where everything happens (player movement, background, enemies). The code starts by setting up this window:
					pygame.init()
win = pygame.display.set_mode(SIZE)  # Game window size (1000 x 650 pixels)
pygame.display.set_caption('DASH')   # Window title "DASH"
clock = pygame.time.Clock()          # Controls game speed (FPS)
pygame.init(): Initializes the Pygame engine.pygame.display.set_mode(): Creates the game window of the specified size.pygame.display.set_caption(): Sets the name of the window (appears at the top).pygame.time.Clock(): Manages the speed of the game, which is set to 30 FPS.
Loading Background and Images
The game uses background images to make the game visually appealing. These are loaded from the assets folder:
					bg1 = pygame.image.load('assets/BG1.png')  # Loads background image 1
bg2 = pygame.image.load('assets/BG2.png')  # Loads background image 2
bg = bg1  # Sets the initial background to bg1
- The images
bg1andbg2are used to display different backgrounds as the player moves through the game.
Loading Levels
The game is divided into levels (like different stages of the game). The code loads the level data from the levels folder:
					level = 1
max_level = len(os.listdir('levels/'))  # Loads all the available levels
data = load_level(level)  # Loads data for the current level
This part of the code loads the first level (level = 1), but it can handle more levels based on how many level files are available in the levels directory.
Creating Game Objects
The game has different objects like water, lava, enemies, and diamonds. These objects are grouped together so they can be easily managed and drawn on the screen:
					water_group = pygame.sprite.Group()  # Group for water objects
lava_group = pygame.sprite.Group()   # Group for lava objects
forest_group = pygame.sprite.Group() # Group for forest objects
Each group is like a collection of similar things (e.g., water, enemies) that the game handles together. The player can interact with these groups (e.g., avoid lava, collect diamonds).
2. The Player (objects.py)
The player is the character you control in the game. This character is defined in the Player class inside objects.py.
How the Player is Set Up
Here’s how the player is initialized:
					class Player(pygame.sprite.Sprite):
    def __init__(self, x, y):
        self.image = pygame.image.load('assets/player.png')  # Player image
        self.rect = self.image.get_rect()  # Player's position (x, y)
        self.rect.x = x
        self.rect.y = y
        self.vel_y = 0  # Velocity (how fast the player moves vertically)
        self.jumping = False  # Whether the player is jumping
- The player’s image is loaded from the assets folder, and its position (x, y) is set.
vel_ykeeps track of the player’s vertical speed (for jumping).jumpingis used to check if the player is already jumping.
Player Movement
The player can move left, right, and jump. Here’s how the movement is handled:
					def update(self):
    keys = pygame.key.get_pressed()  # Get keys pressed by the player

    if keys[pygame.K_LEFT]:  # Move left if left arrow key is pressed
        self.rect.x -= 5
    if keys[pygame.K_RIGHT]:  # Move right if right arrow key is pressed
        self.rect.x += 5
    if keys[pygame.K_SPACE] and not self.jumping:  # Jump with spacebar
        self.vel_y = -15
        self.jumping = True
- Moving left/right: When the left or right arrow keys are pressed, the player moves accordingly.
- Jumping: When the spacebar is pressed, the player jumps by changing their vertical velocity.
Gravity and Landing
Gravity is simulated to pull the player down after jumping:
					self.vel_y += 1  # Gravity pulls the player down
self.rect.y += self.vel_y  # Move player down according to velocity

if self.rect.y >= ground_level:  # If player lands on the ground
    self.rect.y = ground_level
    self.jumping = False
- The vertical speed (
vel_y) increases to simulate gravity. - When the player lands on the ground, they stop falling, and
jumpingis set toFalse.
3. Main Game Loop
The game loop keeps the game running. Inside this loop, events (like key presses or quitting the game) are handled, the player is updated, and everything is drawn on the screen:
					running = True
while running:
    clock.tick(FPS)  # Keeps the game running at 30 FPS

    for event in pygame.event.get():  # Handles user events
        if event.type == pygame.QUIT:
            running = False

    player.update()  # Update player movements
    world.update()   # Update game world

    win.blit(bg, (0, 0))  # Draw background
    world.draw(win)       # Draw world elements
    player.draw(win)      # Draw player

    pygame.display.update()  # Refresh the screen
- Game speed: The game runs at 30 frames per second (FPS).
- Event handling: Events like quitting the game or pressing keys are handled.
- Updating the game: The player and the game world are updated every frame.
- Drawing: The background, world, and player are drawn to the screen, and the screen is refreshed.
Summary :
main.py: Sets up the game window, loads levels, and manages the game loop.objects.py: Defines the player and other game objects like enemies, platforms, and collectibles.- Game Flow: The game continuously checks for user inputs (like key presses), updates the player’s position, and redraws everything on the screen in real-time.
The game is structured with multiple levels and various objects (water, lava, enemies) that the player must navigate. The player’s movement (left, right, jump) is controlled through the keyboard, and gravity ensures realistic movement.
Get Discount on Top Educational Courses
Source Code:
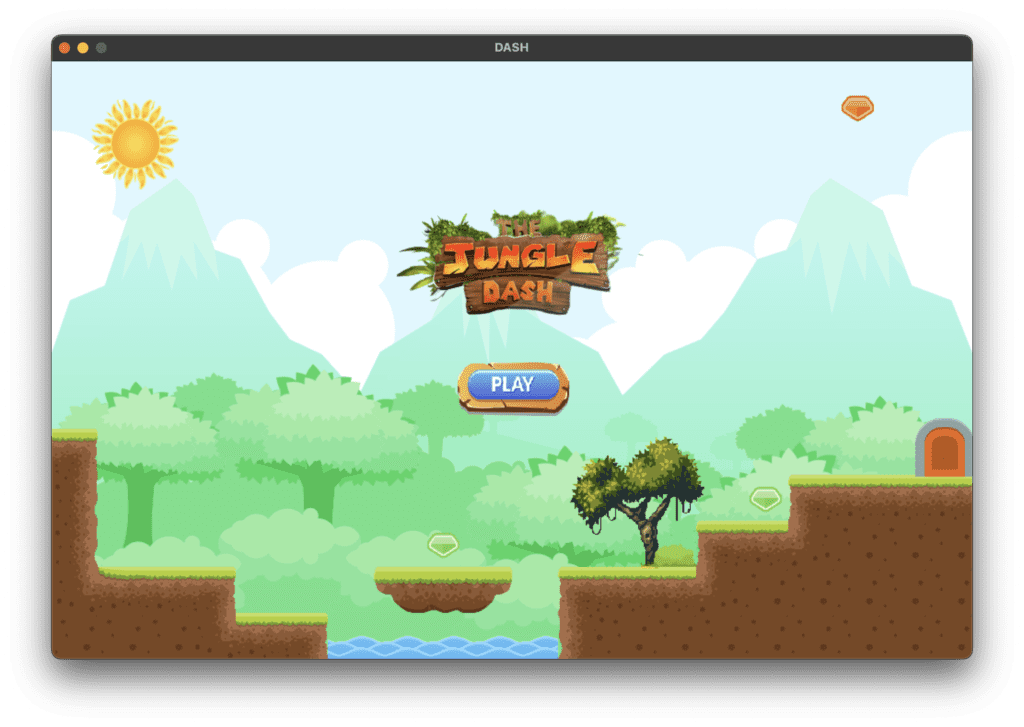
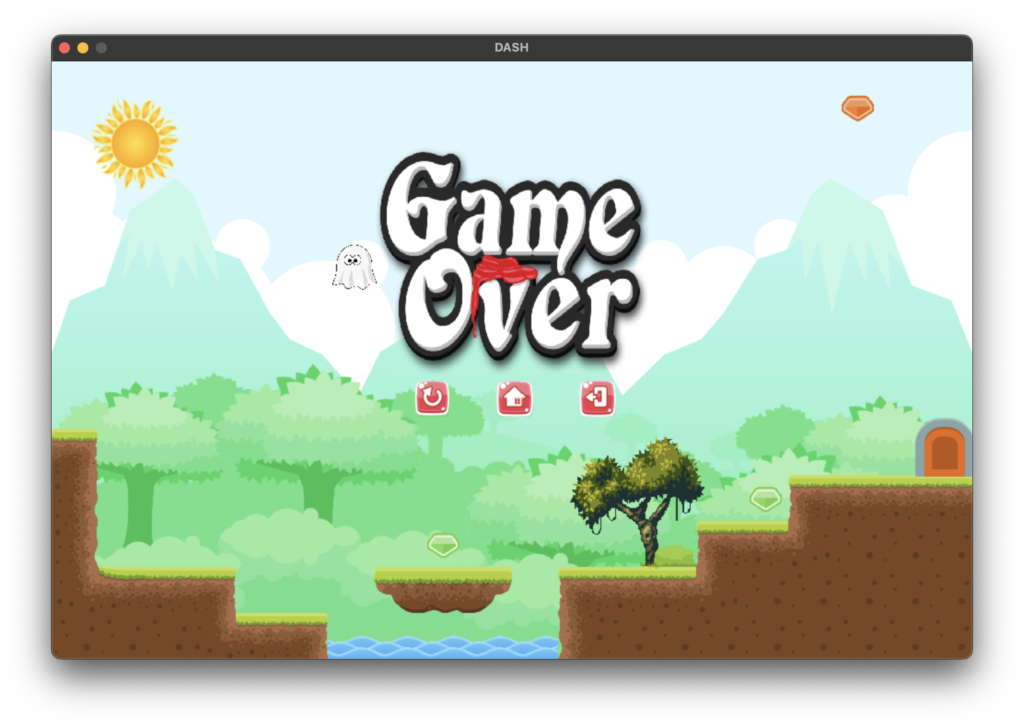
Output:

More Projects:

URL Shortener Using Python Django
URL Shortener Using Python Django Introduction: Long URLs can be shortened into short, shareable links with the help of the URL Shortener project. Though it

User Authentication System Using Python Django
User Authentication System Using Python Django Introduction: The implementation of safe and adaptable user authentication in Django is the main goal of this project. It

E-Learning System Using JAVA
The E-Learning System using Java with a Graphical User Interface (GUI) Introduction The E-Learning System is developed using Java (with a Graphical User interface through
Weather App Using Python Django with Source Code
Weather App Using Python Django Introduction: When a user enters the name of a city, the Weather App retrieves current weather information. It provides temperature,
Quiz App Using Python Django with complete source code
Quiz App Using Python Django Introduction: Users can take quizzes in a variety of subjects, see their results, and monitor their progress with the Django

Resume Screener in python using GUI
resume screener in python using python introduction The hiring process often begins with reviewing numerous resumes to filter out the most suitable candidates for a


