
CAPTCHA Generator Using Python With Source Code

Introduction :
Checking whether a user accessing web services is indeed a human and not some automated bot is very important in this digital era. One such technique more popular in use to distinguish a human user from a bot is CAPTCHA, Completely Automated Public Turing test to tell Computers and Humans Apart. We will make a very basic CAPTCHA generator with Python. In this case, we are going to use the power of the PIL library when creating and manipulating images, and Streamlit for building an interactive web interface.
First, we will cover the basics of CAPTCHA, why it is essential in web security, and then get into the code that generates a CAPTCHA image. By the end of this tutorial, you’ll have a complete, running CAPTCHA generator on a web page in a form, where you can regenerate new CAPTCHA images with a click of a button.
Explanation :
Language & Interface
This project is implemented using Python and features a web-based interface built with the Streamlit library. This will GUI interface that allows users to regenerate the Captcha Texts too.
Understand the Termonology
What is CAPTCHA?
It is a challenge-response test in computing designed to test whether the user is a human. It normally involves a user being asked to input letters or digits from a given distorted image.
Why CAPTCHA is Important?
CAPTCHA ensures that bots cannot create forms, hence providing protection to online services from spams, brute-force attacks, and many other abuses.
Types of CAPTCHA
Provide an overview of different types of CAPTCHA, including text-based, image-based, audio- based, and reCAPTCHA from Google: Why, even text-based ones are still very widely used.
Setting Up the Environment
Installing Required Libraries:
To create our CAPTCHA generator, we’ll use the PIL library (Pillow) for image processing and
Streamlit for creating the web interface. Install these libraries using pip through terminal:
pip install pillow streamlit
Get Discount on Top Educational Courses
Now, lets begins our Coding
					from PIL import Image, ImageDraw, ImageFont
import random
import string
import streamlit as st
from io import BytesIO

def generate_captcha(text, font_path='arial.ttf', font_size=36):
    width, height = 200, 100
    image = Image.new('RGB', (width, height), (255, 255, 255))
    font = ImageFont.truetype(font_path, font_size)
    draw = ImageDraw.Draw(image)

    # Randomize the position and angle
    text_bbox = draw.textbbox((0, 0), text, font=font)
    text_width = text_bbox[2] - text_bbox[0]
    text_height = text_bbox[3] - text_bbox[1]
    position = ((width - text_width) // 2, (height - text_height) // 2)
    draw.text(position, text, font=font, fill=(0, 0, 0))

    # Add some random noise (dots)
    for _ in range(random.randint(100, 1000)):
        draw.point((random.randint(0, width), random.randint(0, height)), fill=(0, 0, 0))

    return image

def generate_random_text(length=5):
    letters = string.ascii_uppercase + string.digits
    return ''.join(random.choice(letters) for _ in range(length))

# Streamlit Application
st.title("CAPTCHA Generator")

# Initialize CAPTCHA text in session state
if 'captcha_text' not in st.session_state:
    st.session_state['captcha_text'] = generate_random_text()

# Generate the CAPTCHA image
captcha_image = generate_captcha(st.session_state['captcha_text'])

# Convert the image to bytes
buffered = BytesIO()
captcha_image.save(buffered, format="PNG")
img_bytes = buffered.getvalue()

# Display the CAPTCHA image on the webpage
st.image(img_bytes, caption="Generated CAPTCHA", use_column_width=True)

# Button to regenerate CAPTCHA
if st.button('Refresh CAPTCHA'):
    st.session_state['captcha_text'] = generate_random_text()

# Display the CAPTCHA text
st.write(f"Generated CAPTCHA text: {st.session_state['captcha_text']}")

# Custom CSS for the button
st.markdown("""
    .stButton button {
        background-color: green;
        color: white;
        font-size: 16px;
        border-radius: 10px;
        padding: 10px 20px;
    }
    .stButton {
        display: flex;
        justify-content: center;
    }
""", unsafe_allow_html=True)
Code Explanation :-
Step 1: Importing the Required Modules
Start by importing the necessary modules, including Image, ImageDraw, and ImageFont from PIL, random and string for generating random text, and Streamlit for creating the web interface.
					from PIL import Image, ImageDraw, ImageFont import random
import string
import streamlit as st from io import BytesIO
Step 2: Generating the CAPTCHA Image
Use the Image module to create a new image and the ImageDraw module to draw the text on the image. To randomize the text position and add noise (dots) to make the CAPTCHA more secure.
					def generate_captcha(text, font_path='arial.ttf', font_size=36): width, height = 200, 100
image = Image.new('RGB', (width, height), (255, 255, 255)) font = ImageFont.truetype(font_path, font_size)
draw = ImageDraw.Draw(image)

# Randomize the position and angle
text_bbox = draw.textbbox((0, 0), text, font=font) text_width = text_bbox[2] - text_bbox[0] text_height = text_bbox[3] - text_bbox[1]
position = ((width - text_width) // 2, (height - text_height) // 2) draw.text(position, text, font=font, fill=(0, 0, 0))

# Add some random noise (dots)
for _ in range(random.randint(100, 1000)):
draw.point((random.randint(0, width), random.randint(0, height)), fill= (0, 0, 0))

return image
Step 3: Create Random Text
The function generate_random_text, which creates a random string of characters (letters and digits) to be used as the CAPTCHA.
					def generate_random_text(length=5):
letters = string.ascii_uppercase + string.digits
return ''.join(random.choice(letters) for _ in range(length))
Step 4: Adding a Refresh Button
Adding a button to refresh the CAPTCHA image.Streamlit’s session state to keep track of the CAPTCHA text and update it when the button is clicked.
					# Button to refresh CAPTCHA
if st.button('Refresh CAPTCHA'): st.session_state['captcha_text'] = generate_random_text()
Step 6: Enhancing the User Interface by adding Custom CSS code;
					# Custom CSS for the button st.markdown("""

.stButton button { background-color: green; color: white;
font-size: 16px; border-radius: 10px; padding: 10px 20px;
}
.stButton { display: flex;
justify-content: center;
}

""", unsafe_allow_html=True)
Step 5: Displaying the CAPTCHA on the Web Page
Use Streamlit to create a web page that displays the generated CAPTCHA image. Convert the image to bytes and using st.image() to display it on the web interface.
streamlit run captcha_stream.py
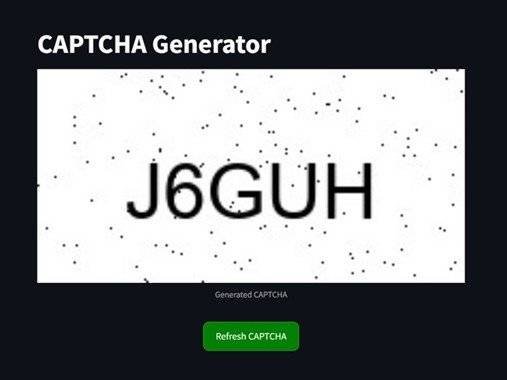
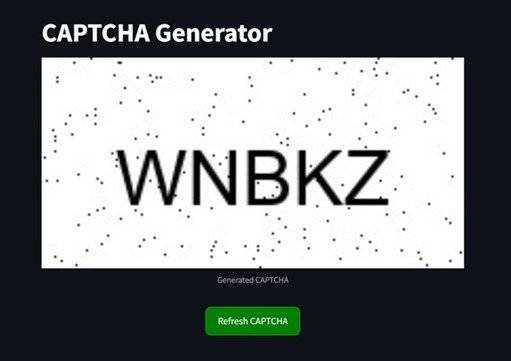
Output :
Find More Projects

URL Shortener Using Python Django Introduction: Long URLs can be shortened into short, shareable links with the help of the URL Shortener …

User Authentication System Using Python Django Introduction: The implementation of safe and adaptable user authentication in Django is the main goal of …

The E-Learning System using Java with a Graphical User Interface (GUI) Introduction The E-Learning System is developed using Java (with a Graphical …

Weather App Using Python Django Introduction: When a user enters the name of a city, the Weather App retrieves current weather information. …

Quiz App Using Python Django Introduction: Users can take quizzes in a variety of subjects, see their results, and monitor their progress …

resume screener in python using python introduction The hiring process often begins with reviewing numerous resumes to filter out the most suitable …
More HTML CSS JS Projects

Get Huge Discounts
