digital calculator in python using GUI
introduction
The Calculator Project is a basic yet essential Python application that replicates the functions of a standard calculator. Designed using Tkinter, Python’s built-in GUI library, this calculator allows users to perform fundamental arithmetic operations such as addition, subtraction, multiplication, and division through an interactive graphical interface.
This project is perfect for beginners to understand how GUI components work in Python and how event-driven programming is applied to real-life applications. It demonstrates the use of buttons, text inputs, layout managers, and simple logic handling for processing user input.
By developing this calculator, learners gain valuable experience in:
Handling GUI events
Performing real-time input/output operations
Structuring a Python application for usability and maintainability
The project is easy to enhance by adding features such as:
Keyboard support
Scientific calculator functions (square root, exponents, etc.)
Input validation and error handling
Tools and Technologies Used
Python – Programming language
Tkinter – Built-in Python module for GUI applications
IDEs – Jupyter Notebook, VS Code, PyCharm (can be used to run the project)
Tkinter provides a simple interface to develop GUI-based applications in Python, eliminating the need for external libraries and making the project highly portable.
steps to create digital calculator in python
Step 1: Install Python
Make sure Python is installed on your system. You can download it from:
https://www.python.org/downloads/
Tkinter comes pre-installed with Python. No need to install it separately.
Step 2: Set Up Your Development Environment
Use any of the following:
Jupyter Notebook (for notebook-based GUI demo)
IDLE (default Python editor)
VS Code or PyCharm (for full IDE support)
Step 3: Create the GUI Window
Start by importing Tkinter and creating the main window.
import tkinter as tk

root = tk.Tk()
root.title("Simple Calculator")
root.geometry("300x400")
Step 4: Add Display Field
Add an entry box to show input and results.
entry = tk.Entry(root, font=("Arial", 20), bd=10, relief="sunken", justify="right")
entry.grid(row=0, column=0, columnspan=4, padx=10, pady=10)
code explanation
1.Import Tkinter
import tkinter as tk
This imports the
tkintermodule, allowing you to create GUI elements like windows, buttons, text fields, etc.
2.click(event) Function
def click(event):
    text = event.widget.cget("text")
event.widgetrefers to the button that was clicked..cget("text")gets the text label of the button (e.g., ‘7’, ‘+’, ‘=’, etc.).
    if text == "=":
        try:
            result = eval(str(entry.get()))
            entry.set(result)
If the “=” button is clicked, it evaluates the current expression in the entry field using Python’s
eval()function.The result is shown in the entry field.
entry.set(result)updates the entry with the calculated result.
        except:
            entry.set("Error")
If evaluation fails (e.g., invalid math), it shows
"Error".
    elif text == "C":
        entry.set("")
Clears the entry if
"C"is clicked.
    else:
        entry.set(entry.get() + text)
For any number/operator button, it appends that text to the current entry value.
3.Create the Main Window
root = tk.Tk()
root.title("Simple Calculator")
Initializes the main application window and sets the window title.
4. Entry Field for Displaying Input/Output
entry = tk.StringVar()
entry_field = tk.Entry(root, textvar=entry, font="Arial 20")
entry_field.pack(fill="both", ipadx=8, pady=10, padx=10)
StringVar()is used to dynamically update the entry box.Entryis the text input field where the math expression appears.pack()places it in the window with padding.
5.Calculator Buttons
buttons = [
    ['7', '8', '9', '/'],
    ['4', '5', '6', '*'],
    ['1', '2', '3', '-'],
    ['C', '0', '=', '+']
]
A list of lists to define the calculator layout row-wise.
for row in buttons:
    frame = tk.Frame(root)
    frame.pack()
For each row, a separate
Frameis created to arrange buttons horizontally.
    for btn in row:
        button = tk.Button(frame, text=btn, font="Arial 18", height=2, width=5)
        button.pack(side="left", padx=5, pady=5)
        button.bind("<Button-1>", click)
A
Buttonis created for each symbol in the row.pack(side="left")places buttons next to each other horizontally.bind("<Button-1>", click)links each button to theclick()function on left mouse click.
6.Run the Application
root.mainloop()
This keeps the GUI running and listening for events like button clicks.
source code
					import tkinter as tk

def click(event):
    text = event.widget.cget("text")
    if text == "=":
        try:
            result = eval(str(entry.get()))
            entry.set(result)
        except:
            entry.set("Error")
    elif text == "C":
        entry.set("")
    else:
        entry.set(entry.get() + text)

root = tk.Tk()
root.title("Simple Calculator")

entry = tk.StringVar()
entry_field = tk.Entry(root, textvar=entry, font="Arial 20")
entry_field.pack(fill="both", ipadx=8, pady=10, padx=10)

buttons = [
    ['7', '8', '9', '/'],
    ['4', '5', '6', '*'],
    ['1', '2', '3', '-'],
    ['C', '0', '=', '+']

]

for row in buttons:
    frame = tk.Frame(root)
    frame.pack()
    for btn in row:
        button = tk.Button(frame, text=btn, font="Arial 18", height=2, width=5)
        button.pack(side="left", padx=5, pady=5)
        button.bind("", click)

root.mainloop()
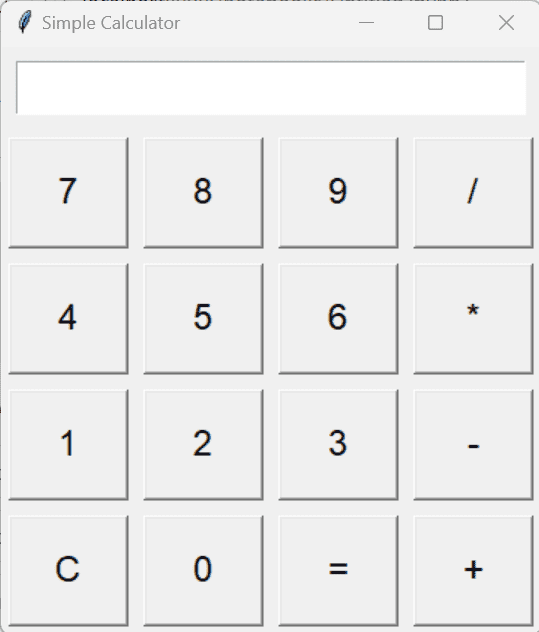
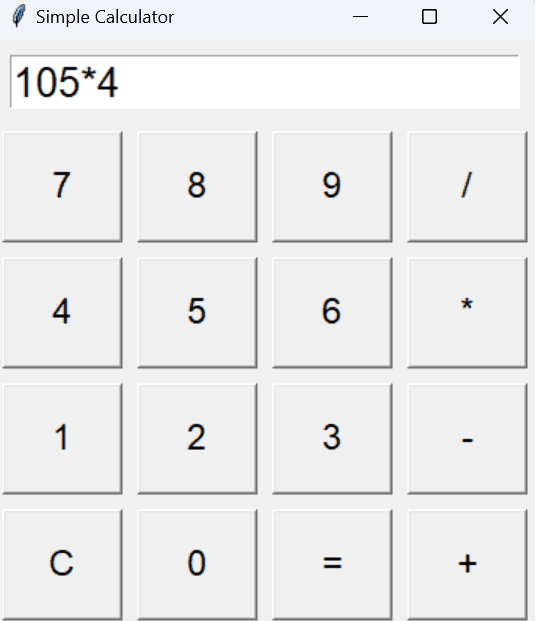
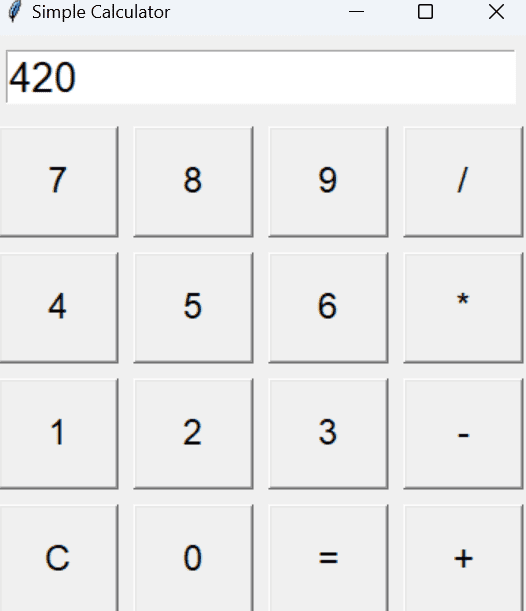
output
Get Huge Discounts