alumni management system in java
introduction
The alumni management system is a Java-based application developed to maintain and manage the records of alumni in educational institutions such as colleges, universities and schools.
The system aims to provide an organized and user -friendly platform that brids the difference between the institution and its alumni.
With the increasing number of students every year, it becomes difficult for institutions to manually maintain contact information, career updates, incident participation and achievements of graduates.
This system streamlines the process by digitizing the database and offering facilities for easy communication, record-maping and alumni engagement.
Netbeans developed using Java with swing GUI, this application includes a graphical interface for administrators: Add, edit, see and delete alumni records. Find alumni by batch, name or course. Manage events and announcements.
Keep the contact details and employment status of alumni. The project not only improves institutional outreach, but also helps the alumni to be connected, contributing to the community, and also contributing to the network.
It is a useful tool for career services, event planning and having a lifetime relationship with graduates.
Core Features and Functionalities:
1. Alumni Data Management:
Add New Alumni Records: Admin can enter alumni details such as:
Full Name
Batch Year
Course or Department
Current Occupation and Company
Contact Number, Email, and Address
Edit/Delete Records: Update alumni information or remove inactive entries.
Search and Filter: Search alumni by name, graduation year, department, or job role.
2. Event and Announcement Module (Optional):
Post Events: Admins can add event details such as reunions, webinars, or job fairs.
Notify Alumni: Notify registered alumni via email (future scope) or GUI-based notifications.
3. Interactive GUI:
Developed with Java Swing, featuring:
Input forms for data entry
Tables to view and sort alumni records
Buttons for operations like Save, Update, Delete, and Search
4. Data Storage:
File Handling or Database: Stores alumni data in structured files or integrates with a database like MySQL or SQLite for persistent storage.
steps to create alumni management system
1. Set Up the Project in NetBeans
Open NetBeans IDE.
Go to File → New Project → Java → Java Application.
Name the project (e.g.,
AlumniManagementSystem), and uncheck “Create Main Class”.
2. Design the GUI using Swing
Right-click on
Source Packages→ New → JFrame Form (e.g.,Dashboard.java,AddAlumniForm.java).Use Swing components from the Palette:
JLabel,JTextField,JComboBox,JButton,JTable,JDateChooser(optional with JCalendar).Organize them using Panels and Layouts for an attractive interface.
3. Create Required Classes
You’ll need to create several classes/modules for:
Alumni: Model class for storing alumni data (ID, name, year, course, email, job, etc.).DatabaseConnection: Handles database connectivity (JDBC).AlumniDAO: Handles database operations like add, update, delete, and search.MainFrame: Main UI interface or dashboard with menu/navigation.Additional forms:
AddAlumniForm,SearchAlumniForm,ViewAlumniForm.
4. Set Up the Database
Use MySQL or SQLite as backend.
Create a table like
alumni_datawith fields:sqlCREATE TABLE alumni_data (
id INT PRIMARY KEY AUTO_INCREMENT,
name VARCHAR(100),
batch_year INT,
course VARCHAR(50),
email VARCHAR(100),
phone VARCHAR(20),
job_title VARCHAR(100),
company_name VARCHAR(100)
);
5. Connect Java to the Database
Add JDBC library:
Right-click Project → Properties → Libraries → Add JAR/Folder.
Add MySQL JDBC Driver (
mysql-connector-java.jar).
Create a
DatabaseConnectionclass using JDBC to connect to MySQL.
6. Implement CRUD Operations
In
AlumniDAO.javaor controller class, implement:addAlumni(Alumni a)updateAlumni(Alumni a)deleteAlumni(int id)getAllAlumni()searchAlumni(String keyword)
7. Add Functional Buttons in GUI
Connect
Add,Edit,Delete, andSearchbuttons to the respective functions.Use
ActionListenerfor button click events.Populate data into a JTable using
DefaultTableModel.
8. Enhance the UI
Add logos, banners, and background images.
Use
JTabbedPanefor navigation (e.g., Dashboard, Alumni List, Events).Add validations for fields (e.g., email format, empty fields).
9. Test the Application
Enter sample alumni data.
Check for bugs in add, search, update, and delete functionalities.
Test form input validation and error handling.
10. Export or Package the Project
Build and run the project.
Go to Build → Clean and Build Project.
Create a
.jarfile for deployment.
code explanation
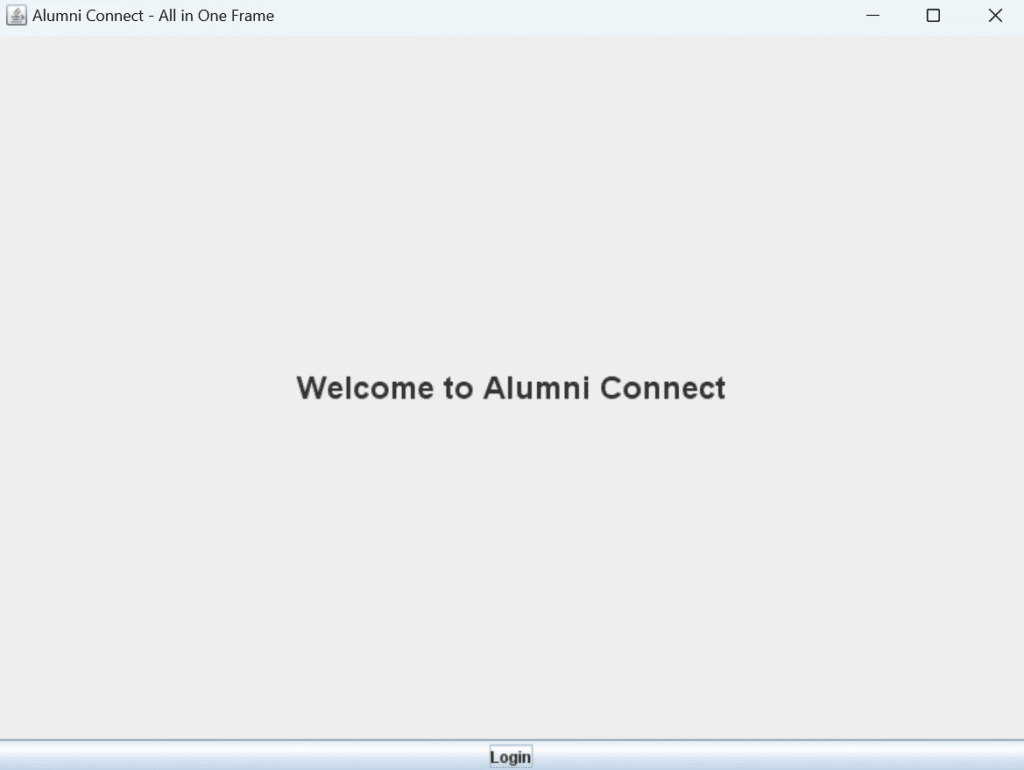
1.Main frame setup
 Setital ("alumni connect - all in one frame");

 Setsize (800, 600);

Forms a window called "alumni connect".
Set the fixed size (800 × 600) and focuses on the screen.
2. Cardalot and panel system
 Cardlayout cardlayout = new cardlayout ();

Jpanel cardpanel = new jpanel (cardlayout);
Cardlayout allows several screens (panels) in a window. The cardpanel is the main container that keeps all other panels (eg page in a book). 3. Login panel Java Copy edit Panel.
Shows a welcome label and a login button. When clicking on the login, switchs to the dashboard.
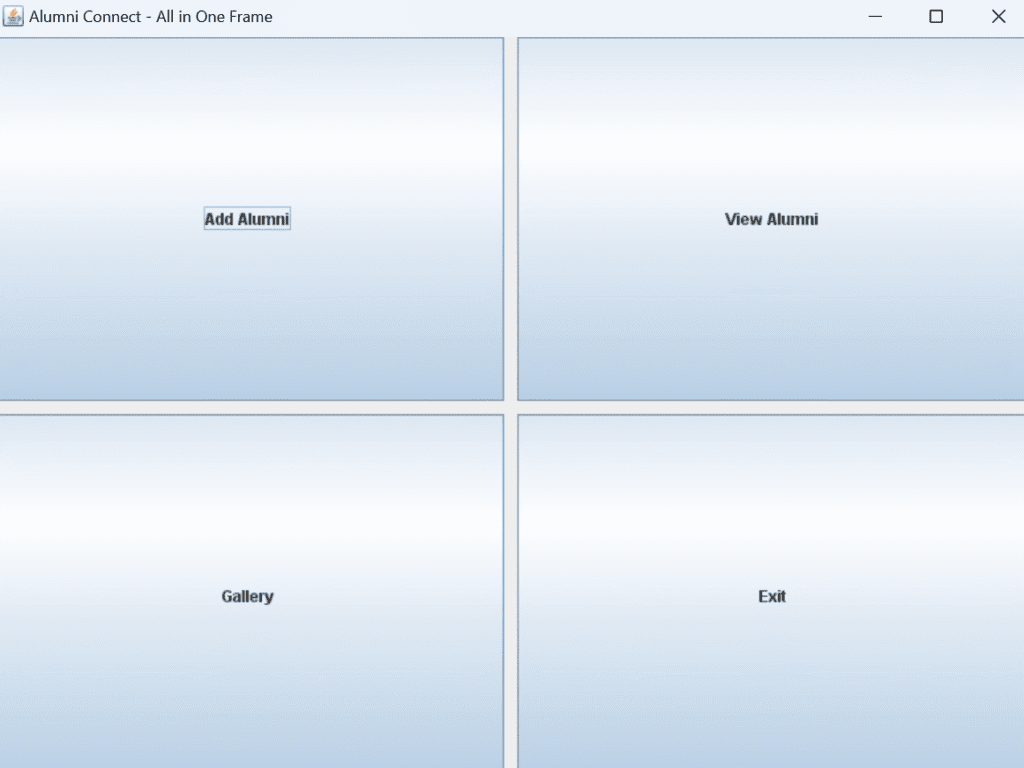
3. Dashboard panel
Gridlayout (2, 2, 10, 10);
There are 4 buttons: add alumni, alumni, gallery and exit. Clicking on a button switchs to the concerned panel.
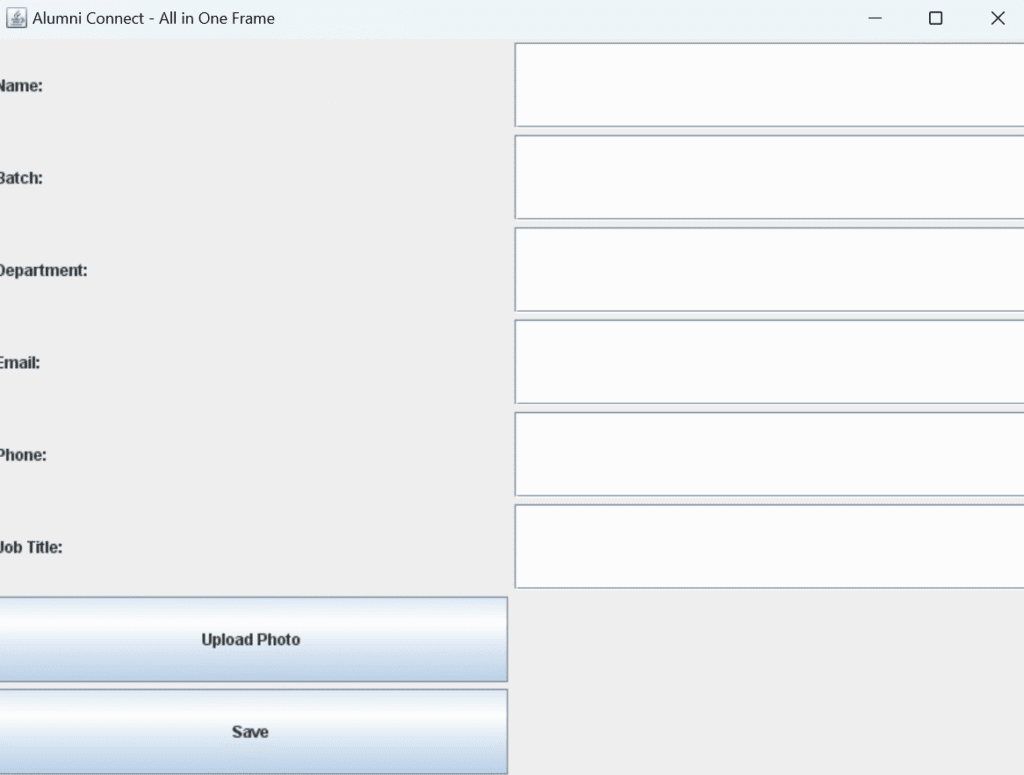
4. Add alumn student panel
Gridlayout (8, 2);
Input fields include: name, batch, department, email, phone, job title.
Upload Photo: Placeholder button (not yet functional).
Save the button: On clicking, a message dialogue shows, “Alumni have been saved details!” (No real data saving logic yet).
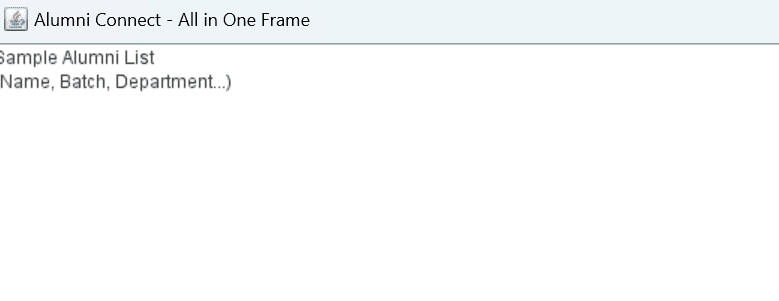
5. View alumni panel
Jtextarea alumniarea = new jtextarea ("Sample alumni list ...");The stable sample displays the text. In a complete system, it should bring and display data from a database.
6. Gallery panel imglabel.
Seticon (new imageicon ("resource/picture/sample_event.jpg"));An image displays (like an alumni event photo). The image should be placed in the right path in your project folder.
7. Main method
Swingutibility.invokeelater (former scholarships :: new);
Launch the app in a thread-safe manner.
source code
import javax.swing.*;
import java.awt.*;

public class AlumniManagementSystem extends JFrame {
    CardLayout cardLayout;
    JPanel cardPanel;

    public AlumniManagementSystem() {
        setTitle("Alumni Connect - All in One Frame");
        setSize(800, 600);
        setDefaultCloseOperation(EXIT_ON_CLOSE);
        setLocationRelativeTo(null);

        cardLayout = new CardLayout();
        cardPanel = new JPanel(cardLayout);

        // Create and add all screens
        cardPanel.add(loginPanel(), "Login");
        cardPanel.add(dashboardPanel(), "Dashboard");
        cardPanel.add(addAlumniPanel(), "AddAlumni");
        cardPanel.add(viewAlumniPanel(), "ViewAlumni");
        cardPanel.add(galleryPanel(), "Gallery");

        add(cardPanel);
        cardLayout.show(cardPanel, "Login");
        setVisible(true);
    }

    private JPanel loginPanel() {
        JPanel panel = new JPanel(new BorderLayout());
        JLabel label = new JLabel("Welcome to Alumni Connect", JLabel.CENTER);
        label.setFont(new Font("Arial", Font.BOLD, 24));
        JButton loginButton = new JButton("Login");

        loginButton.addActionListener(e -> cardLayout.show(cardPanel, "Dashboard"));
        panel.add(label, BorderLayout.CENTER);
        panel.add(loginButton, BorderLayout.SOUTH);
        return panel;
    }

    private JPanel dashboardPanel() {
        JPanel panel = new JPanel(new GridLayout(2, 2, 10, 10));
        JButton addBtn = new JButton("Add Alumni");
        JButton viewBtn = new JButton("View Alumni");
        JButton galleryBtn = new JButton("Gallery");
        JButton exitBtn = new JButton("Exit");

        addBtn.addActionListener(e -> cardLayout.show(cardPanel, "AddAlumni"));
        viewBtn.addActionListener(e -> cardLayout.show(cardPanel, "ViewAlumni"));
        galleryBtn.addActionListener(e -> cardLayout.show(cardPanel, "Gallery"));
        exitBtn.addActionListener(e -> System.exit(0));

        panel.add(addBtn);
        panel.add(viewBtn);
        panel.add(galleryBtn);
        panel.add(exitBtn);
        return panel;
    }

    private JPanel addAlumniPanel() {
        JPanel panel = new JPanel(new GridLayout(8, 2, 5, 5));
        JTextField nameField = new JTextField();
        JTextField batchField = new JTextField();
        JTextField deptField = new JTextField();
        JTextField emailField = new JTextField();
        JTextField phoneField = new JTextField();
        JTextField jobField = new JTextField();
        JButton uploadBtn = new JButton("Upload Photo");
        JButton saveBtn = new JButton("Save");

        panel.add(new JLabel("Name:")); panel.add(nameField);
        panel.add(new JLabel("Batch:")); panel.add(batchField);
        panel.add(new JLabel("Department:")); panel.add(deptField);
        panel.add(new JLabel("Email:")); panel.add(emailField);
        panel.add(new JLabel("Phone:")); panel.add(phoneField);
        panel.add(new JLabel("Job Title:")); panel.add(jobField);
        panel.add(uploadBtn); panel.add(new JLabel(""));
        panel.add(saveBtn); panel.add(new JLabel(""));

        saveBtn.addActionListener(e -> JOptionPane.showMessageDialog(this, "Alumni details saved!"));
        return panel;
    }

    private JPanel viewAlumniPanel() {
        JPanel panel = new JPanel(new BorderLayout());
        JTextArea alumniArea = new JTextArea("Sample Alumni List\n(Name, Batch, Department...)");
        alumniArea.setEditable(false);
        JScrollPane scrollPane = new JScrollPane(alumniArea);
        panel.add(scrollPane);
        return panel;
    }

    private JPanel galleryPanel() {
        JPanel panel = new JPanel(new BorderLayout());
        JLabel imgLabel = new JLabel();
        imgLabel.setHorizontalAlignment(SwingConstants.CENTER);
        imgLabel.setIcon(new ImageIcon("resources/images/sample_event.jpg")); // Place your image in this path
        panel.add(imgLabel, BorderLayout.CENTER);
        return panel;
    }

    public static void main(String[] args) {
        SwingUtilities.invokeLater(AlumniManagementSystem::new);
    }
}
output
Get Huge Discounts