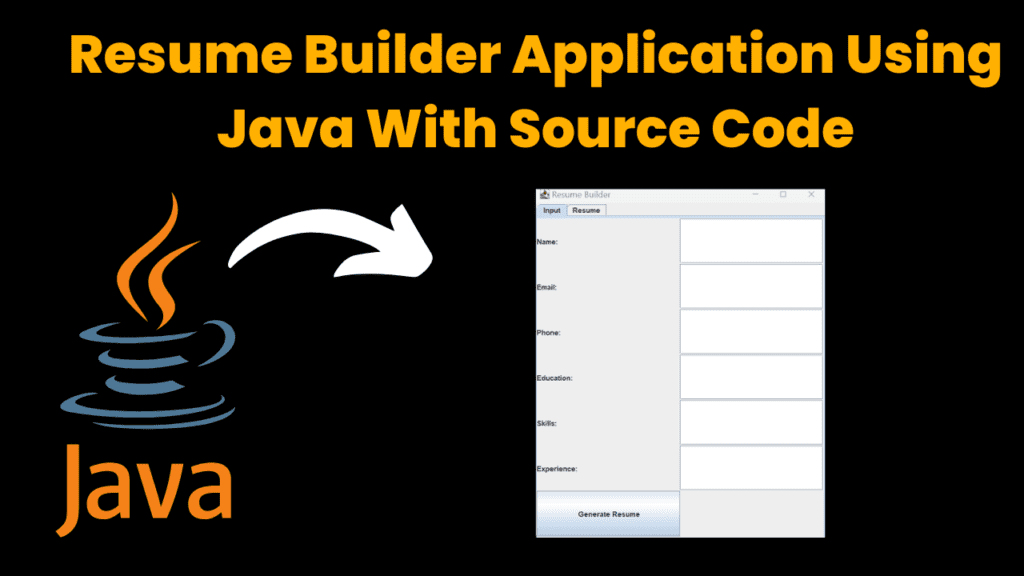
Resume Builder Application using Java With Source Code Graphical User Interface [GUI]
Introduction:
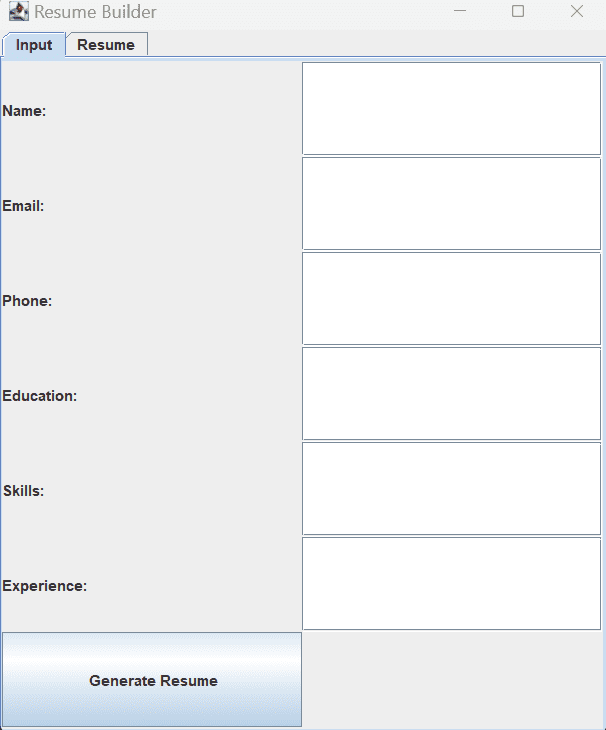
The Resume Builder Application is a powerful and user-friendly tool designed to help individuals create professional resumes with ease. Whether you are a student, a job seeker, or an experienced professional, this application simplifies the resume creation process by providing a structured format for entering personal details, educational qualifications, skills, and work experience. Built using Java Swing, the application offers an interactive graphical user interface (GUI) that ensures a smooth and intuitive user experience. With its tabbed layout, users can seamlessly navigate between input fields and the generated resume, making modifications effortlessly. The auto-formatting feature ensures that resumes are well-structured and visually appealing, saving time and effort.
Features of Resume Builder Application
- Simple and intuitive GUI for easy resume creation.
- Tabbed interface to separate input fields and resume preview.
- Auto-formatting for a structured and professional appearance.
- Scrollable text areas for detailed input sections.
- Easy editing and modification of resume details.
- Cross-platform compatibility (Windows, macOS, Linux).
Required Modules:
Required Modules for Resume Builder Application
javax.swing– GUI components (JFrame,JLabel,JTextField,JButton,JTabbedPane).java.awt– Layout managers (GridLayout,BorderLayout).java.awt.event– Event handling (ActionListener).- Optional Enhancements:
java.io– Save resume as a file.javax.swing.filechooser– File selection for saving.javafx.print– Print resume option.
How to Run the Code:
Steps to Run the Resume Builder Application (Java GUI)
1. Install Java (if not installed)
Make sure JDK (Java Development Kit) is installed on your system. You can check by running:
java -version
javac -version
If not installed, download it from Oracle JDK or use OpenJDK.
2. Save the Java Code
- Code the provided Java code into a file named
ResumeBuilder.java.
3. Compile the Java Program
Open a terminal or command prompt, navigate to the directory where the file is saved, and run:
javac ResumeBuilder.java
4. Run the Application
After successful compilation, execute the following command to launch the GUI:
java ResumeBuilder
Code Explanation :
1. ResumeBuilder Class (Main GUI Class):
- Extends
JFrame: This class is the main window of the application. It inherits fromJFrame, which is a basic container for building GUI applications in Java. - Constructor (
ResumeBuilder()):- Sets up the window title, size, and close operation.
- Initializes a
JTabbedPanefor navigation between the input form and generated resume view. - Creates two panels:
- Input Panel (
inputPanel): Contains labels and fields (text fields and text areas) for entering personal details and resume sections (name, email, phone, education, skills, experience). - Output Panel (
outputPanel): Contains aJTextAreato display the generated resume.
- Input Panel (
2. Swing Components Used:
JTextField: Used for single-line text input fields (e.g., name, email, phone).JTextArea: Used for multi-line text input fields (e.g., education, skills, experience).JButton: A button that, when clicked, generates the resume based on user input.JLabel: Labels used to indicate what each input field represents (e.g., “Name”, “Email”).JTabbedPane: Allows the user to switch between two tabs: one for input and one for viewing the generated resume.JScrollPane: Wraps theJTextAreacomponents to allow scrolling when the content exceeds the visible area.
3. Event Handling:
ActionListeneron the “Generate Resume” button:- When the button is clicked, it triggers the
generateResume()method. - After generating the resume, it switches the tab view to the “Resume” tab, displaying the formatted resume.
- When the button is clicked, it triggers the
4. Resume Generation Logic:
- The
generateResume()method retrieves the user input from the text fields (getText()) and formats it into a structured resume. - It concatenates the name, email, phone, education, skills, and experience into a formatted resume string.
- This formatted string is then set as the text of the
outputArea, displaying the generated resume.
5. main() Method:
- Initializes and displays the
ResumeBuilderwindow usingSwingUtilities.invokeLater()to ensure that GUI updates happen on the Event Dispatch Thread (EDT). - The
ResumeBuilderwindow is shown as visible (frame.setVisible(true)).
Source Code:
Get Discount on Top Educational Courses
					import javax.swing.*;
import java.awt.*;
import java.awt.event.ActionEvent;
import java.awt.event.ActionListener;

public class ResumeBuilder extends JFrame {
    private JTextField nameField, emailField, phoneField;
    private JTextArea educationArea, skillsArea, experienceArea;
    private JButton generateButton;
    private JTabbedPane tabbedPane;
    private JTextArea outputArea;

    public ResumeBuilder() {
        setTitle("Resume Builder");
        setSize(500, 600);
        setDefaultCloseOperation(JFrame.EXIT_ON_CLOSE);

        tabbedPane = new JTabbedPane();
        JPanel inputPanel = new JPanel(new GridLayout(7, 2));
        JPanel outputPanel = new JPanel(new BorderLayout());

        inputPanel.add(new JLabel("Name:"));
        nameField = new JTextField();
        inputPanel.add(nameField);

        inputPanel.add(new JLabel("Email:"));
        emailField = new JTextField();
        inputPanel.add(emailField);

        inputPanel.add(new JLabel("Phone:"));
        phoneField = new JTextField();
        inputPanel.add(phoneField);

        inputPanel.add(new JLabel("Education:"));
        educationArea = new JTextArea(3, 20);
        inputPanel.add(new JScrollPane(educationArea));

        inputPanel.add(new JLabel("Skills:"));
        skillsArea = new JTextArea(3, 20);
        inputPanel.add(new JScrollPane(skillsArea));

        inputPanel.add(new JLabel("Experience:"));
        experienceArea = new JTextArea(3, 20);
        inputPanel.add(new JScrollPane(experienceArea));

        generateButton = new JButton("Generate Resume");
        inputPanel.add(generateButton);
        inputPanel.add(new JLabel());

        outputArea = new JTextArea(10, 40);
        outputArea.setEditable(false);
        outputPanel.add(new JScrollPane(outputArea), BorderLayout.CENTER);

        tabbedPane.addTab("Input", inputPanel);
        tabbedPane.addTab("Resume", outputPanel);
        add(tabbedPane);

        generateButton.addActionListener(new ActionListener() {
            @Override
            public void actionPerformed(ActionEvent e) {
                generateResume();
                tabbedPane.setSelectedIndex(1);
            }
        });
    }

    private void generateResume() {
        String name = nameField.getText();
        String email = emailField.getText();
        String phone = phoneField.getText();
        String education = educationArea.getText();
        String skills = skillsArea.getText();
        String experience = experienceArea.getText();

        String resume = "Resume:\n" +
                "-------------------------------\n" +
                "Name: " + name + "\n" +
                "Email: " + email + "\n" +
                "Phone: " + phone + "\n\n" +
                "Education:\n" + education + "\n\n" +
                "Skills:\n" + skills + "\n\n" +
                "Experience:\n" + experience + "\n";

        outputArea.setText(resume);
    }

    public static void main(String[] args) {
        SwingUtilities.invokeLater(() -> {
            ResumeBuilder frame = new ResumeBuilder();
            frame.setVisible(true);
        });
    }
}
Output:

Get Huge Discounts